
Your cart is currently empty.

You’ve seen them everywhere, from bustling trade shows to the entrance of your local café. They're the tall, sleek, self-standing signs that seem to appear out of nowhere. We’re talking about pull up banners, of course.
At its heart, a pull up banner is a retractable display stand. It’s a clever piece of kit where a printed graphic panel rolls up into a compact, sturdy base, making it incredibly easy to store and carry around. You might also hear them called roll-up banners, but the idea is the same: a spring-loaded system lets you pull the graphic up and lock it in place with a support pole. Setup is done in seconds.
What Is a Pull Up Banner and Why It Works
Picture this: you're at a crowded event, and you have about three seconds to grab someone's attention before they walk right past. You need something that's professional, eye-catching, and doesn't require a team of people to set up. That’s exactly where a pull up banner shines.
Think of it as your personal, portable billboard. It can turn a boring, empty corner into a powerful brand statement in less than a minute. The magic is in how its three main parts work together so beautifully.
First, you have the retractable base. This is usually a smart-looking aluminium cassette that protects your rolled-up graphic from getting scuffed or damaged in transit. Inside, a spring mechanism does all the work, making both setup and pack-down a smooth, fuss-free experience.
Then there's the graphic panel itself—your canvas. This is where you get to share your message, show off a new product, or simply boost your brand. It’s typically printed on tough vinyl or a high-quality blockout fabric, and its tall, vertical shape is a natural attention-grabber.
Finally, the support pole provides the backbone. It’s a lightweight, collapsible pole that slots into the base and holds the banner perfectly taut and upright.
The Science of Visual Impact
So, what makes this simple design so darn effective? It all comes down to its ability to own vertical space.
Most pull up banners stand around two metres tall, which means they naturally draw people's eyes upward, cutting through all the visual clutter happening at eye level. This powerful visual punch is a game-changer for a few key reasons:
- It Grabs Attention: In a sea of horizontal signs and distractions, a tall banner acts like a landmark for your brand. It’s almost impossible to ignore.
- It Delivers a Clear Message: The large, uncluttered space is perfect for a short, sharp message that people can read and understand from a distance.
- It Screams Professionalism: A well-designed, sturdy banner gives off an air of quality and credibility. It instantly builds a sense of trust with potential customers.
A pull up banner isn't just a sign; it's a strategic marketing asset. It wraps up portability, ease of use, and visual authority into one reusable package, making it an essential tool for any New Zealand business wanting to make a big impact without the big fuss.
Choosing the Right Type of Pull Ups Banner
Picking the right pull up banner isn't a one-size-fits-all job. It really comes down to what you’re trying to achieve, where you'll be setting it up, and of course, your budget. Think of it like buying a car: you wouldn’t take a zippy little sports car on a backcountry gravel road, just as you wouldn't use a massive ute for a quick trip to the dairy.
In the same way, a banner made for a quiet indoor reception has a completely different build to one designed to stand up to a gusty outdoor market. Getting your head around these differences is the key to making a smart investment – one that not only looks sharp but does the job you need it to do.
Standard Single-Sided Banners
The most common option you'll see around is the standard single-sided pull up banner. This is the trusty workhorse of the events world, and for good reason. It’s perfect for almost any indoor situation you can think of. Its biggest drawcards are its simplicity and how cost-effective it is.
You’ll find these banners tucked against a wall, forming the backdrop of a trade show booth, or welcoming people at an entrance. Because the graphic is only on one side, where you place it is everything. They’re light, a breeze to carry around, and give you a great bang for your buck, which makes them the go-to choice for countless Kiwi businesses.
Double-Sided Banners for Maximum Exposure
Now, if your banner needs to grab attention from every direction, a double-sided pull up banner is what you’re looking for. This clever design has two graphic panels that retract into one central base, so your message is visible from both the front and the back.
This makes them absolutely brilliant for open areas where people are milling about and approaching from all angles.
- Trade Show Aisles: You can catch people walking in both directions down an aisle.
- Shopping Centre Kiosks: Engage shoppers no matter which way they're coming from.
- Large Foyers or Lobbies: Make a strong statement right in the middle of a room.
They are a bit heavier and cost a little more than the single-sided versions, but the 360-degree visibility can easily double your marketing impact when you’re in the right spot.
This decision tree gives you a great visual on whether you should prioritise portability or go for maximum impact.
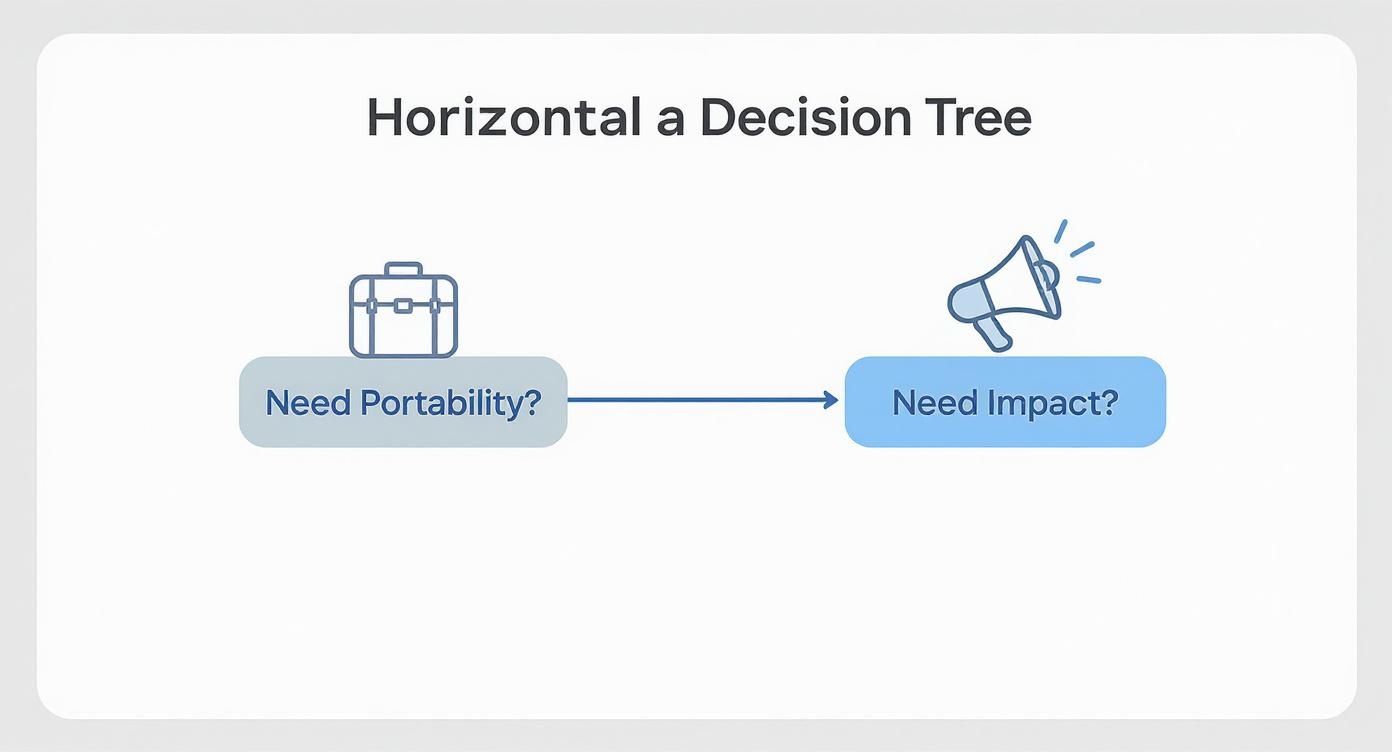
As you can see, for those busy, open-plan spaces, a double-sided banner gives you a massive advantage in getting eyes on your message.
Premium and Outdoor Banner Options
When you want to project a more polished, high-end image, premium pull up banner models are a fantastic choice. These usually have sleeker, more stylish bases, often without the little swing-out 'feet' you see on standard models. The bases tend to be heavier, giving them better stability and a more professional look that fits right in at corporate headquarters or upmarket retail stores.
A pull up banner is a physical representation of your brand. Investing in a premium or specialised model shows an attention to detail that customers and partners notice.
And finally, if you're taking your brand outdoors, a proper outdoor pull up banner is a non-negotiable. These are built tough to handle the elements. They feature heavy bases that can often be filled with water for extra stability in the wind, and the graphics are printed on weather-resistant materials. They’re the most durable and stable option by far, designed to keep your brand looking sharp, come rain or shine.
What Makes a Quality Pull Ups Banner
We’ve all seen them: the flimsy banner that leans to one side or the one with curled, sad-looking edges. The difference between a pull up banner that looks sharp for years and one that’s destined for the bin after a single event comes down to its construction.
It’s not just about the design you print on it. The real value lies in the hardware you can't always see—the base, the internal mechanism, and the material of the graphic itself. Getting these right is the secret to a banner that works as hard as you do.
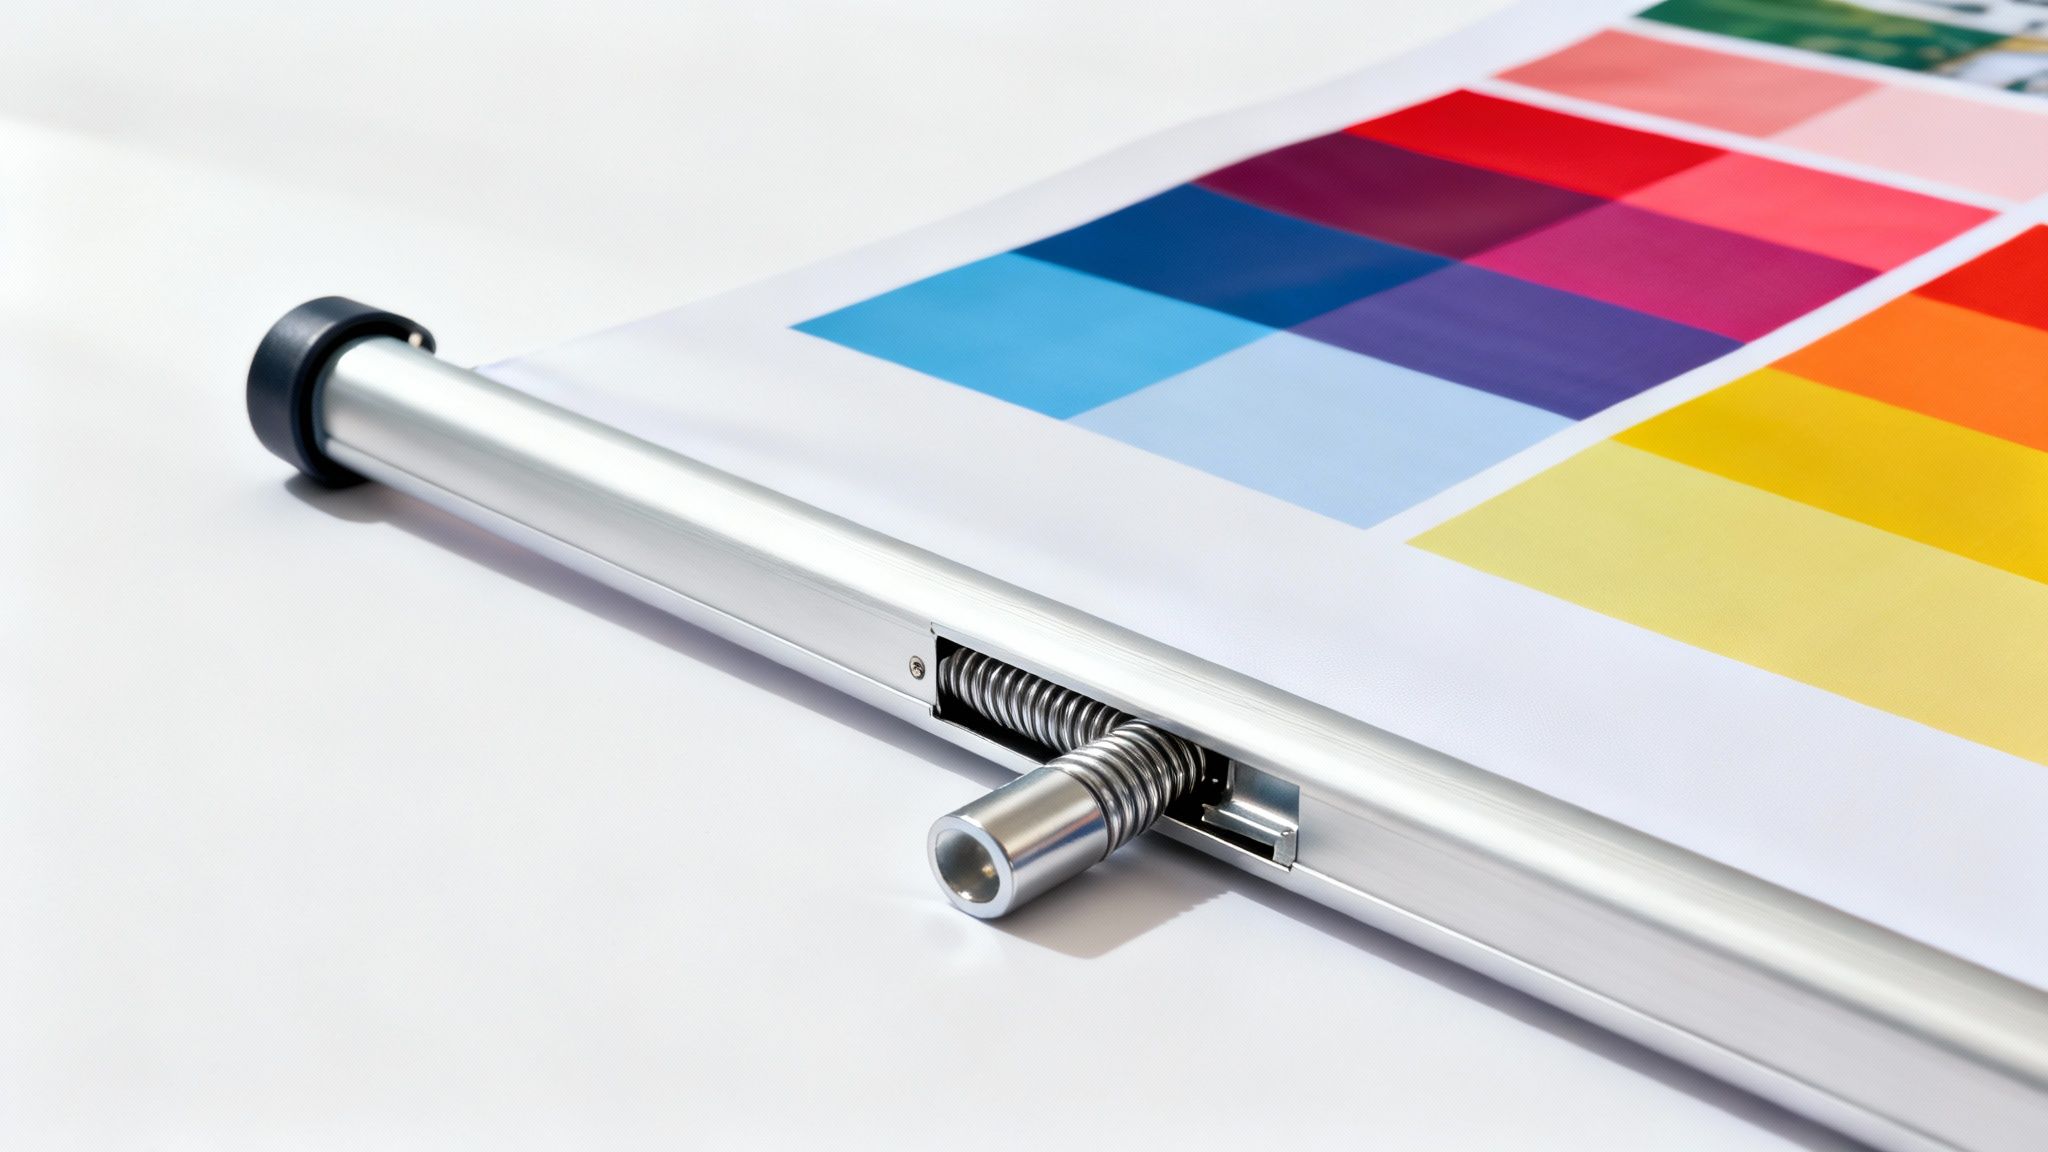
The Foundation: The Base and Mechanism
Think of the base as the banner's anchor. It does more than just hold the graphic; it provides the stability needed to stand tall in a busy environment and protects your investment during transport and storage.
You'll generally find two main options for the base, also called the cassette:
- Lightweight Aluminium: This is the go-to for most people because it’s so easy to carry. If you’re constantly on the road for trade shows and events, a lightweight base is your best friend. It’s perfectly durable for indoor use.
- Sturdier Steel or Heavier Aluminium: Premium models often feel noticeably heavier, and that's a good thing. The extra weight gives them rock-solid stability, so they won't wobble or get knocked over easily in high-traffic spots.
Inside that base is the heart of the system: the retractable spring mechanism. A cheap, weak spring will lose its tension, making the banner a nightmare to roll up or causing it to snap back violently. A quality mechanism, on the other hand, gives you a smooth, controlled retraction every single time. It's a small detail that makes a huge difference in usability and lifespan.
The Canvas: Graphic Material and Print Quality
The visual pop of your banner is all about the canvas it’s printed on. A low-grade material will let you down by curling at the edges, while a poor print job can make even the most brilliant design look washed out and amateur.
A banner’s graphic is its voice. A premium material ensures that voice is clear, confident, and won’t be drowned out by distracting flaws like curling edges or light bleed.
Here are the material and printing factors you really need to pay attention to:
- Standard PVC Vinyl: This is a common, budget-friendly choice. The downside? Cheaper vinyls are notorious for curling along the vertical edges over time, which instantly cheapens the banner's overall look.
- Premium Blockout Fabric: This is the material you want for a truly professional finish. It has a grey or black backing that completely stops light from shining through, keeping your colours rich and your text sharp, even with a bright window behind it. These fabrics are also engineered to be "lay-flat," meaning they’re built to resist curling and stay perfectly taut.
The printing industry is a cornerstone of physical marketing in New Zealand, and the tech behind a great pull up banner shows why. These tools are vital for making a real, tangible impression at exhibitions and in-store. To learn more about the local printing sector’s role in creating these marketing staples, check out the insights on sonidesign.co.nz.
Finally, look for high-resolution printing using UV-cured or eco-solvent inks. This ensures your colours are vibrant, your blacks are deep, and the graphic has a durable, scratch-resistant finish that can handle the rigours of repeated use.
Designing a Banner That Actually Gets Noticed

A great pull-up banner does more than just sit there looking pretty; it starts a conversation. Picture a busy event hall—you've got maybe three seconds to catch someone's eye before they're gone. That fleeting moment is everything when it comes to good banner design.
The real challenge is to get your main point across in a single, powerful glance. This means fighting the urge to cram in every last detail. If someone has to stop, squint, and work to figure out what you’re about, you’ve already lost them. Clarity and impact are your best friends here.
Follow the Three-Second Rule
Think of your banner as a visual elevator pitch. You need to land your most important message in the first three seconds someone lays eyes on it. This forces you to be disciplined and ensures every single element on that banner has a job to do.
The best way to nail this is with a simple, logical flow that guides the eye naturally. A top-to-bottom hierarchy works wonders.
- Top Third (Eye Level): This is your prime real estate. Slap your logo and a punchy headline right here. It’s the first thing people will see from across the room, so make it count.
- Middle Section: This space is for the key supporting act. A stunning, high-quality image of your product or a few bullet points spelling out the main benefits works perfectly. Keep it visual and straight to the point.
- Bottom Third: Reserve this area for the details. Your website, contact info, or a clear call-to-action (CTA) belong here. This is for people who are already hooked and have walked closer for a better look.
Creating a Clear Visual Hierarchy
Visual hierarchy is just a fancy way of saying "make the important stuff stand out." It’s what separates a jumbled mess from a clear, persuasive message. You can create this structure with a few basic design principles.
Choose Legible Fonts and Colours
Your choice of font is a bigger deal than you might think. Stick with clean, simple sans-serif fonts that are easy to read from a few metres away. Ditch the overly decorative or skinny fonts—they’ll just turn into an unreadable blur from a distance.
Colour is also huge for grabbing attention and showing off your brand's personality. Use bold, contrasting colours that match your brand. A dark background with light text (or the other way around) creates a strong visual pop that makes everything easier to read.
Your pull up banner is not a brochure. Its job is to attract, not to explain every single detail. Keep your text minimal—a killer headline, a few key points, and a call-to-action are all you need.
Use High-Resolution Imagery
Nothing screams "amateur hour" quite like a blurry, pixelated image. A photo that looks perfectly fine on your monitor can look like a complete mess when it’s blown up to two metres tall.
Always, always use high-resolution images. We're talking at least 150 DPI (dots per inch) at the final, full-size print dimension. For logos and graphics, vector files (like .ai or .eps) are the absolute best choice. You can scale them to the size of a building without losing an ounce of quality, ensuring your banner looks sharp and professional every time.
Putting Your Pull-Up Banner to Work
So, you've got a brilliantly designed pull-up banner. What now? A great banner is a powerful asset, but its real magic happens when you put it in the right place. Think of it less like a static sign and more like a versatile member of your marketing team, ready to adapt to whatever situation you throw at it.
From anchoring your trade show booth to announcing a flash sale in your shop, the secret is matching your banner’s placement and message to the people you want to connect with.
Dominating Trade Shows and Expos
At a buzzing trade show, your pull-up banner is your beacon. It’s often the very first thing that catches an attendee's eye, pulling their gaze towards your stand from across a crowded hall. In this environment, its job is to make a bold, immediate impression—clearly stating who you are and what you do.
When you're at an event, your banner needs to work hand-in-hand with your other marketing efforts. A well-placed banner and the right giveaways create a cohesive and memorable brand experience that captures attention and brings people right to you. For more on this, check out this helpful guide to promotional items for trade shows.
The continued success of physical displays like banners isn't just a hunch. In New Zealand, Out-of-Home (OOH) advertising is a seriously robust market. In fact, ad spending in this space is projected to hit around US$117 million by 2025. It's a clear sign that as people become more used to tuning out digital ads, tangible, real-world advertising is as important as ever.
You can see the steady projected growth in this sector in the chart below.
This data really drives home the point: physical media like a pull-up banner is still a fantastic way to capture public attention.
Engaging Customers in Retail and Corporate Spaces
Beyond the big events, your banner can be a workhorse in everyday commercial settings. With a bit of strategic placement, it becomes a silent salesperson, guiding customers and reinforcing your brand identity without you having to say a word.
Here are a few ways to put it to work:
- In Retail: Pop a banner near your entrance to shout about a new product line or a limited-time sale. You could also place one deeper in the store to point shoppers towards a specific section, like a clearance rack or a new seasonal collection.
- In Corporate Lobbies: A sleek, premium banner in your reception area instantly communicates professionalism to visiting clients and partners. It’s a great spot to highlight company milestones, awards, or your core mission.
- At Job Fairs: Use your banner to create an eye-catching backdrop for your recruitment stand. It helps potential candidates quickly get a feel for your company culture and the roles you have on offer, making you stand out in a sea of other employers.
- For Community Events: Sponsoring a local sports team or a community fair? A portable pull-up banner is the perfect way to show your support and build a positive connection between your brand and the local community.
Your Pull-Up Banner Questions, Answered
Even with something as straightforward as a pull-up banner, a few questions always pop up. It’s the little details—getting the setup right, knowing how to clean it, and understanding the specs—that make the difference between a one-off display and a marketing workhorse that pays for itself over and over again.
Let's dive into some of the most common queries we hear from clients. Getting these right will keep your banner looking sharp and ready for action whenever you need it.
How Do I Set Up a Pull-Up Banner Without Breaking It?
This is the big one. The key to a long-lasting banner is setting it up with care, not speed. Rushing it is the quickest way to damage the internal spring mechanism or end up with a wobbly, leaning display.
Just take it slow and steady:
- Pop the base on the floor and swing out the little stabilising feet at the bottom (if your model has them).
- The pole usually comes in a few sections. Just slot them together to make one long pole.
- Find the hole in the base and slide the pole in until it feels snug and secure.
- Now, put one foot gently on the base to hold it steady, grab the top rail of the banner, and pull it straight up. Hook it onto the top of the pole.
When you’re done, just reverse the steps. The most important part is this: when you unhook the graphic, gently guide it back into the base. Don't ever let it fly back on its own. That sudden snap is the #1 cause of a busted banner.
What’s the Best Way to Clean and Store My Banner?
Keeping your banner looking brand new is easier than you’d think. A little TLC goes a long way.
For most vinyl or fabric graphics, all you need is a soft, clean cloth slightly dampened with a bit of water. Gently wipe away any dust or smudges. The golden rule is to avoid harsh chemicals or abrasive cleaners—they can strip the colour and ruin the print finish. Always make sure the graphic is completely dry before you roll it back into the base to prevent any mildew from growing inside.
Storage is just as crucial as cleaning. Always tuck your banner away in its carry bag. Find a cool, dry spot for it, well away from direct sunlight, which can fade the colours over time.
Can I Just Replace the Graphic on My Banner Stand?
Absolutely! This is one of the best things about investing in a quality banner stand. When you rebrand or launch a new promotion, there's no need to ditch the whole thing. You can simply get the printed graphic replaced, a service we in the industry call ‘reskinning’.
Most professional printers across NZ can do this for you. You'll likely need to bring your stand to them so they can swap out the old graphic for the new one, making sure the tension is just right and everything is aligned perfectly. It’s a brilliant, cost-effective way to keep your marketing fresh without buying new hardware every time.
What Image Resolution Do I Need for a Sharp-Looking Print?
There's nothing worse than a fantastic design ruined by a blurry, pixelated print. Because banners are printed so large, the quality of your image file is everything.
For a beautifully crisp result, you’ll want your images and design files to be at least 150 DPI (dots per inch) at their final, full-scale print size. Better yet, if your design involves logos, text, or illustrations, always use vector files (like formats ending in .ai, .eps, or .svg). Vector graphics are magic; you can scale them up to the size of a bus without them losing a single drop of quality, guaranteeing a flawless finish.
Ready to create a pull-up banner that actually turns heads? At SONI DESIGN, we specialise in crafting high-quality, eye-catching displays that tell your unique story. Let's work together to bring your vision to life.
Leave a Comment
Stay home & get your daily
needs from our shop
Start You'r Daily Shopping with Nest Mart