
Your cart is currently empty.
When you're looking for quality sticker printing in NZ, partnering with a local expert is a game-changer. It’s about more than just ink on paper; it's about finding someone who gets your vision and can deliver a vibrant, durable product. Working with a Kiwi team means faster turnarounds, no confusing time zones, and stickers made to handle our unique weather conditions.
Getting Started with Custom Sticker Printing in NZ
Kicking off a custom sticker project can feel a bit overwhelming at first. You've got this great idea, but then you're faced with a mountain of choices: materials, finishes, shapes, and sizes. Where do you even begin?
Don't worry. This guide will be your friendly roadmap. We'll break down the whole process into simple, easy-to-digest steps, turning that brilliant idea into a physical sticker you'll be stoked to show off.
Defining Your Sticker's Purpose
Before you jump into colours and fonts, take a step back and ask a crucial question: what job does this sticker need to do? The answer will steer almost every other decision you make, from the material you pick to how many you order.
- Brand Awareness: Are these for giving away at events or slipping into customer orders? You'll want something eye-catching and tough enough to last on a laptop or drink bottle. Visibility is key.
- Product Labelling: If these stickers are going directly onto your products, they need to look professional and withstand handling. They're a core part of your brand's first impression and must communicate essential info clearly.
- Promotional Campaigns: Is the sticker for a one-off event, a special sale, or a new product launch? Think about how it fits into your wider marketing. For a launch, you might explore different types of content for a product launch to make sure your sticker design tells the same story as your other materials.
Understanding the Core Choices
Think of your first sticker order as a series of a few key decisions. First, there's the material—is it for indoor or outdoor use? This is like choosing between a paper sticker (great for journals) and a weatherproof vinyl one (perfect for a car bumper). Then there's the finish, which adds the final touch. Do you want a high-gloss look that pops, or a subtle, modern matte finish?
Choosing a local NZ provider like SONI DESIGN is a strategic first step. It ensures smoother collaboration, faster delivery across the country, and access to expertise on what works best in our local climate.
Mapping out these fundamentals gives you a solid foundation. You'll go into the process knowing exactly what to ask and which details matter most, ensuring your sticker printing journey is smooth sailing from start to finish.
Quick Guide to Your First Sticker Order
To make things even easier, here’s a quick-glance table to help you navigate those initial decisions. It’s a simple cheat sheet to get you started on the right foot.
| Decision Point | Key Consideration | Best For |
|---|---|---|
| Material | Where will the sticker be used? Indoors or outdoors? | Vinyl for durability and outdoor use; Paper for indoor, short-term applications. |
| Finish | What look are you going for? Shiny or subtle? | Gloss for vibrant, eye-catching designs; Matte for a modern, elegant look. |
| Size & Shape | How will it fit on the intended surface? | Custom shapes for unique branding; Standard circles or squares for classic labels. |
| Quantity | How many do you realistically need? | Start with a smaller run (e.g., 100) to test the design; Order in bulk for better per-unit pricing if you're confident. |
This table should help you organise your thoughts and communicate your needs clearly to your printer, setting you up for a successful first order.
Navigating the New Zealand Sticker Market
Getting the best stickers for your project means getting to know the local printing scene first. The world of sticker printing NZ offers is packed with options, from massive operations to small, specialist workshops. Understanding this landscape helps you make a smart choice, not just a quick one.
While the general print industry has had to adapt to the digital age, niche areas like custom stickers and labels are absolutely booming. This is a huge win for you. It means you’re not just another number in a long queue; you’re working with people who are true experts in their craft.
The Power of Choosing a Local NZ Printer
When you work with a local Kiwi business for your stickers, you get so much more than just a great product. You’re plugging into a whole network of real-world benefits that overseas suppliers just can't offer. It all comes down to speed, clear communication, and supporting our own backyard.
It's a bit like choosing between the local farmers' market and a giant supermarket chain. At the market, you can chat directly with the person who grew the produce, everything is fresher, and you know your money is staying in the community. The supermarket might seem cheaper on the surface, but you lose that personal touch and local expertise.
A local printer, for instance, gets the unique challenges of our Kiwi climate. They can recommend the perfect vinyl and laminate that will survive the harsh summer UV rays and the damp chill of a South Island winter. You can't put a price on that kind of on-the-ground knowledge.
Understanding the Current Market Dynamics
It's no secret that the broader printing industry in New Zealand has seen some changes. Recent figures show a slight dip in the number of printing businesses, with around 775 businesses operating as of 2025. This points to a mature industry evolving with technology, but that’s only part of the picture. You can dive deeper into the data on the national printing industry to see these trends for yourself.
This shift has actually made the market more focused. Instead of being dominated by a few giants, the industry has become more fragmented, which is fantastic news for customers like you. It’s allowed specialist providers to pop up, honing in on quality and service in areas like sticker production.
This is exactly where businesses like SONI DESIGN thrive. By concentrating on specific services like high-quality sticker and signage printing, local experts can offer a level of detail, customer service, and product quality that larger, more generalised companies often struggle to match.
This specialisation is where you find the real gold.
Key Advantages of a Kiwi Partnership
So, what do you actually get by keeping your sticker printing on home turf? These aren't just nice-to-haves; they can genuinely make or break your project.
Let's break it down:
- Faster Turnaround and Shipping: With no international shipping headaches or customs delays, your stickers arrive much faster. An order from Auckland to Invercargill will always be quicker and more reliable than one coming from the other side of the world.
- Clear and Direct Communication: Being in the same time zone means no more late-night emails or confusing delays. You can just pick up the phone and talk to the actual person handling your job. Simple as that.
- Supporting the Local Economy: Every dollar spent with a New Zealand business gets reinvested right back into our communities. It helps create local jobs and keeps our economy strong.
- No Unexpected Costs: Ordering from overseas can sting you with surprise import taxes, duties, and weird currency conversion fees. Local pricing is upfront and honest—what you’re quoted is what you pay.
Ultimately, choosing a local provider for your sticker printing NZ needs isn't just about being patriotic. It’s a savvy business move that gets you better service, faster results, and a far superior final product.
Choosing the Right Sticker Material and Finish
This is where the magic happens—when your digital design becomes a real, tangible object you can hold. Picking the right material and finish is a bit like an artist choosing their canvas; it sets the tone for the final look, feel, and lifespan of your sticker. The options might sound technical at first, but they’re actually pretty straightforward.
Think of it like this: the material is the sticker’s foundation, determining its strength and where it can live. The finish is the final coat, deciding how it catches the light and the impression it leaves. Get these two right, and your sticker won't just look amazing on day one—it’ll keep representing your brand perfectly for months or even years.
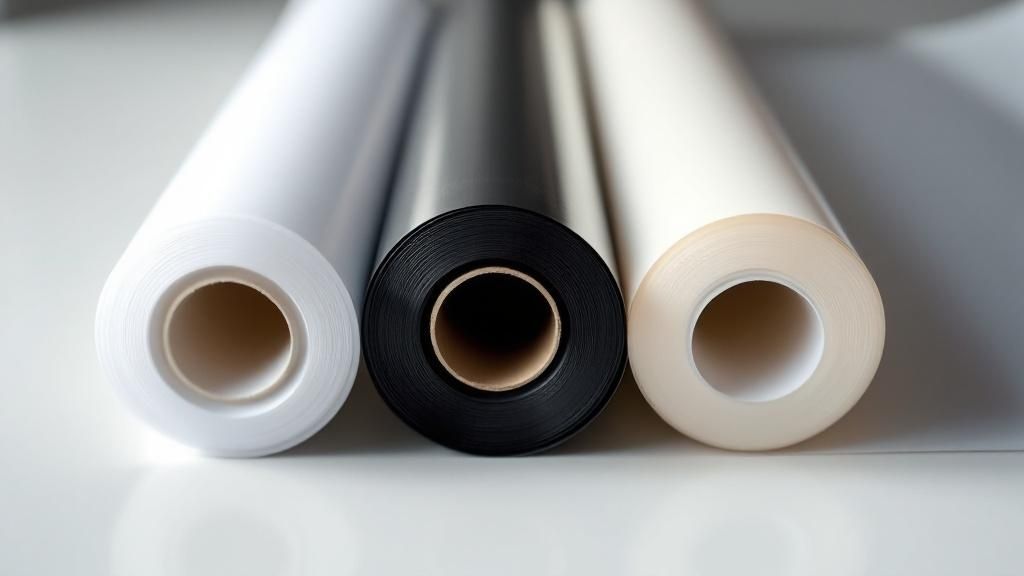
Decoding Sticker Materials: Vinyl vs. Paper
Your first big decision is the material itself. For most projects, this choice comes down to two main contenders: tough, versatile vinyl or classic, cost-effective paper. The right one for you depends entirely on what your sticker is for.
Imagine you're dressing for the weather. Paper stickers are like a comfy t-shirt—great for indoor use, temporary events, or adding a nice touch inside packaging. They look fantastic but aren't built to handle a classic Kiwi downpour.
Vinyl, on the other hand, is the GORE-TEX jacket of the sticker world. It’s made to withstand the elements, making it the only serious choice for anything that’s going to live outside.
A common question in the world of sticker printing NZ is whether vinyl stickers are truly waterproof. The answer is a resounding yes. High-quality vinyl stickers are engineered to survive for years outdoors, putting up with everything from the harsh UV rays of a Northland summer to the frosty bite of a South Island winter.
So, if you need a sticker for a car bumper, drink bottle, snowboard, or any outdoor gear, vinyl is the undisputed champ. It gives you the ruggedness needed to keep your brand looking sharp, no matter what.
The Finishing Touch: Glossy vs. Matte
Once you've settled on a material, it’s time to think about the finish. This choice is all about aesthetics and the personality you want your sticker to have. The two most popular options, glossy and matte, each offer a completely different vibe.
A glossy finish is like a vibrant, high-definition photo. Its reflective surface makes colours pop and grabs attention instantly. This makes it a brilliant choice for promotional stickers, product labels that need to stand out on a crowded shelf, or any design with bright, bold graphics. That shine just adds a layer of energy and professionalism.
In contrast, a matte finish is like a premium, uncoated business card. It has a non-reflective, satin-smooth surface that creates a more subtle, modern, and sophisticated feel. Matte finishes are fantastic for elegant branding, artistic designs, or any time you want to avoid glare. They have a lovely tactile quality that just makes people want to touch them.
Why Lamination is Your Sticker's Best Friend
To really boost your sticker's durability and appearance, you should seriously consider lamination. Think of a laminate as a protective shield or a clear coat for your sticker. It’s a thin, transparent layer applied over the printed surface, and it offers two massive benefits.
First, it dramatically improves durability. A laminate layer provides solid protection against:
- UV Radiation: It stops colours from fading under the relentless New Zealand sun.
- Scratches and Abrasions: It guards the printed design from scuffs and daily wear and tear.
- Moisture and Chemicals: It adds an extra waterproof barrier, making the sticker even more resilient.
Second, the laminate itself provides the finish. You can choose a gloss laminate for that bright, shiny look or a matte laminate for that elegant, non-reflective appearance. Lamination essentially locks in the quality of the print while delivering your desired aesthetic, ensuring your investment lasts as long as possible. For any sticker destined for the outdoors, lamination isn't just a nice-to-have; it's a necessity.
To help you visualise the options, here’s a quick guide to choosing the best combination for your needs.
Sticker Material and Finish Comparison for NZ Conditions
This table breaks down the most common choices to help you pick the perfect sticker material and finish for your project, keeping our unique Kiwi conditions in mind.
| Material/Finish | Best Use Case | Durability (Outdoors/Indoors) | Look and Feel |
|---|---|---|---|
| Gloss Vinyl | Car bumpers, product labels, outdoor gear, promotional giveaways. | Excellent for both outdoors and indoors; highly durable. | Shiny, vibrant, and eye-catching. Makes colours pop. |
| Matte Vinyl | Laptops, premium product branding, artistic designs, event merch. | Excellent for both outdoors and indoors; highly durable. | Smooth, non-reflective, and sophisticated. Modern and understated. |
| Paper | Indoor packaging, journals, short-term promotional labels, crafts. | Indoor use only; not water-resistant or for outdoors. | Classic and cost-effective. Available in various textures. |
By thinking carefully about your sticker’s job and the environment it will live in, you can confidently pick the perfect material and finish. It’s a fundamental choice that ensures your sticker not only captures your vision but also performs flawlessly for a long time to come.
Getting Your Sticker Design Ready for Print
A brilliant idea for a sticker is one thing, but getting it to look just as good in your hand as it does on your screen? That's the real magic. The journey from a digital file to a physical sticker has a few technical hurdles, but nailing them is what separates a professional-looking sticker from one that just looks... a bit off.
Think of it like being a chef. You can have a world-class recipe, but if you get the oven temperature wrong or mix up the salt and sugar, the final dish won't live up to its potential. Let's walk through the key ingredients for a perfect print file, so your design comes out looking exactly how you envisioned it.
Setting Up Your File for Success
The very first step is preparing your digital canvas. This foundation is crucial because it ensures what you see on your screen is a true representation of the final printed sticker. Two of the most important settings to get right from the get-go are the colour mode and the resolution.
Before you even start designing, it's a great idea to get your thoughts in order. A clear design brief helps you communicate exactly what you want to a designer or printer. Using something like a downloadable design brief template can be a massive help here, as it organises all your ideas and technical needs in one spot.
Now, let's get into the specifics that really matter for sticker printing in NZ.
CMYK: Speaking the Language of Printers
Your computer screen and your phone create colour by mixing light—a system called RGB (Red, Green, Blue). It’s why digital colours can look so bright and luminous. Professional printers, however, don't use light; they use ink. Their system is called CMYK (Cyan, Magenta, Yellow, and Key/Black).
Here’s the catch: if you design your sticker in RGB, those super-vibrant colours you fell in love with on screen can look dull, flat, or just plain different when printed with CMYK inks. By setting up your design file in CMYK right from the start, you get a much more accurate preview of how the colours will actually look on paper. No nasty surprises.
300 DPI: The Magic Number for Sharpness
Ever seen a printed image that looked fuzzy and pixelated? That’s a resolution problem. Resolution is measured in DPI (Dots Per Inch), and it dictates how sharp and clear your sticker will be.
For crisp, clean, professional-quality printing, 300 DPI is the gold standard. It’s non-negotiable. Setting your file to this resolution ensures every line is sharp and every tiny detail is crystal clear. Think of it as the difference between an old standard-definition TV and a brand new 4K screen—300 DPI gives you that high-definition pop.
Designing for Impact and Readability
Once the technical stuff is sorted, you can focus on the fun part: the creative design. But remember, even a perfectly printed sticker will fall flat if people can't understand its message at a glance. This is especially true for smaller stickers where every millimetre counts.
The most effective sticker designs are often the simplest. A clean layout with a clear focal point is far more powerful than a cluttered design that tries to say too much.
Keep these design tips in mind:
- Pick Readable Fonts: That intricate, cursive font might look amazing on a big poster, but on a 5cm sticker? It’ll probably look like an unreadable smudge. Go for clean, simple fonts and make sure the text is big enough to be read from a normal distance.
- Go for High Contrast: Your design needs to be instantly understandable. Strong contrast between your background and foreground elements makes a world of difference. Dark text on a light background (or the other way around) is a classic for a reason—it works.
- Vectors are Your Best Friend: Whenever you can, use vector graphics (made in programs like Adobe Illustrator). Unlike pixel-based images (like a JPG), vectors are made of mathematical paths, not pixels. This means you can scale them up or down to any size without them ever losing quality or becoming blurry. Perfect for logos and text.
Don't Forget the Bleed!
Here's a final pro tip that makes a huge difference: always add a bleed to your artwork. In the real world, stickers are printed on massive sheets and then cut out by a machine. While these machines are incredibly precise, they aren’t perfect, and tiny shifts can happen.
A bleed is a small, extra margin of your background colour or pattern that extends beyond the final cut line (usually 3mm). This creates a safety buffer. So, if the cutting blade is off by a fraction of a millimetre, it cuts into the extra colour instead of the white paper beneath. This simple step is the secret to avoiding those ugly, amateurish-looking white slivers along the edge of your finished sticker.
The Journey from Digital File to Finished Sticker
Ever wondered what happens after you hit 'send' on your sticker design? It’s not quite magic, but it is a fascinating process that turns your digital idea into a tangible sticker you can hold. Knowing what goes on behind the scenes is great for planning your timelines and having a better chat with your Kiwi printer about what you need.
The whole thing kicks off the moment your approved design file lands with the production team. First up is a final pre-press check. This is where an expert eye goes over everything one last time – colours, bleed, cut lines – to make sure it's all spot on. It's a crucial step that catches any potential issues before they become expensive mistakes.
Choosing the Right Printing Method
Once your file gets the green light, it heads to the printer. But not all printing is created equal. The right method really comes down to how many stickers you need and how detailed your design is.
Think of it this way: digital printing is like your high-tech home oven. It's brilliant for smaller batches and getting things done quickly. If you're after a short run of stickers, say 50-1000, digital is the way to go. It has minimal setup, so it's fast and cost-effective for smaller orders, especially those with vibrant, full-colour designs.
On the flip side, offset printing is the full-scale commercial bakery. It involves creating custom plates and a much more involved setup, which makes it perfect for huge runs of thousands of stickers. The initial cost is higher, but once it's up and running, the price per sticker plummets, making it the most economical choice for large-scale jobs.
This image breaks down the key cost factors in the sticker production process.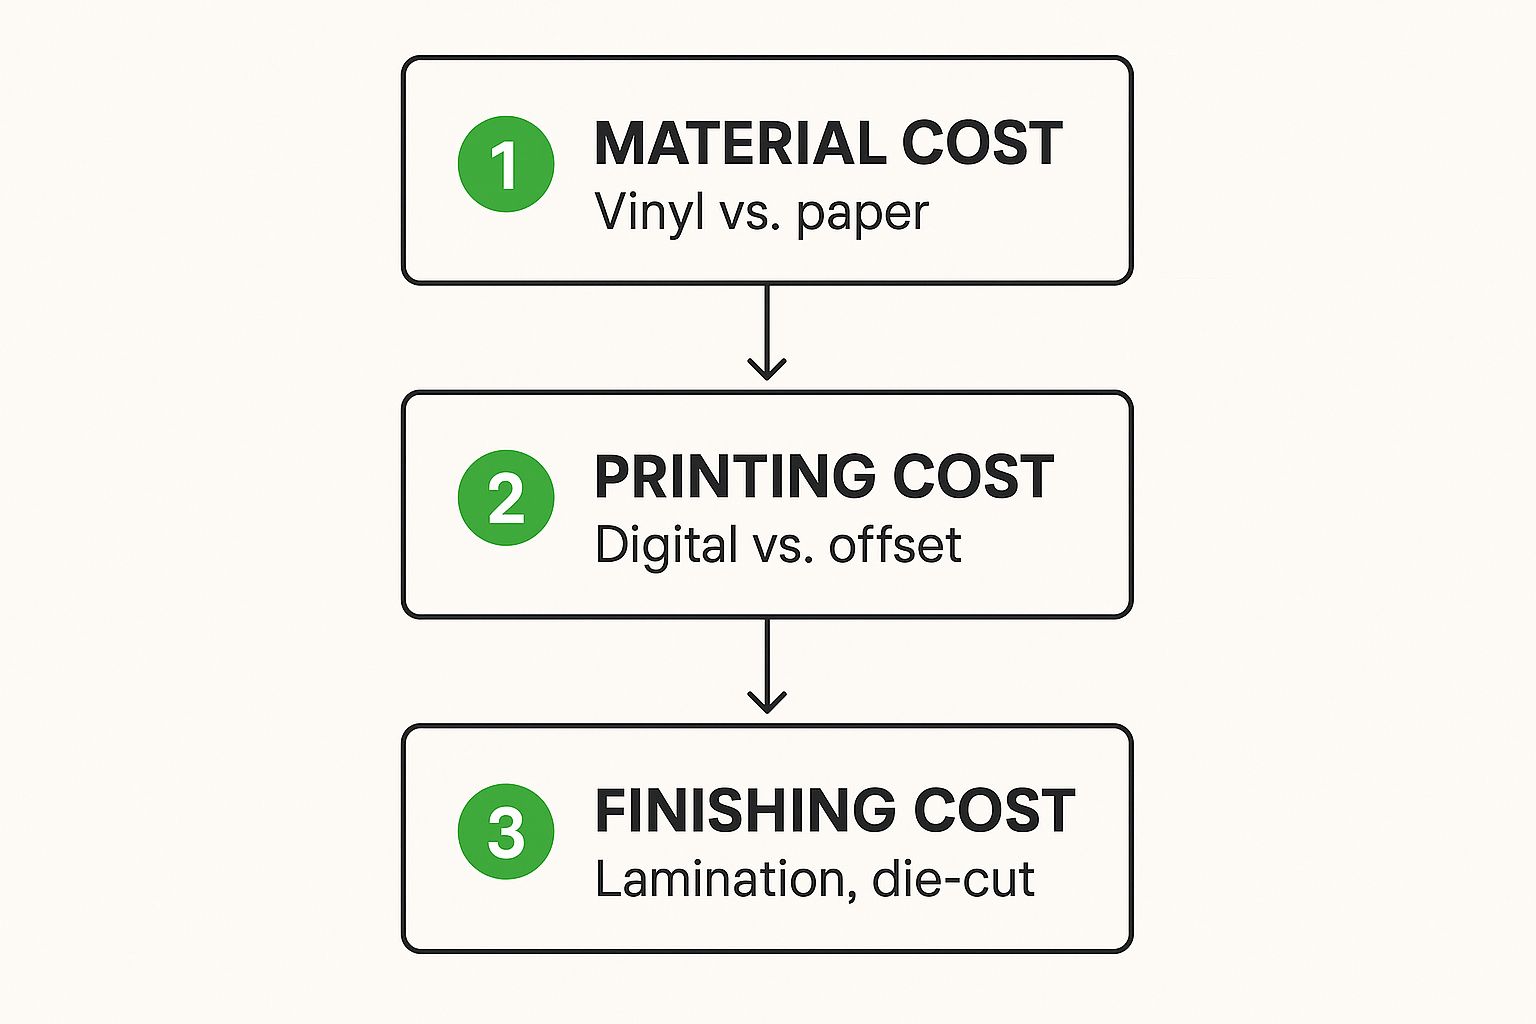
As you can see, the final price tag is a mix of the material you choose, the printing method that fits your quantity, and any special finishing touches you've added.
The demand for this kind of custom sticker printing in NZ is definitely on the rise, reflecting what's happening globally. The worldwide sticker market was valued at USD 4.61 billion in 2024, and it's set to keep growing, with label stickers making up over 72% of that. This boom is largely thanks to e-commerce and retail, where businesses rely on quality stickers for everything from packaging to promos. You can read more about these fascinating market trends to see how they connect to what's happening right here in New Zealand.
The Art of Cutting and Finishing
After the ink has dried, your stickers head to the final stage: cutting. This is what gives your sticker its final shape and makes it easy to use.
- Die-Cut: This is where a blade cuts right through both the sticker vinyl and the paper backing. It creates a sticker that is the exact shape of your design, with no extra border. It’s perfect for a clean, premium look where the shape is a key part of the design itself.
- Kiss-Cut: This method is a bit more delicate. The blade only slices through the vinyl layer, leaving the backing paper intact. This makes the stickers much easier to peel off, which is a lifesaver for really intricate designs or when you're creating sheets with multiple stickers.
Once cut, your stickers aren't quite done. They go through a final quality check. At a place like SONI DESIGN, the team will give the whole order a thorough once-over, checking for colour accuracy and cutting precision before carefully packing it all up to be sent out across New Zealand.
It’s this meticulous journey, from a simple file to a finished product, that ensures every sticker you receive is one you’ll be proud to stick somewhere.
How to Choose the Right NZ Sticker Printer
So, you’ve sorted your materials, nailed the finish, and have your design files ready to go. Now for the most important part: picking the right team to bring it all to life. Choosing a provider for your sticker printing in NZ isn’t just about hunting for the cheapest quote. It’s about finding a genuine expert who’ll deliver a fantastic product that ticks all your boxes—quality, budget, and deadline.
Get this decision right the first time, and you’ll avoid the headache of costly reprints and frustrating delays. Think of it as an investment in your brand’s reputation.
Your Essential Printer Evaluation Checklist
To cut through the noise, it helps to have a practical checklist. Focus on what really matters for a great outcome, and don't be shy about asking direct questions before you place an order.
-
Look at their work: Do they have a gallery showcasing past projects? Hunt for examples that look similar to what you have in mind. High-quality photos of finished stickers are a great sign they know their stuff and care about the details.
-
Check their material quality: Ask what brands of vinyl and laminates they use. A good printer will be upfront about their materials and can explain why they’ve chosen them for durability—especially for our tough Kiwi climate.
-
Read customer reviews: See what other New Zealand businesses are saying. Look for comments on print quality, communication, and whether they delivered on time. A pattern of positive feedback is a massive green flag.
Assessing Their Technical Expertise and Service
Beyond the sticker itself, you want a partner who is easy to work with and technically on the ball. Great customer service can make the whole process feel less like a transaction and more like a collaboration.
A printer’s website is often a good clue to their level of professionalism. When you’re checking out NZ sticker printers, have a look at the quality of their site—after all, it’s their main digital shop window. Understanding the importance of a professional website as a digital storefront can give you a better lens through which to judge their business. Is the site easy to use? Is the information clear?
Choosing a dedicated local expert like SONI DESIGN gives you direct access to people who are passionate about their craft. You can have a real conversation about your project, ensuring your specific needs are understood and met with precision.
While the wider printing industry in New Zealand has seen a general contraction of about 2.2% annually between 2020 and 2025, the niche for custom labels and stickers is actually a bright spot. This growth comes from local businesses in retail, food, and healthcare needing high-quality, specialised solutions. The printers who focus on this area are often more agile and innovative.
Key Questions to Ask Before You Order
Arm yourself with a few key questions to make sure there are no nasty surprises waiting for you down the track. A good printer will be happy to answer them clearly and confidently.
- What’s your standard turnaround time for an order of my size? This helps you plan your own timelines without any guesswork.
- Can I get a physical proof or sample before you do the full run? This is a non-negotiable for checking colours and the feel of the material.
- What file types do you prefer, and do you offer any design help? This clears up how to supply your artwork and what support is available if you need it.
- Are your prices all-inclusive, or are there extra setup or shipping fees? Transparent pricing is the mark of a trustworthy partner.
By taking a structured approach, you can confidently pick a provider who will not only print your stickers but act as a valuable partner in your success.
Got Questions About Sticker Printing? We've Got Answers
Diving into the world of custom stickers can bring up a few questions, especially when you’re trying to get every detail perfect. We get it. To help you out, we’ve put together answers to some of the most common queries we hear from Kiwis about getting their stickers printed.
Our aim is simple: to make sure you feel totally confident before you hit that "order" button, knowing you’ll get a final product that looks exactly how you imagined.
What’s the Smallest Order You Can Place?
This is easily one of the most popular questions, and the answer really comes down to the printing technique. Thanks to modern digital printing, we can now handle really small batches – sometimes as few as 50 stickers. This is brilliant if you're testing out a new design, need some stickers for a small-scale event, or you're labelling a limited product run.
On the other hand, for bigger jobs where you want to bring the cost-per-sticker right down, traditional methods like screen printing are a better fit, but they do have higher minimums. The best bet is to chat with your printer; they’ll point you towards the most economical choice for the quantity you need.
Are Your Vinyl Stickers Genuinely Waterproof?
You bet they are. Our high-quality vinyl stickers are engineered from the ground up to be waterproof and incredibly durable. They're built tough to handle the unpredictable New Zealand weather – from the harsh summer sun to driving rain and even a good winter frost.
We’ve seen Kiwi businesses, from ski fields to boat charters, use these vinyl stickers on outdoor gear like snowboards, helmets, and vehicles. If they can survive a full season on the slopes of Mt Ruapehu, they'll have no trouble handling life on your car bumper or drink bottle.
This built-in resilience makes them the go-to choice for any situation where you need your sticker to last and look good, no matter what the weather throws at it.
How Long Will My Stickers Actually Last Outside?
The lifespan of an outdoor sticker really depends on a couple of things, but a professionally printed vinyl sticker with a protective laminate can easily last for 3-5 years, and sometimes even longer. The secret sauce is the combination of UV-resistant inks and that crucial laminate layer.
Think of the laminate as a tough, clear shield. It guards the printed design against the sun's UV rays, which cause fading, and also protects it from everyday scuffs and scratches. If your sticker is going to live outside for a long time, making sure it’s laminated is the single best thing you can do for its longevity. Without it, you could see noticeable fading in under a year.
Ready to turn your sticker ideas into something real with a team that gets it right? At SONI DESIGN, we live and breathe this stuff, creating vibrant, tough-as-nails stickers that get your brand noticed. Get a free, no-obligation quote from our team today!
Leave a Comment
Stay home & get your daily
needs from our shop
Start You'r Daily Shopping with Nest Mart