
Your cart is currently empty.

Before you even think about hitting 'print', let's talk about the foundation of your sticker project. The single most important decision you'll make is choosing the right vinyl and adhesive. Get this wrong, and you're looking at peeling corners, faded colours, and a brand image that just won't stick.
This choice dictates everything: durability, appearance, and how your sticker holds up, whether it's on a shop window in Wellington or a product label in Auckland.
Choosing Your Materials for a Perfect Sticker
The path to a flawless sticker starts with understanding your core materials. You wouldn't use watercolour paper for an oil painting, right? It's the same principle here. Picking the right vinyl from the get-go saves you from costly reprints and ensures your brand looks its best.
The world of vinyl really comes down to two main players, each built for different jobs and budgets. Think of it as choosing between a temporary fix and a long-term investment.
The Great Divide: Calendared vs. Cast Vinyl
Your first big decision is between calendared and cast vinyl.
Calendared vinyl is made by rolling and stretching a heated lump of plastic into a sheet. It's an efficient process that keeps costs down, making it a fantastic choice for short-to-medium-term indoor jobs. It's also great for flat outdoor surfaces that won't see too much harsh weather. A café advertising a weekly special on its front door? Perfect.
Cast vinyl, on the other hand, is a different beast altogether. It's made by pouring a liquid vinyl mixture onto a casting sheet and then baking it. This creates a much thinner, more flexible, and incredibly durable film. It’s the undisputed champion for complex surfaces, like vehicle wraps that need to hug every curve and contour. If your sticker needs to stand up to the harsh Kiwi sun for years, cast vinyl is the only real choice.
This simple guide can help you decide which path to take.
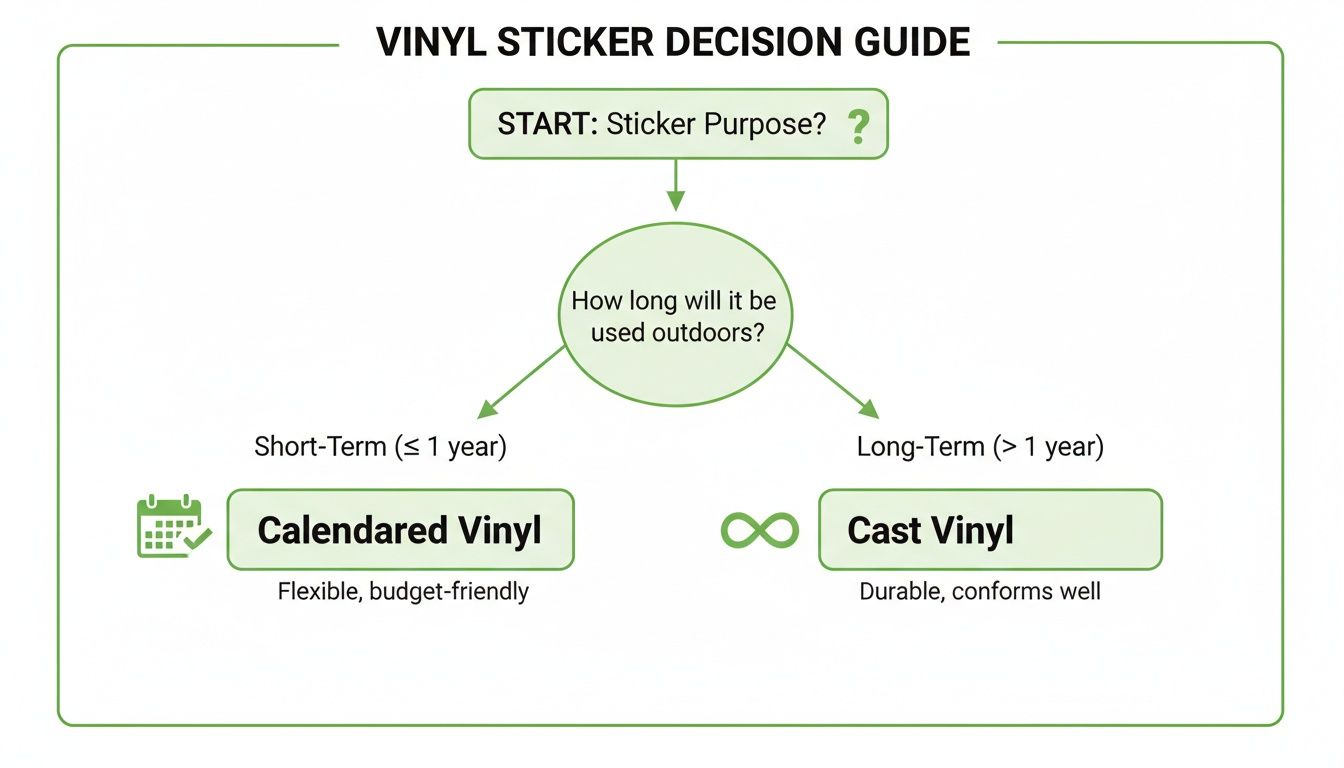
As you can see, the intended lifespan and where you'll be putting your sticker are the key factors. They'll tell you whether the budget-friendly calendared vinyl will do the trick or if you need to invest in the premium, long-lasting cast vinyl.
Understanding Your Adhesive Options
Once you've settled on a vinyl type, the next piece of the puzzle is the adhesive. This isn't a one-size-fits-all situation; the 'stickiness' has to be right for the job.
You'll generally come across three primary types:
- Permanent Adhesive: This is your go-to for stickers that absolutely must stay put. Think safety warnings, permanent branding on equipment, or high-quality product labels. It forms a powerful bond that's tough to remove without heat or solvents.
- Removable Adhesive: Perfect for temporary promotions. A real estate agent might use this for an 'Open Home' decal on a window, knowing it will peel off cleanly without leaving that frustrating, sticky residue behind.
- Repositionable Adhesive: This one offers a bit of flexibility, allowing you to place, peel, and re-stick the vinyl a few times before the adhesive cures and forms a stronger bond. It’s a lifesaver for applying large graphics where getting the placement perfect on the first try is a challenge.
The right adhesive ensures your sticker not only looks professional when applied but also behaves as expected throughout its lifespan—whether that means staying on for five years or peeling off cleanly after five days.
To make things even clearer, this table breaks down which combinations work best for common business needs.
Matching Vinyl and Adhesive to Your Project
| Material or Adhesive | Best Use Case Example | Durability | Cost Factor |
|---|---|---|---|
| Calendared Vinyl | Indoor wall graphics, short-term promotional window decals | 1-5 years | Low |
| Cast Vinyl | Vehicle wraps, long-term outdoor signage, curved surfaces | 5-10+ years | High |
| Permanent Adhesive | Product labels, safety signs, permanent asset tagging | High | Medium |
| Removable Adhesive | Temporary event signage, seasonal retail promotions | Low | Low-Medium |
| Repositionable Adhesive | Large-format wall murals, DIY application graphics | Medium | Medium-High |
Choosing the right pair from this list is the key to a project that not only looks great but also performs exactly as your client expects.
The demand for high-quality vinyl stickers is undeniable. In New Zealand's printing scene, they've become a powerhouse for local businesses, a trend that really took off in the 2010s with advancements in digital printing. This is backed by real numbers, with one report highlighting a 7.26% CAGR in the NZ bumper stickers market from 2020 to 2024. For businesses like SONI DESIGN, this shows the huge potential for retail and e-commerce shops needing vibrant, durable labels. You can find out more about the New Zealand bumper stickers market trends here.
Selecting the Right Print Method for Your Design
You've picked out your vinyl and the perfect adhesive, so what's next? Now we get to the fun part: figuring out how to actually print your design. This choice is a big one. It's going to dictate the final look, feel, durability, and of course, the cost of your stickers.
Think of it like this: you wouldn't use a fine-tipped pen to paint a whole wall. The printing method you choose has to be the right tool for the job. It will define everything from how vibrant your colours pop to how well your sticker stands up to the harsh Kiwi sun. Let's walk through the main contenders.
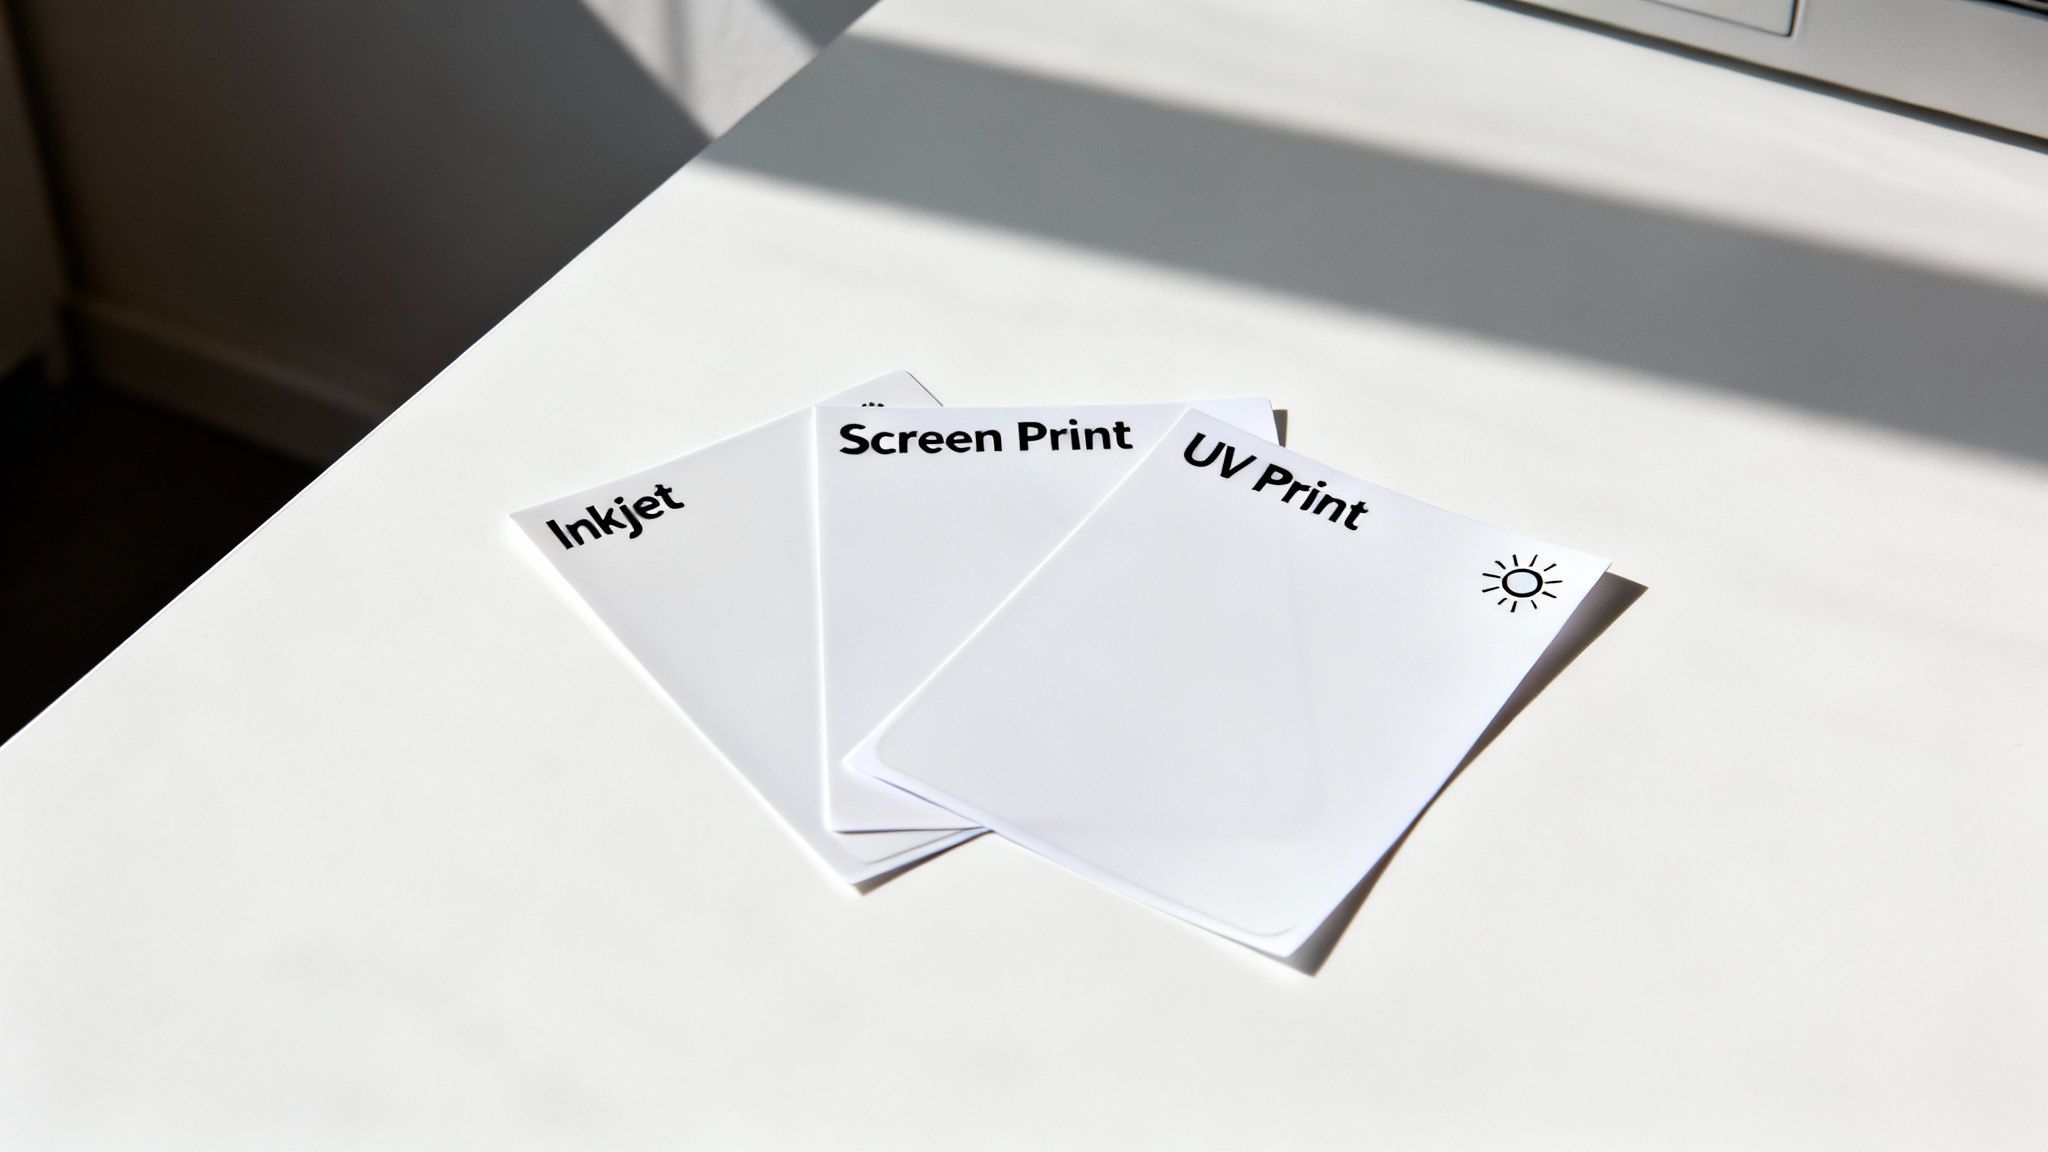
Digital Inkjet Printing: The Versatile All-Rounder
When people talk about custom vinyl stickers, they're often talking about digital inkjet. It’s easily the most common method you'll come across, especially for small-to-medium batches. The process is a lot like your home printer, just on a much more sophisticated scale, using special solvent, eco-solvent, or latex inks that are made to fuse with vinyl.
The biggest drawcard here is flexibility. There’s no complex setup—no screens to burn, no plates to make. This makes it incredibly cost-effective for short runs. Need just 50 intricate, full-colour stickers for a weekend market stall or a new product prototype? Digital inkjet is your best mate. It’s fantastic at reproducing photographic images, complex logos, and gradients with stunning detail.
The trade-off? The inks can be prone to fading from UV exposure over time. While modern eco-solvent inks are pretty tough, I always recommend adding a protective UV laminate for any stickers that will live outdoors for a long time. That extra layer makes a world of difference.
Screen Printing: The Durable Workhorse
If you need a massive batch of stickers and your design is bold and simple, screen printing is tough to beat. It’s a classic technique where ink is pushed through a mesh screen onto the vinyl. Each colour in your design needs its own separate screen, which means the setup can be a bit of a mission.
Because of that initial setup cost, screen printing just doesn't make sense for small orders. But once you're printing hundreds—or thousands—of the same design, the price per sticker plummets. It becomes the most economical choice by a long shot. Picture a nationwide company needing thousands of identical bumper stickers; that’s a job for screen printing.
What really makes screen-printed stickers stand out is their durability. The ink is laid down in thick, solid layers, making them incredibly fade-resistant and tough. They often outlast their digitally printed counterparts, even without a laminate. For designs with one to three solid colours that need to look good for years, this method delivers serious value and performance.
UV Printing: The Ultimate in Durability
When your stickers absolutely, positively have to withstand a beating, you turn to UV printing. This process uses ultraviolet (UV) light to instantly cure (or "dry") the ink as it hits the vinyl. This flash-curing creates an incredibly robust finish that’s resistant to fading, scratching, and weathering right out of the printer.
UV-cured inks essentially form a hard, protective shell on top of the vinyl. This gives them superior defence against moisture, chemicals, and the intense New Zealand sun, making UV printing the top choice for industrial labels, outdoor gear branding, or any sticker destined for a harsh environment.
The gear and inks are more expensive, no doubt. But the trade-off is a sticker so tough it often doesn’t need a separate protective laminate, which can help balance the cost. For businesses in fields like construction or the marine industry, where durability is non-negotiable, investing in UV-printed stickers is a smart move. It ensures their branding and critical safety info stays put for years.
This push for durability reflects a wider industry trend. Research on the vinyl films market in New Zealand here shows significant growth in demand for signage and graphics, with a projected 4.2% CAGR in our region alone.
How to Prepare Your Artwork for Flawless Printing
Even the best vinyl and the most advanced printer on the planet can't salvage a poorly prepared design file. Honestly, getting your artwork print-ready is the single most important thing you can do to make sure your final stickers look exactly how you imagined them. It’s the secret to dodging frustrating delays, expensive reprints, and that sinking feeling of disappointment.
Think of your digital file as the architectural blueprint for your sticker. If that blueprint is off, the final build will be too. Let's get into the essential checks that will take a good design and make it a perfect print.
Nail Your Colours With CMYK Mode
One of the most common pitfalls I see is a glaring colour mismatch between the vibrant image on a screen and the final printed sticker. This almost always comes down to one simple thing: the file was designed in the wrong colour mode.
Your monitor creates colour using RGB (Red, Green, Blue) light. Professional printers, on the other hand, mix CMYK (Cyan, Magenta, Yellow, and Key/Black) inks to put colour onto a physical surface. If you design in RGB, the printer has to perform a last-minute conversion to CMYK, which can leave your bright colours looking dull, muddy, or just plain wrong.
To get ahead of this, always set your design software—whether it's Adobe Illustrator or Affinity Designer—to CMYK right from the very start. This way, the colours you’re working with are already within the printer's achievable range, giving you a far more accurate preview of the final job.
Achieve Sharpness With High Resolution
Ever seen a printed sticker that looks fuzzy or pixelated up close? That’s a classic sign of a low-resolution file. For printing on vinyl, the non-negotiable industry standard is 300 DPI (dots per inch). This number dictates how much detail the printer can pack into every square inch.
A file set to 300 DPI has enough data to produce a crisp, sharp, and professional-looking sticker. Trying to print a 72 DPI file, which is fine for websites, will result in jagged edges and a blurry mess. Before you even think about sending that file off, pop open the image settings and confirm it’s 300 DPI at the final print size.
A simple rule of thumb I tell all my clients: if you have to stretch a small image to make it bigger in your design, you're killing its resolution. Always, always start with high-quality, large source files for the best results.
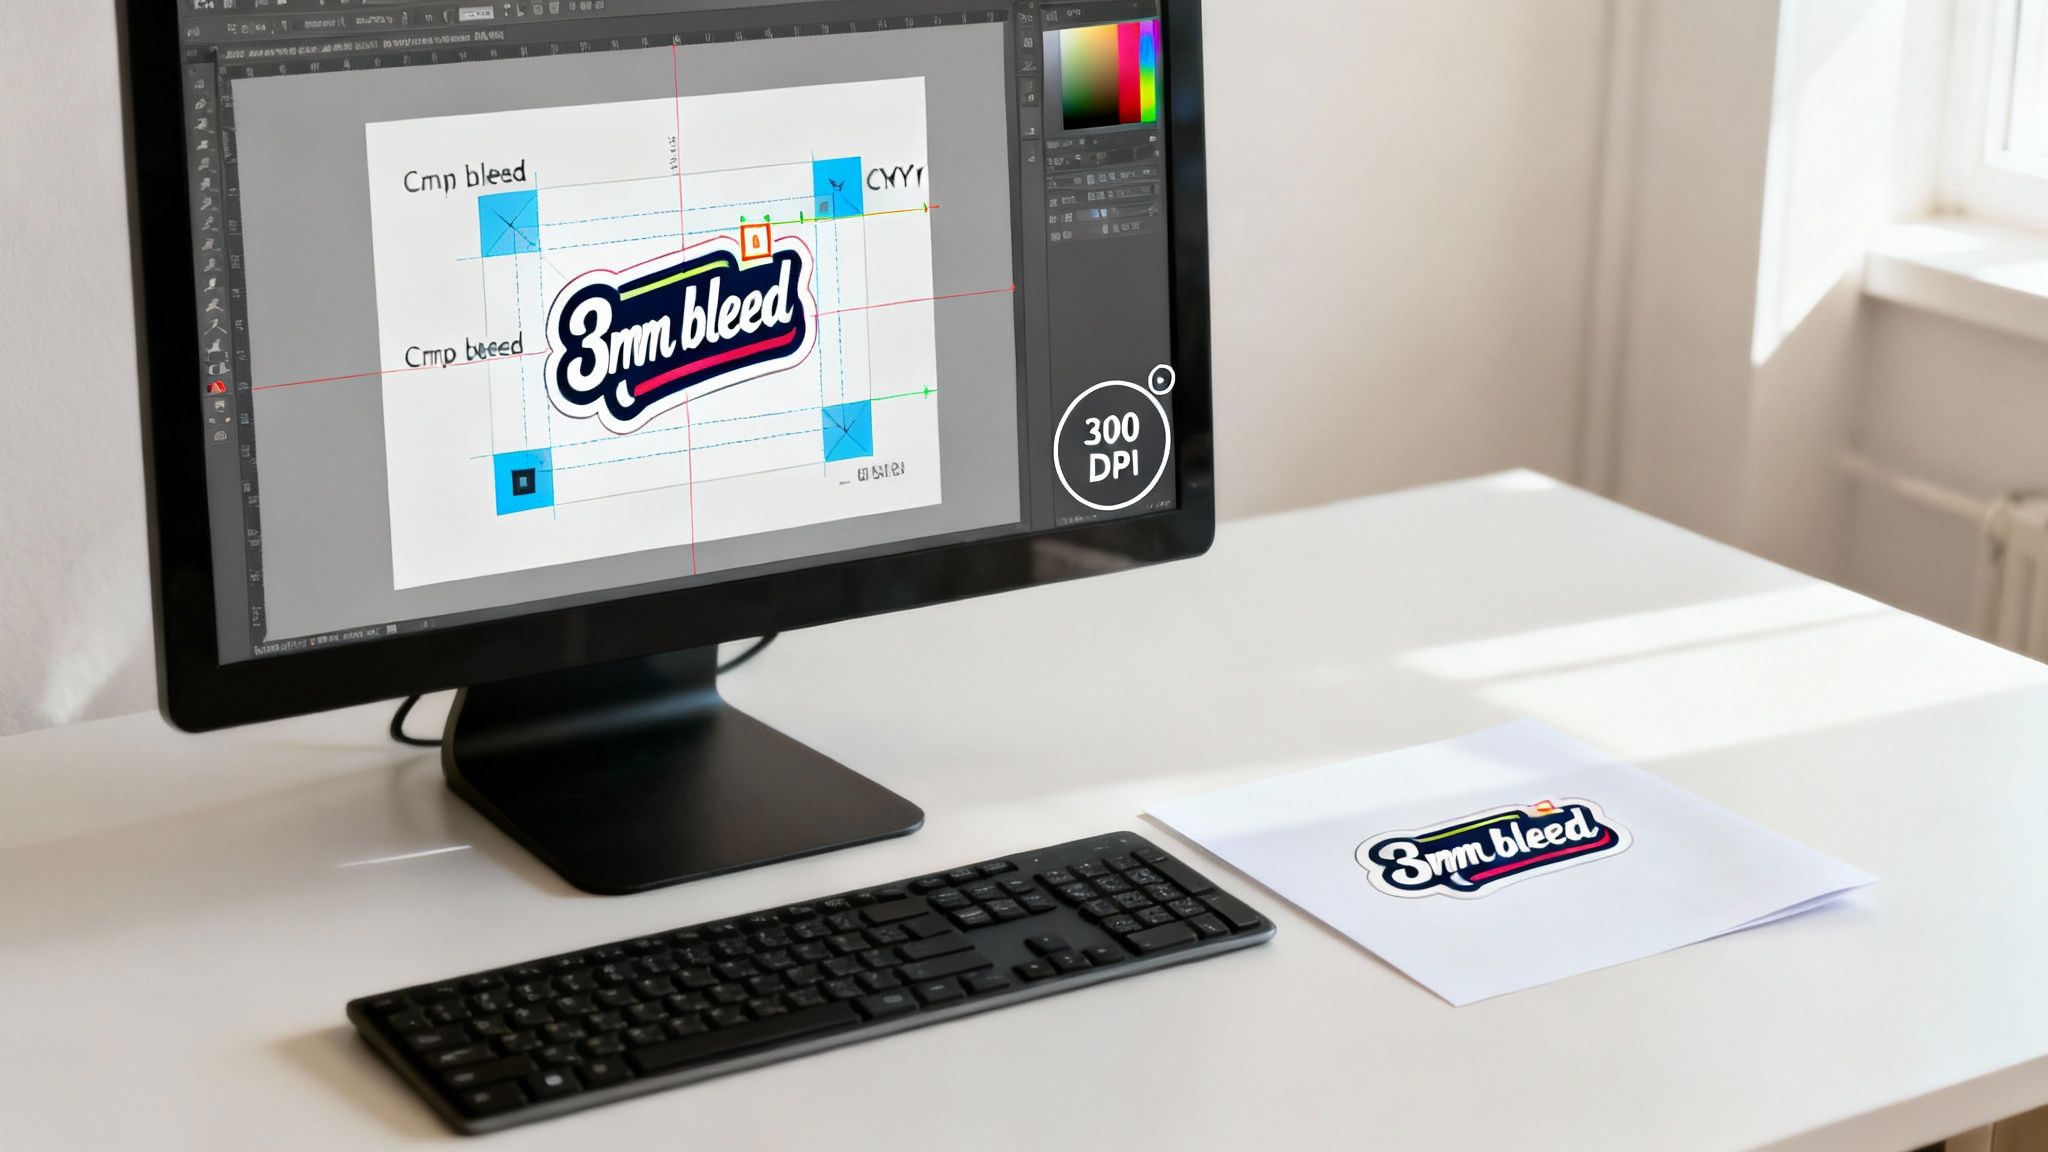
The Crucial Role of Bleed and Cut Lines
This is where so many projects go sideways, but it’s actually really simple to get right. Bleed is the extra bit of your background design that extends past the final trim edge of the sticker. The cut line (or die line) is a vector path that tells the cutting machine exactly where to slice.
Think about it this way: printing and cutting machines are incredibly precise, but they still have a tiny margin of error, maybe a millimetre or two. Without that bleed, any slight shift in the cut will leave an ugly, unprofessional white sliver along the edge of your sticker.
To prevent this nightmare, you need to add a bleed area. Here’s how it works in practice:
- First, you create a clean vector line that traces the exact shape you want your finished sticker to be. This is your cut line.
- Next, you extend your background colour or image 3mm past this cut line on all sides. This extra margin is your bleed.
- When you save the file, make sure the cut line is on its own separate layer (often named "CutContour" or something similar) so the printer’s software can see it.
The machine then follows your cut line precisely, slicing through the extended artwork to deliver a perfect sticker with colour that goes right to the very edge.
Setting up your file correctly from the get-go is the key. To make it even easier, I've put together a quick checklist of the must-haves for any print-ready file.
Your Print-Ready File Checklist
This quick reference table summarises the technical specs you absolutely need to check before sending your artwork to print. Getting these right will help you avoid common delays and costly mistakes.
| Artwork Element | Required Specification | Why It's Critical |
|---|---|---|
| Colour Mode | CMYK | Ensures the colours on your screen will accurately match the final printed sticker. |
| Resolution | 300 DPI | Guarantees your design prints with sharp lines, crisp text, and clear details. |
| Bleed | 3mm on all sides | Prevents unwanted white edges if the cutting blade shifts even slightly during production. |
| Cut Line | Separate vector layer | Provides a precise, clean path for the cutting machine to follow for custom shapes. |
Taking a few extra minutes to run through this list is the best investment you can make in your sticker project. It saves time, prevents headaches, and is ultimately the key to professional-quality printing on vinyl.
Finishing Touches That Make Your Stickers Pop
Printing the design feels like a huge win, but we're not quite at the finish line yet. The final steps—lamination and cutting—are what separate a good sticker from a great one. These finishing touches are your sticker's armour, protecting your investment from the elements while giving it that premium feel that boosts your brand's value.
I like to think of this stage as the clear coat on a car. It's that invisible shield that offers vital protection and really defines the final look. Getting this right is critical for making sure your stickers leave a lasting impression, whether they're on a product package in a shop or a van cruising around Auckland.
Laminate for Looks and Longevity
Lamination involves applying a thin, transparent film over your printed vinyl. Honestly, it's a non-negotiable step for any sticker that’s meant for long-term or outdoor use, especially under the harsh New Zealand sun. This protective layer is what shields the ink from UV rays, scratches, and moisture, seriously extending the sticker's life.
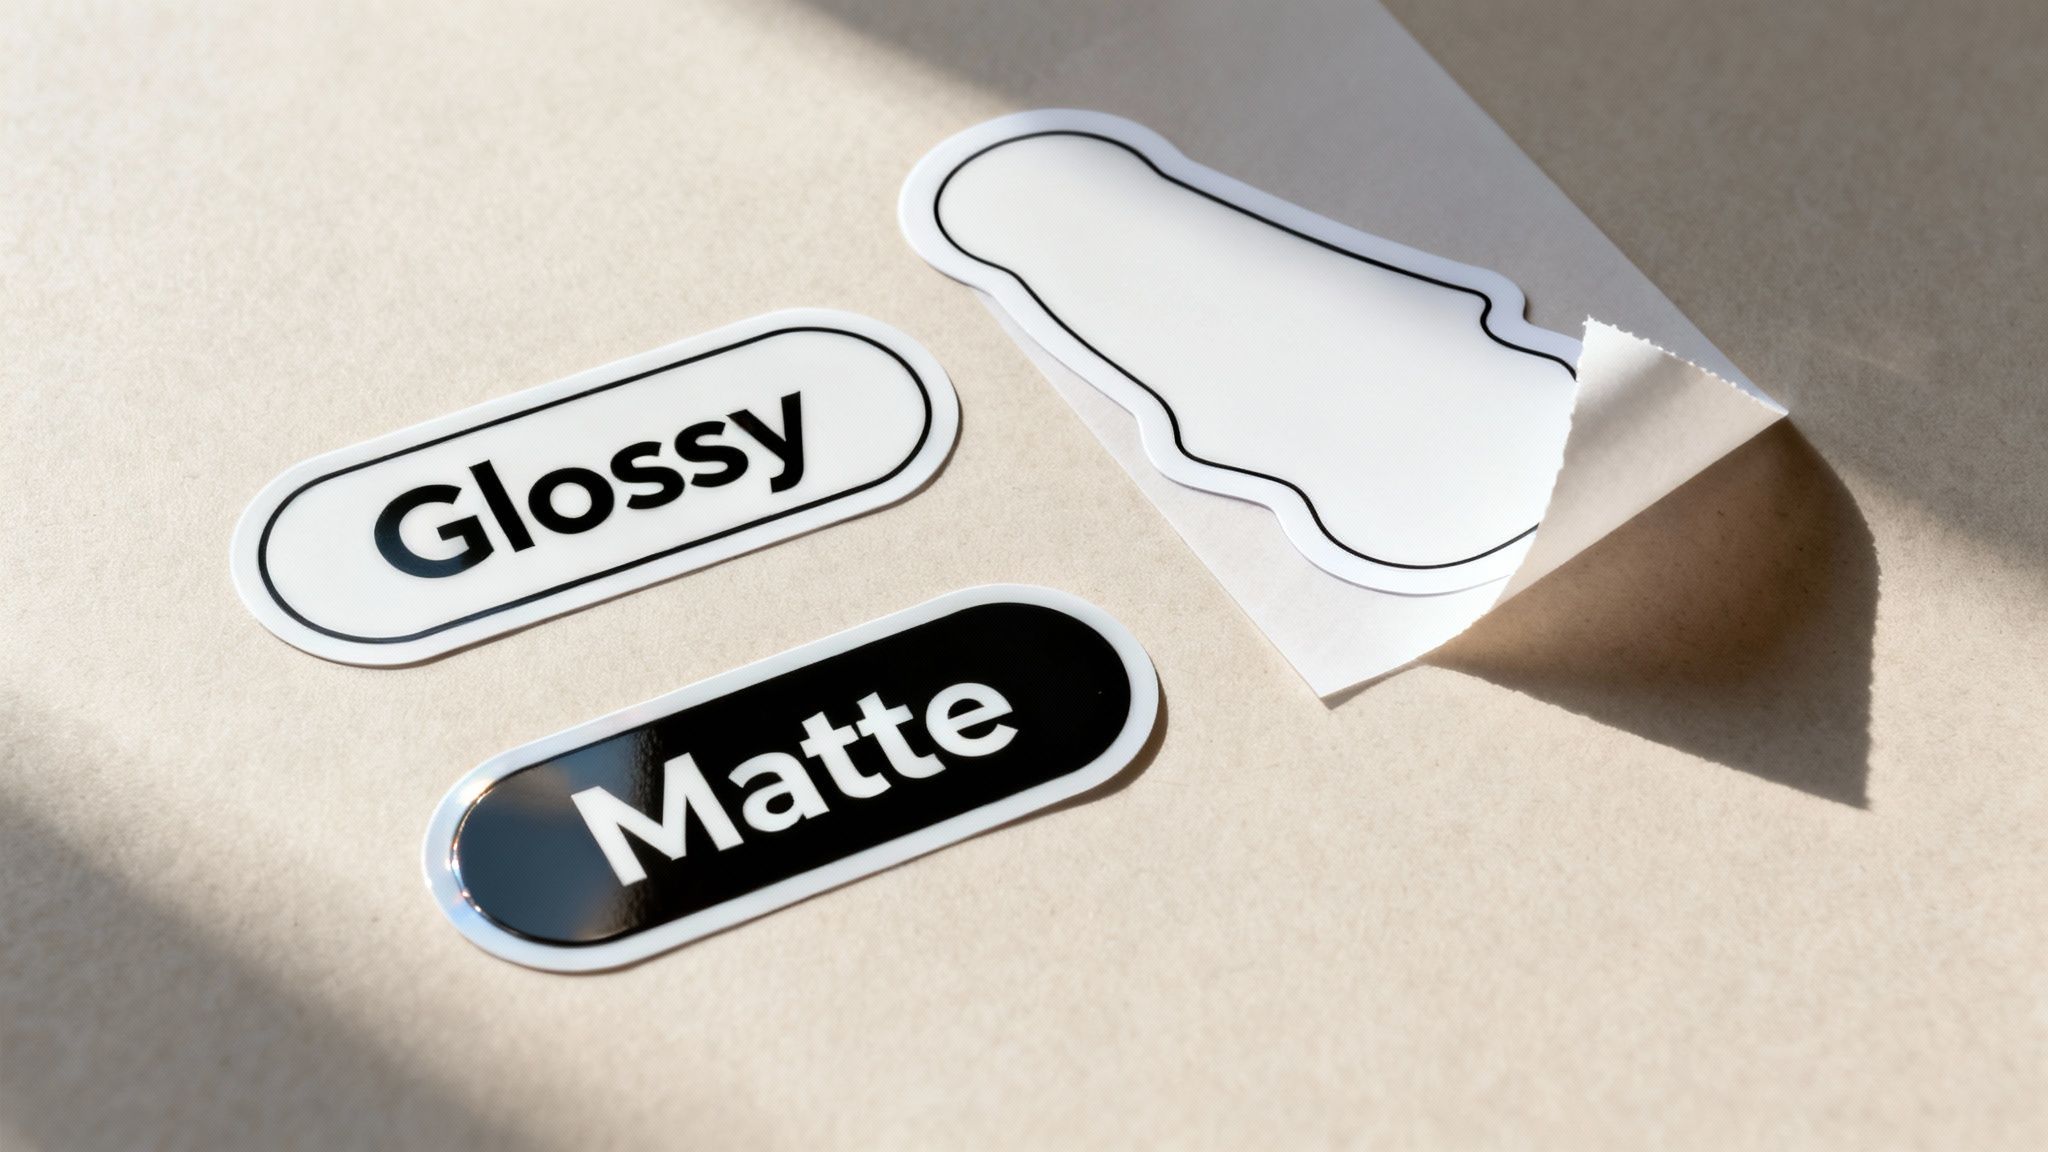
But it’s about more than just protection; the type of laminate you choose completely changes the final aesthetic.
- Glossy Laminate: This is your go-to for making colours vibrant and punchy. It creates a high-shine, reflective surface that grabs attention, making it perfect for eye-catching product labels or promotional stickers that need to stand out on a crowded shelf. That slick finish really deepens the colour and contrast.
- Matte Laminate: If you're after a more subtle, sophisticated feel, matte is the answer. It gives you a smooth, non-reflective finish that kills glare, which is fantastic for corporate branding, high-end packaging, or any design where readability is crucial. It also just feels premium to the touch.
Your choice here directly shapes how people perceive your brand. A glossy finish shouts "Look at me!", while a matte finish quietly communicates "This is quality."
The right laminate does more than just protect the ink; it completes the design's story. It can add a sense of fun and energy with a glossy sheen or convey elegance and professionalism with a subtle matte texture.
Precision Cutting for a Professional Shape
Once your vinyl is printed and laminated, it’s time for the final cut. This part determines the sticker's final shape and how it's handed over to the end-user. The two most common methods produce very different results, and each is suited to specific jobs.
Understanding the difference is key to getting the sticker you’re actually picturing in your head.
Custom Shapes with Die Cutting
Die-cutting is when we cut through both the vinyl sticker and its paper backing to create a custom, standalone shape. The blade follows the exact contour of your design, which means all the surrounding waste material is completely removed.
This is the perfect method for creating uniquely shaped stickers that really stand out. Picture your company logo as a sticker; a die-cut version would be trimmed precisely to the logo's outline, creating a clean, professional piece that looks incredible on its own. They're usually supplied as individual stickers, which is ideal for giveaways at events or for tucking into customer orders.
Easy Peeling with Kiss Cutting
Kiss-cutting, on the other hand, is a much more delicate process. Here, the blade slices through the vinyl layer only, leaving the paper backing completely intact. This is how you can have multiple, intricately shaped stickers all on one sheet.
This is the technique we use for sticker sheets. Think of a sheet of small, differently shaped stickers for a planner or a collection of logos for a corporate client. Because the backing paper stays whole, the individual stickers are incredibly easy to peel off without tearing any of those fine, delicate edges. Kiss-cutting is the best choice when you need to provide multiple designs in a convenient, easy-to-handle format.
Dodging the Common Sticker Printing Blunders
You can have the best materials and a perfect design file, but a few small oversights can still send your sticker project sideways. After years in this business, I've seen it all, and there are a few common traps that even experienced people fall into.
Getting these things right isn't just about saving money on a reprint. It's about making sure your brand looks its best and your stickers actually do the job you need them to. Let's walk through the mistakes we see most often and, more importantly, how to avoid them.
The Wrong Material for the Wrong Surface
This is, without a doubt, the most frequent and costly mistake we see. A sticker can look amazing, but if it's peeling off a week after you've stuck it down, the whole project has failed. The surface is king.
For example, trying to stick a standard vinyl onto a rough, textured brick wall is a classic recipe for disappointment. The adhesive just can't get a proper grip on all those nooks and crannies, and it won't be long before it starts lifting. For a surface like that, you need a specialised high-tack vinyl that's designed to conform and cling to those tricky textures.
It's the same story with curves. A sticker made for a flat window will just wrinkle and bubble if you try to wrap it around a motorbike helmet. The material simply isn't flexible enough for the job.
The golden rule is simple: Always consider the final destination of the sticker first. Is it a smooth, flat surface or a complex curve? Is it indoors, or will it be battling the New Zealand elements? Answering these questions before you order will save you a world of frustration.
Forgetting the Finer Design Details
A design that looks brilliant on your big computer screen can turn into a real mess when it's shrunk down to a 5cm sticker. There are two big design details that people often miss, leading to a poor final product.
First up is text that's just too small. It's a common temptation to cram too much information into a small space. That clever tagline or your phone number might look clear on-screen, but once printed, it can easily become an unreadable smudge. As a general rule of thumb, try to keep your text above 6 points to ensure it's legible.
The second culprit is the dreaded low-resolution artwork. Grabbing a pixelated logo from a website is a surefire way to get a blurry, unprofessional sticker. All your graphics, especially your logo, need to be in a high-resolution vector format (like an .AI or .EPS file) or, at the very least, a 300 DPI raster file at the final print size. This is what gives you those clean, sharp lines.
Rushing the Application
You’ve got your perfect stickers in hand. The final step is getting them applied correctly, and rushing this part can undo all your hard work, leaving you with a bubbly, crooked eyesore.
A proper application is all about patience and a little bit of prep.
- Clean the Surface: First things first, give the application area a good wipe-down with isopropyl alcohol. This gets rid of any dust, oil, or grime that could stop the adhesive from working properly.
- Use the Hinge Method: For anything bigger than your palm, don't just peel the whole backing off at once. Instead, peel back a small strip from one edge. Line it up and stick that edge down first.
- Squeegee It Down: With that first edge secured, use a squeegee or even a credit card to smooth the rest of the sticker down, working from the centre outwards. As you go, slowly pull away the rest of the backing paper. This technique pushes air out to the edges instead of trapping it in the middle.
Taking an extra five minutes to apply your sticker with care makes a huge difference. It’s what separates a professional, long-lasting result from a botched job. By steering clear of these common pitfalls, you’re setting your project up for success from the get-go.
Got Questions About Vinyl Stickers? We've Got Answers.
When you're investing in vinyl stickers for your business, you want to get it right. From figuring out how they'll handle the harsh Kiwi weather to picking a finish you can actually write on, a few key questions always pop up. Let's clear the air on some of the most common queries we get.
Think of this as a quick-fire guide to making sure your stickers don't just look great, but do the job you need them to.
How Long Do Printed Vinyl Stickers Last Outdoors?
This really comes down to the materials and finish you choose. For a standard digitally printed sticker, a protective UV laminate is non-negotiable if it's going outside. With that extra layer, you can realistically expect a solid 3-5 years of life before the sun and rain start to take their toll.
But if you need something truly bulletproof, cast vinyl with a premium overlaminate is the way to go. It's the top-tier option for a reason. This combination is engineered for extreme toughness and can easily last 7 years or more, making it perfect for long-term vehicle branding or permanent outdoor signage where you just can't compromise on durability.
What Is the Difference Between a Sticker and a Decal?
Good question! While most people use the words interchangeably, there's a subtle but important difference in the print world, and it's all about how the graphic gets onto the surface.
- Sticker: This is what most people picture. It's a design printed onto a single piece of vinyl with a sticky back. You peel the whole thing off the backing paper and apply it in one go—design, background, and all.
- Decal: This usually refers to cut-out graphics, like individual letters or a logo with lots of separate pieces. They come with a layer of transfer tape over the top, which holds everything in perfect alignment. You apply it, squeegee it down, and then carefully peel off the transfer tape, leaving only the design elements stuck to the surface.
A simple way to think about it: a full-colour bumper sticker is a sticker. The individual vinyl letters spelling out your business hours on a shop window? That's a decal.
Can I Write on My Vinyl Stickers?
You certainly can, but your choice of finish is absolutely critical here. If you need to jot down dates, serial numbers, or a quick note, you'll want to go with a matte laminate. Its slightly porous, non-shiny surface gives a permanent marker something to grip onto, so your writing won't smudge or wipe off.
Trying to write on a high-gloss finish, on the other hand, is a recipe for frustration. The ink from most pens and markers will just bead up or rub right off. It's simply too slick and non-porous for writing.
If you're designing something like service reminder labels, food container tags, or even name badges, always insist on a matte finish. This one small decision makes your stickers infinitely more functional.
What's the Minimum Order Quantity for Custom Stickers?
This depends entirely on the printing method.
For full-colour, complex designs or if you just need a small batch, digital printing is your best bet. The setup is fast and flexible, which means the minimum order quantity (MOQ) can be incredibly low—we're talking as few as one single sticker. It’s perfect for prototypes or small-run promos without a big financial commitment.
Screen printing, however, is a different beast. It's built for big runs. Because of the extensive setup involved for each individual colour, it just isn't cost-effective for small jobs. You're usually looking at a minimum order of 100-250 units. But when you need a large batch of a simple, bold design, the price-per-sticker drops dramatically, making it the most economical choice.
Ready to bring your sticker ideas to life? At SONI DESIGN, we specialise in creating high-quality, custom vinyl stickers that tell your brand's story. Let's work together to produce something truly special. https://www.sonidesign.co.nz
Leave a Comment
Stay home & get your daily
needs from our shop
Start You'r Daily Shopping with Nest Mart