
Your cart is currently empty.
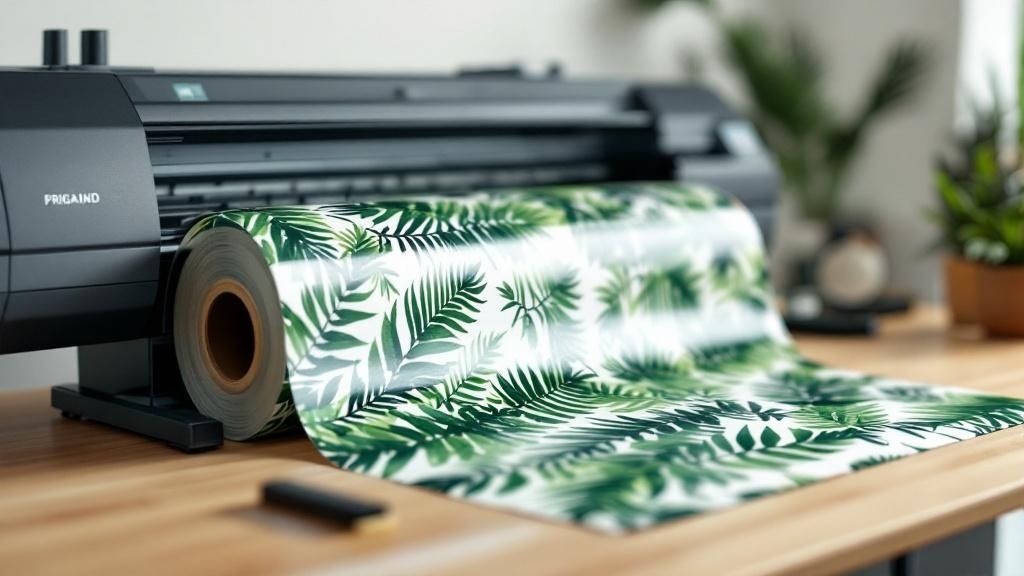
Welcome to the vibrant world of vinyl printing! At its heart, this is the art of turning a digital design into a tough, versatile graphic that can stick to just about anything. Think of it as creating a super high-quality, custom sticker—one that can brand a company van, announce a sale on a shop window, or bring a personal art project to life.
Your Introduction to Vinyl Printing
This guide is your all-in-one map for turning brilliant ideas into tangible, high-impact visuals. Whether you're a business owner in Auckland looking for signage that gets noticed or a creative in Wellington exploring a new medium, you’re in the right place. We're going to pull back the curtain on the entire process and make it straightforward.
We’ll cover everything you need to know, starting with the practical skills. You'll learn how to pick the right materials to stand up to New Zealand’s unique and often harsh climate—from the blistering sun to damp, salty air. From there, we'll dive into the technologies that bring these vivid designs to life and look at what makes each one different.
What You Will Learn
We’ve structured this guide to build your knowledge from the ground up. By the end, you'll feel confident enough to tackle any vinyl printing project, no matter how big or small. Here's a quick look at what’s ahead:
- Material Mastery: We'll break down the key differences between cast and calendared vinyl and show you exactly when to use each for professional results.
- Technology Explained: You'll get to grips with the core printing methods—like eco-solvent, latex, and UV—so you can make smart decisions for your projects.
- Essential Toolkit: Get familiar with the gear the pros rely on, from large format printers and laminators to the humble but crucial weeding tools.
- Business Applications: Discover how vinyl printing skills can open up new revenue streams and exciting business opportunities across Aotearoa.
Vinyl printing is so much more than a technical process; it’s a powerful communication tool. It gives businesses a way to put their brand right in front of the public and offers artists a durable medium to express their creativity on a massive scale.
The applications are almost endless. A well-designed vehicle wrap can generate thousands of impressions every single day, turning a standard commute into a mobile marketing campaign. In retail, eye-catching window graphics can lure customers inside. Artists are even using vinyl to produce stunning limited-edition prints and large-scale installations. To get a broader perspective on how these printing techniques fit into the wider world of digital advertising, you can find some great articles on their blog for more insights.
With this foundation set, you're ready for the more technical sections that follow.
Choosing the Right Vinyl for Your Project
Getting started in vinyl printing means getting to know your materials. This is arguably the most critical decision you'll make, as the vinyl you choose directly affects the look, feel, and lifespan of your finished product. It's a bit like painting a house – you wouldn't slap interior wall paint on the exterior and expect it to last. The same logic applies here. The vinyl you need for a temporary indoor sign is worlds away from the high-performance material required for a vehicle wrap that has to brave the elements for years.
Picking the wrong material can be a costly mistake. You risk graphics that peel away, fade in the sun, or crack under pressure, which means wasted time, money, and a disappointed client. This guide will walk you through the options, helping you understand the key differences so you can confidently pick the perfect vinyl for your specific project, budget, and durability needs. We want your work to look incredible on day one and stay that way.
The image below gives you a feel for how different finishes can completely change the character of a design. Notice how the light plays differently across the gloss, matte, and other specialty textures.
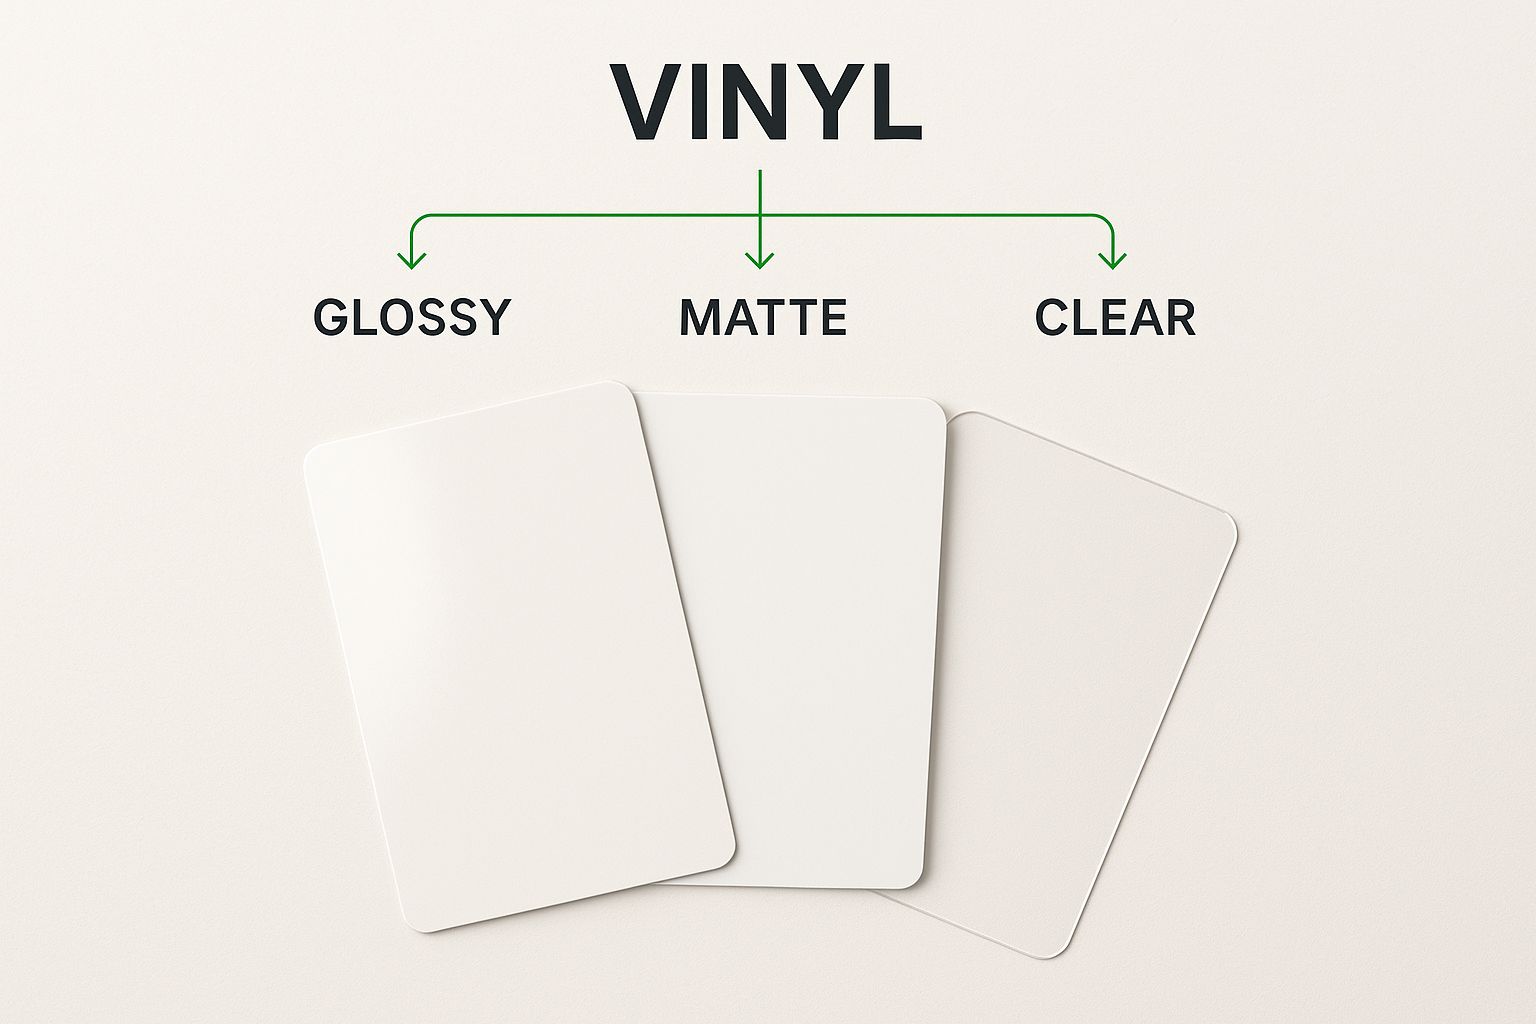
As you can see, this choice isn't just cosmetic. The finish impacts everything from visibility under bright lights to the overall aesthetic you're trying to achieve.
Calendared vs Cast Vinyl: The Core Difference
When you strip it all back, there are two main families of vinyl you’ll work with: calendared and cast. The secret to knowing when to use each one lies in understanding how they are made.
Think of calendared vinyl like rolling out pastry dough. A chunk of plastic is heated, then forced and squeezed through a series of massive, high-pressure rollers to flatten it into a sheet. It's a fast and cost-effective method, but it builds stress into the material. The vinyl retains a "memory" of its original, thicker form and will try to shrink back over time.
Cast vinyl, however, is more like pouring pancake batter. A liquid plastic formula, called an organosol, is poured onto a super-smooth casting sheet and then sent through ovens to bake. This process creates an incredibly thin, relaxed, and dimensionally stable film with virtually no built-in tension.
Here's a simple way to remember it: Calendared vinyl is forced into shape, while cast vinyl is formed into shape. This fundamental distinction is why they perform so differently.
Because of this manufacturing difference, calendared vinyl is the go-to for flat or gently curved surfaces. It's a fantastic, budget-friendly choice for things like window graphics, wall decals, and standard flat signage.
Cast vinyl is the premium option, and it's absolutely essential for wrapping complex 3D surfaces. Think vehicles, helmets, or even textured walls. Its relaxed nature means it can be stretched and moulded into deep channels and around rivets without wanting to pull back or shrink.
Vinyl Type Comparison Guide
To make the choice clearer, here’s a side-by-side look at how these two vinyl types stack up.
| Feature | Calendared Vinyl | Cast Vinyl |
|---|---|---|
| Manufacturing Process | Heated and rolled under pressure | Poured as a liquid and baked |
| Material Tension | High (has "memory") | Very low (dimensionally stable) |
| Thickness | Thicker (2.5-4.0 mils) | Thinner (2.0 mils) |
| Durability | Shorter term (3-6 years) | Long term (7-12 years) |
| Conformability | Good for flat or simple curves | Excellent for complex curves/rivets |
| Shrinkage | Higher tendency to shrink | Minimal to no shrinkage |
| Cost | More economical | Premium price point |
| Best For | Flat signage, window graphics, wall decals, short-term promotions | Vehicle wraps, fleet graphics, textured walls, long-term outdoor use |
Ultimately, calendared vinyl is your workhorse for everyday flat applications, while cast vinyl is your high-performance specialist for the most demanding jobs.
Understanding Adhesives and Finishes
Beyond the vinyl itself, you need to consider the adhesive on the back and the finish on the front. These two elements are just as important for the success of your project. The adhesive is what makes it stick, and the finish dictates the final look.
Let's start with the adhesive – the "glue" that does all the work. The main types you'll encounter are:
- Removable Adhesive: Perfect for temporary jobs like trade show graphics, promotional decals, or wall art in a rental property. It’s designed to be removed cleanly without leaving much sticky residue behind, but only for a specified time frame.
- Permanent Adhesive: Just as it sounds, this creates a much stronger bond. It’s built for the long haul and is essential for graphics that need to endure weather and abrasion, like vehicle wraps or permanent outdoor signs.
- Repositionable Adhesive: This is a brilliant feature, especially for installers. It allows you to lightly tack the vinyl in place, peel it up, and adjust its position until it's perfect. Once you're happy, you apply firm pressure with a squeegee to activate the full, permanent bond.
Next up is the finish, which is the visual texture of the vinyl's surface. Your most common choices are:
- Gloss: A shiny, highly reflective surface that makes colours look vibrant and deep. It’s a popular choice for vehicle graphics and eye-catching signage but can produce a lot of glare in direct light.
- Matte: A flat, non-reflective finish that gives a more subtle, contemporary look. It's ideal for indoor wall art and displays in environments where you need to eliminate glare.
- Satin or Lustre: The perfect middle ground. This finish offers a soft, low-sheen look that enhances colour saturation without the mirror-like reflections of a full gloss.
Exploring Speciality Vinyl Types
Sometimes, a standard vinyl just won't cut it. That's where speciality vinyls come in, offering unique solutions for specific challenges and unlocking a whole new level of creativity.
A great example is perforated window vinyl, often seen on retail storefronts and the rear windows of commercial vehicles. This clever material is covered in tiny holes, creating a one-way vision effect. From the outside, people see a solid, printed graphic; from the inside, you can see right through it.
Another key player is translucent vinyl. This is specifically engineered for backlit signs and lightboxes. It's designed to diffuse light, allowing your graphics to glow evenly and brightly when lit from behind. Having these specialised materials in your arsenal means you’re ready for almost any creative or functional challenge that comes your way.
Right, so you’ve got a handle on the different types of vinyl out there. Now, let’s get into the exciting part: the technology that actually brings your designs to life. When you send a file to be printed on vinyl, it’s not just fed into one generic machine. It enters a specialised ecosystem where ink and media are carefully matched to get a specific result.
Getting your head around these core printing technologies is a game-changer. It means you can have much smarter conversations with print providers, asking the right questions to make sure you get the durability, colour vibrancy, and finish you’re after. And if you're thinking about bringing printing in-house, this knowledge is the absolute foundation for choosing the right gear for your business.
In the world of professional vinyl printing, three technologies really dominate: eco-solvent, latex, and UV printing. Each one has a completely different way of getting ink onto the vinyl, and each comes with its own set of pros and cons.
Eco-Solvent Printing
Think of eco-solvent printing as the long-standing industry champion, famous for producing stunning, high-fidelity images. This method uses inks that contain a mild solvent. This solvent ever-so-gently etches into the surface of the vinyl, allowing the colour pigments to chemically bond with the material itself, not just sit on top of it.
The result? A print with fantastic colour depth and a wide gamut, meaning it can reproduce a massive range of vibrant colours with incredible accuracy. Because the ink becomes a part of the vinyl, these prints are highly durable, scratch-resistant, and can handle outdoor conditions for years, especially when you add a protective laminate over top.
The only real catch is that the "solvent" part means the prints need to "gas-off" before they can be finished or laminated. This is a curing process that can take up to 24 hours, adding an extra day to your production timeline. That’s a crucial detail to remember for jobs with tight deadlines.
Latex Printing
Latex printing takes a completely different route. It uses water-based inks filled with microscopic latex polymers. You can almost think of it as a high-tech version of house paint. The printer sprays the ink onto the vinyl, and then a powerful, built-in heater immediately cures or "bakes" it. This evaporates the water and fuses the latex particles into a tough, flexible layer of colour on the vinyl's surface.
The single biggest advantage of latex printing is speed. Because the prints come out of the machine completely cured and dry, they are ready for immediate lamination and application. This can slash project turnaround times.
This technology is also a big winner for its environmental credentials, as the water-based inks produce very little odour and fewer hazardous air pollutants. The prints are also super flexible, which makes them a go-to choice for things like vehicle wraps where the material needs to stretch around curves and corners. While modern latex inks are tough, they can sometimes be a little less resistant to harsh chemical or abrasive cleaning compared to their solvent cousins.
UV Printing
If you need pure, brute-force durability, you’re talking about UV printing. This process uses unique inks that stay in a liquid state until they’re blasted with intense ultraviolet (UV) light. As the printer head moves along laying down the ink, a powerful UV lamp follows right behind it, instantly curing—or hardening—the ink into a solid layer.
This instant cure means prints are ready for finishing the moment they pop out of the printer. More importantly, it creates an incredibly tough and abrasion-resistant surface. In fact, UV prints can often be used outdoors without any laminate at all, even in demanding environments. One of the really cool tricks of UV printers is their ability to build up layers of ink, creating amazing textured or embossed effects you can actually feel.
The trade-off for all that toughness is that the ink layer sits entirely on top of the vinyl, which can sometimes make it a bit more brittle. This can be a drawback for applications that need a lot of stretch, like complex vehicle wraps.
Comparing the Core Technologies
So, how do you choose? It usually comes down to balancing four things: speed, quality, what you're using it for, and cost. Each method has a moment to shine.
| Feature | Eco-Solvent | Latex | UV (Ultraviolet) |
|---|---|---|---|
| Print Process | Ink with mild solvents bites into the vinyl. | Water-based inks are baked onto the surface. | Liquid ink is instantly hardened by UV light. |
| Best For | High-detail graphics, fine art, vibrant colours. | Fast turnarounds, vehicle wraps, indoor wall graphics. | Extreme durability, outdoor signage, textured prints. |
| Outdoor Durability | Excellent, especially when laminated. | Very good, flexible and weather-resistant. | Outstanding, highly resistant to fading and abrasion. |
| Drying Time | Requires 24 hours to "gas-off" before finishing. | Prints are instantly dry and ready for finishing. | Prints are instantly cured and ready for finishing. |
| Environmental | Low-solvent formula is an improvement on older tech. | Water-based inks have a lower environmental impact. | Low VOCs, but uses more energy due to UV lamps. |
Ultimately, your project's specific needs will point you to the right technology. For a fine art reproduction on vinyl, the incredible colour richness of eco-solvent might be the top priority. For a fleet of commercial vans that need wrapping and putting back on the road ASAP, latex is the clear winner. And for rugged industrial labels or permanent outdoor signage that has to stand up to harsh New Zealand conditions, the resilience of UV is simply unmatched.
The Essential Equipment for Professional Results
A fantastic print doesn't happen by magic, and it certainly takes more than just a great printer. To get those consistently professional results with vinyl, you need a full toolkit where every piece of gear plays its part. Think of it like a finely tuned production line; if one component is off-key or missing, the whole process grinds to a halt.
The journey from a digital design file to a finished graphic is a team effort, relying on specialised tools working in perfect harmony. Let’s start with the heart of the operation, the printer, and then walk through all the other essential bits and pieces that guarantee your final product looks flawless.

The Large Format Printer
This beast is the cornerstone of any serious vinyl printing setup. Unlike your standard office machine, a large format printer is built to handle massive rolls of vinyl. It also uses specific ink technologies—like eco-solvent, latex, or UV—that are specially formulated to bond to vinyl surfaces for a finish that lasts.
When you're shopping around, the two biggest things to look at are print width and resolution. A wider printer means you can tackle huge jobs like full vehicle wraps or large-scale banners in one go. Higher resolution, measured in DPI (dots per inch), is what gives you those crisp, detailed graphics that look sharp even when you're right up close.
The Vinyl Cutter or Plotter
Once your design is printed, you'll often need to cut it out. That's a job for a vinyl cutter, sometimes called a plotter. This machine uses a tiny, incredibly precise blade to slice out shapes, letters, and intricate designs from the printed vinyl sheet.
It’s the tool that transforms a simple printed square of vinyl into a perfectly shaped logo or a set of individual letters for a storefront window. For any business producing decals or custom-shaped graphics, a reliable cutter is non-negotiable.
RIP Software: The Master Translator
You can't just hit "Print" in Photoshop and hope for the best with a large format printer. For that, you need specialised Raster Image Processor (RIP) software. The best way to think about RIP software is as a master translator that sits between your computer and your printer.
RIP software is the brain of the printing operation. It takes your complex design file and converts it into a simple language the printer understands, controlling everything from dot placement to ink density for flawless colour accuracy.
Without it, you'd be constantly fighting with colour matching, ending up with prints that don't quite align with your brand's colours. Good RIP software also helps manage your workflow. It lets you queue up multiple jobs and cleverly arranges your designs on the vinyl roll to minimise waste—a money-saving feature known as "nesting."
Essential Finishing and Application Tools
Getting the print off the machine is only half the battle. The final stage requires a few more key pieces of equipment to ensure a durable, perfectly installed final product. These tools might seem simple, but they’re just as crucial as the high-tech machinery.
- Laminator: This machine applies a clear, protective film over your printed vinyl. This laminate acts like a shield, protecting the print from UV rays, moisture, and scratches, which dramatically extends its life.
- Weeding Tools: These look a bit like dental picks. They’re small, sharp tools used for the painstaking process of removing all the excess vinyl from around your cut design.
- Squeegee: A simple but vital tool. This flat plastic applicator is what you use to press the vinyl onto its final surface, pushing out any trapped air bubbles for a smooth, pro finish.
- Application Tape: Also known as transfer tape, this is a sticky-backed paper or film that you apply over a cut vinyl decal. It holds all the separate pieces of your design in place, allowing you to transfer it as one perfect piece to the target surface.
Of course, all this equipment is only as good as the design file you feed it. Getting professional results from your vinyl printing setup relies heavily on smart design choices, so it's worth checking out some tips for designing for print to achieve professional results.
Finishing Touches for Lasting Durability
The job isn't over when the last drop of ink hits the vinyl. The final stage—what we call finishing—is where you take a good print and make it great. It’s how you prepare a graphic to stand up to the harsh New Zealand environment, protecting your work and ensuring it looks professional for years to come.
Think of an unfinished outdoor print like an unstained wooden deck. Sure, it looks okay for a little while, but the sun and rain will quickly take their toll. Finishing techniques are the clear coat, the protective layer that shields your investment from the elements, scuffs, and general wear and tear.
Lamination: Your Print's Best Defence
For most jobs, especially anything headed outdoors, lamination isn't optional—it's essential. A laminate is a thin, clear film applied right over the top of your printed vinyl. It acts as a powerful shield, safeguarding your graphics from the three biggest threats they'll face.
- UV Radiation: We all know how harsh the Kiwi sun is, and it can bleach the colour out of a print in no time. A good UV-protective laminate acts like a sunscreen, keeping your colours vibrant for much, much longer.
- Moisture and Chemicals: Rain, humidity, and even cleaning products can wreak havoc on inks. Lamination creates a waterproof barrier, sealing the printed layer safely underneath.
- Scratches and Abrasion: Think about graphics on vehicles, benchtops, or floors. They're constantly being touched, rubbed, and scuffed. The laminate provides a tough, sacrificial layer that takes the hit, keeping the print itself looking sharp.
You’ve got a few options for the final look. A gloss finish gives colours a real punch, making them look vibrant and shiny. On the other hand, a matte finish provides a more subtle, non-reflective surface that's perfect for indoor art or under bright lights. For high-traffic areas, you can even get specialised anti-graffiti laminates that make cleaning off spray paint a breeze.
Think of lamination as cheap insurance for your print. The small extra cost and effort to apply a laminate can easily double or triple the life of your graphic, which means far better value for you or your client in the long run.
The Hands-On Art of Weeding and Trimming
Once your graphic is printed and cut, it’s time to get your hands dirty. First up is trimming, which is simply cutting the finished design away from the main roll of vinyl. Easy enough.
Next comes the delicate part: weeding. This is the careful, almost meditative process of removing all the excess vinyl from around your design. Using a sharp, pointy tool, you’ll pick away all the negative space—like the centres of letters such as 'O' and 'P'—and any other bits that aren't part of the final image. Patience is everything here; a rushed job can lead to torn letters and lifted edges.
For decals made of multiple separate pieces, the last step is applying transfer tape. This is a large sheet of paper or film with a light adhesive. You press it firmly over your entire weeded design, and it holds every single letter and shape in perfect alignment. This allows you to lift the whole decal off its backing paper in one piece, ready to be applied smoothly and accurately to its final home. It's the secret to getting professional placement every time.
Real-World Business Opportunities in New Zealand
Alright, you've got the hang of the materials, the tech, and the tools. So, where does the rubber meet the road? This is where your skills in printing on vinyl can turn into a real, profitable business right here in New Zealand.
We're moving beyond the workshop and into the marketplace. From the commercial buzz of Auckland to the bustling main streets of Queenstown, businesses everywhere need quality vinyl graphics to advertise, inform, and stand out. The demand is constant, the applications are incredibly varied, and it's a skill that pays the bills.
Turning Vans into Mobile Billboards
One of the most obvious and powerful uses for vinyl is vehicle wrapping. A plain white van is just a way to get from A to B. But wrap it in a striking design, and it instantly becomes a mobile billboard, working for the business 24/7. Every trip to a job site or delivery run becomes a marketing opportunity.
This is a service that’s always in demand with tradies, couriers, and basically any company with vehicles on the road. By offering full or partial wraps using tough cast vinyl and a protective overlaminate, you're not just selling a graphic; you're selling a high-value marketing tool with a clear return on investment for your clients.
Think about the sheer impact of it. A single, well-designed vehicle wrap can get between 30,000 and 70,000 sets of eyeballs on it every single day. That makes it one of the most cost-effective forms of local advertising out there—a very persuasive argument for any Kiwi business owner.
Boosting Retail and Hospitality Spaces
Take a walk through any shopping centre or down a street packed with cafes and bars, and you'll see vinyl graphics absolutely everywhere. They’re the workhorse of visual merchandising, grabbing attention and telling a brand's story. The possibilities are practically endless:
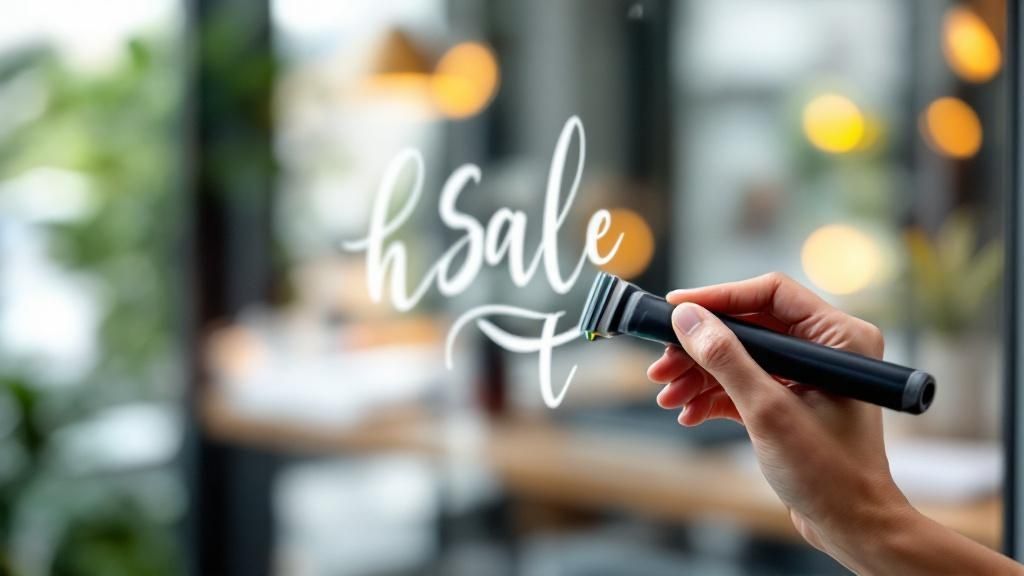
- Window Graphics: Use one-way vision film for massive, impactful displays that still let light in, or simple cut vinyl for sales announcements and opening hours.
- Wall Murals: A boring café wall or a sterile office reception can be completely transformed into a stunning feature with a custom-printed mural.
- Floor Decals: These are perfect for guiding customers, pointing out specials, or marking out social distancing spaces with tough, non-slip graphics.
- Point-of-Sale Signage: Small, punchy signs on counters and displays are easily made by applying vinyl to rigid boards like foamboard or PVC.
Screen printing onto vinyl has long been a major player in New Zealand's print industry, especially for big promotional runs. Even with the move to digital advertising, vinyl's ability to stand up to our famously unpredictable weather makes it the go-to for outdoor signs and event branding. It’s a solid market, and you can see more data on the resilience of the NZ printing industry on ibisworld.com.
Niche Markets and Creative Ventures
Once you move past the big, obvious jobs, you'll find countless niche markets where your vinyl printing skills can really shine. These specialised areas often have less competition and give you a chance to be more creative—which usually means better profit margins.
For instance, think about custom decals for boats. In a country obsessed with its coastline, that's a massive market right there. You could also specialise in graphics for motorsport, create bespoke signage for weddings, or even develop your own line of designer wall art for home décor. Each one is a chance to build a successful business around something you're genuinely passionate about.
Right, you've got the basics of vinyl printing down, but it's totally normal to still have a few questions floating around. Let's tackle some of the most common ones we get asked. Think of this as the final piece of the puzzle to get you printing with confidence.
How Long Does Printed Vinyl Last Outdoors in New Zealand?
Ah, the big question, especially with our notoriously harsh Kiwi sun! The answer really depends on what you're paying for.
If you go for the good stuff – a premium cast vinyl with a top-notch UV protective laminate – you can expect it to look great for a solid 7 to 10 years. It’s built to withstand everything our weather can throw at it.
On the flip side, a cheaper, unlaminated calendared vinyl might only give you 1 to 3 years before it starts looking tired, faded, or cracked. It all comes down to the quality of the vinyl itself, the inks used, and whether you've added that all-important layer of laminate protection.
Can I Use a Regular Home Printer for Vinyl?
In a word, no. Your trusty home inkjet or laser printer just isn't built for the job. The inks are water-based and designed for paper, so when they hit a non-porous vinyl surface, they'll just bead up, smudge, or wipe clean off.
Professional vinyl printing needs the big guns: large format printers running on solvent, eco-solvent, latex, or UV-curable inks. These inks are chemically engineered to bite into the vinyl, creating a permanent, weather-resistant bond that a desktop machine could never achieve.
What Is the Difference Between a Vinyl Decal and a Sticker?
Good question! People mix these up all the time, but there's a clear distinction.
Think of a sticker as a single, all-in-one piece. The design, the ink, and the background are all part of the same layer. You just peel the whole thing off the backing and stick it on. Simple.
A decal, on the other hand, is all about the design itself. Individual letters or graphic elements are precision-cut from a sheet of coloured vinyl. These pieces are held perfectly in place by a layer of transfer tape, which you use to apply the design. Once it's on the surface, you peel away the transfer tape, leaving just the clean, cut-out graphic with no background.
Is Vinyl Printing an Eco-Friendly Option?
It’s certainly getting a lot better. For a long time, the industry relied on PVC-based vinyl, which wasn't great for the planet. But things have come a long way.
Today, many suppliers offer fantastic PVC-free vinyl alternatives that are much more sustainable. What’s more, modern printing tech like water-based latex inks and energy-efficient UV printers are a huge improvement on the old, solvent-heavy methods. If you're looking for a greener approach, just ask your printer about their PVC-free media and modern ink options.
At SONI DESIGN, we live and breathe this stuff. We're all about turning your ideas into high-quality, durable vinyl graphics that get you noticed. Whether it's a head-turning vehicle wrap or sharp retail signage, we've got the expertise to nail your project. Let's create something extraordinary together!
Leave a Comment
Stay home & get your daily
needs from our shop
Start You'r Daily Shopping with Nest Mart