
Your cart is currently empty.

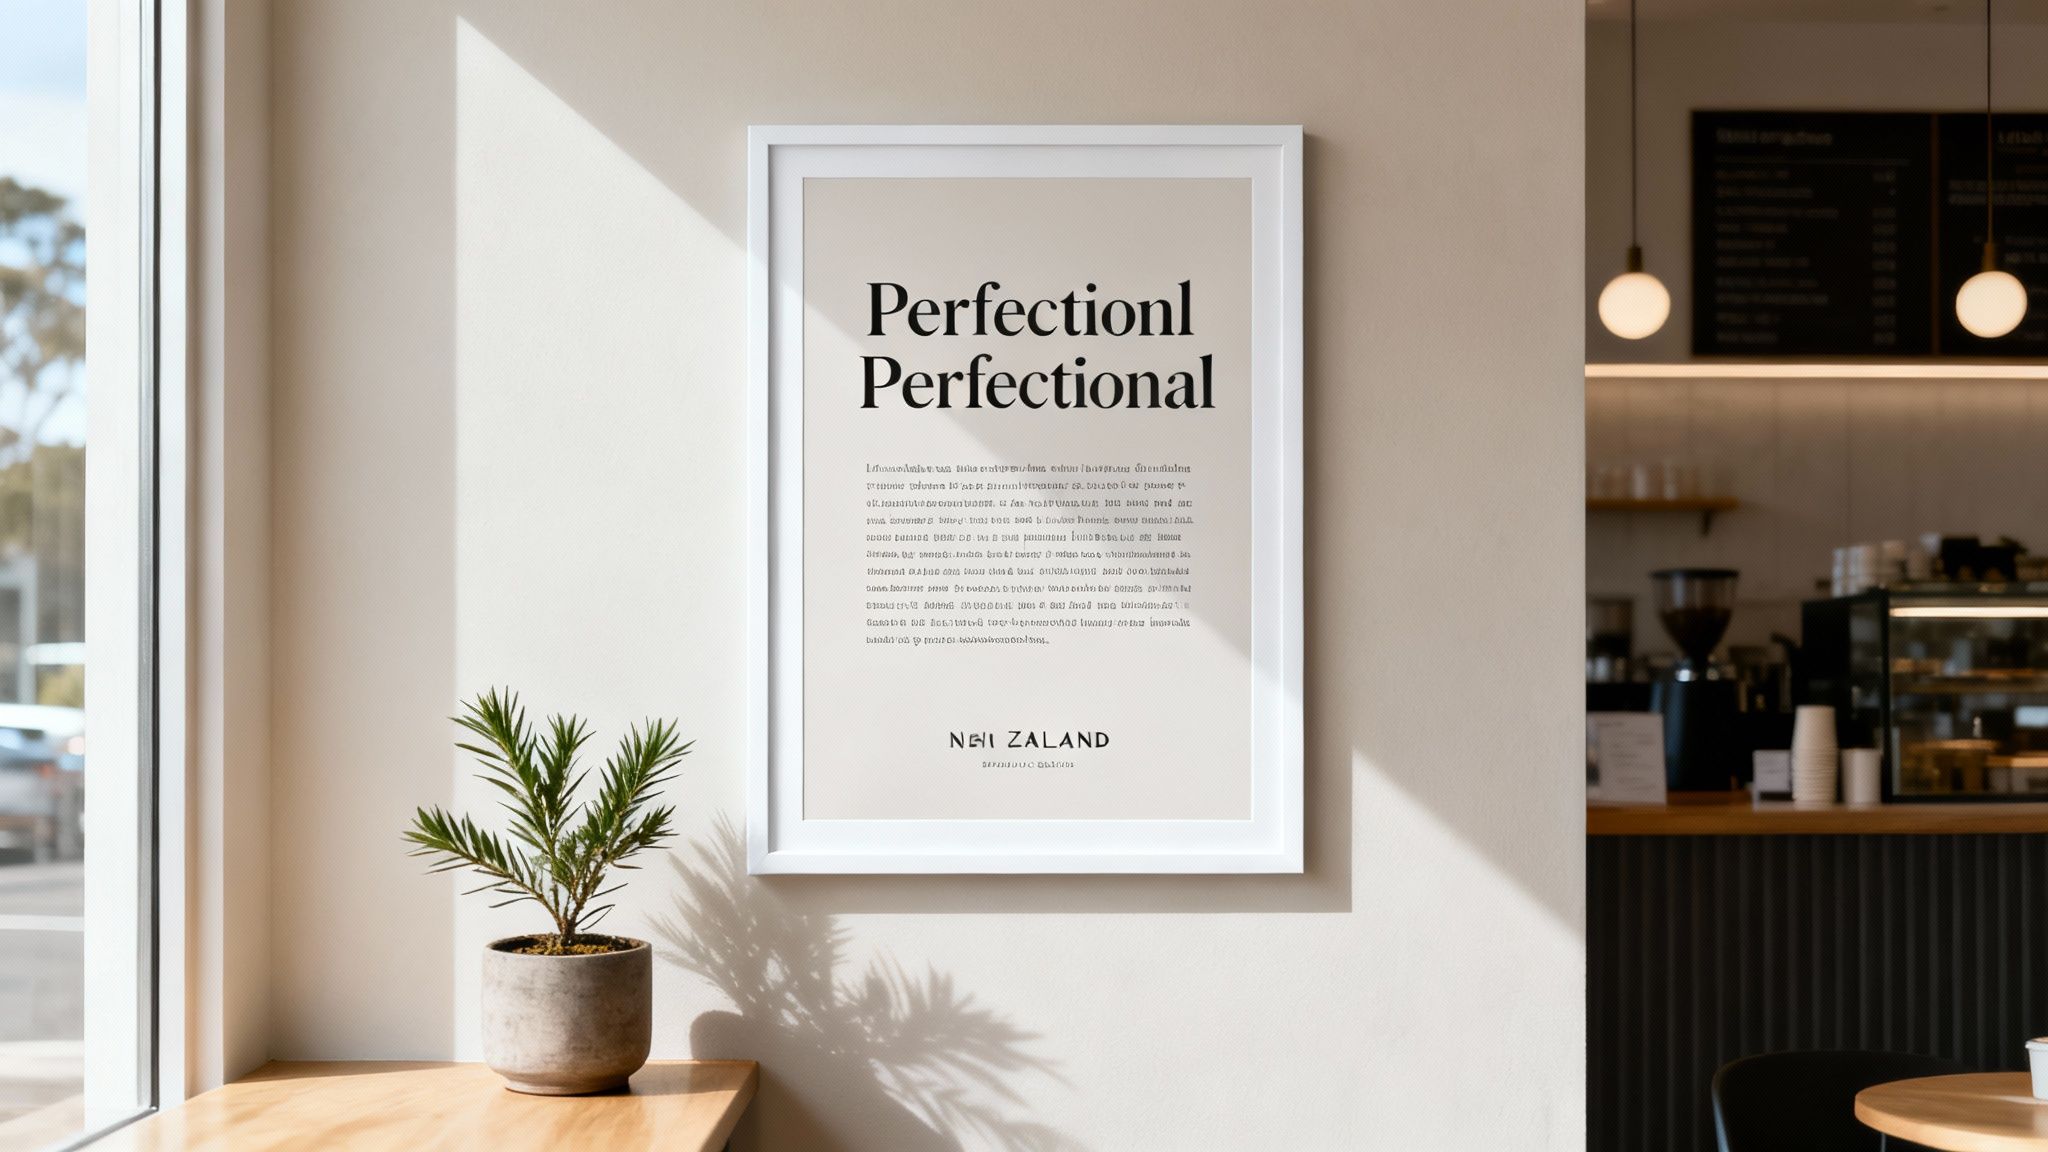
Welcome to the definitive guide for Kiwi businesses looking to make a real visual impact. A professionally produced poster does more than just share information—it grabs attention, builds your brand, and gets people to act. We're here to help you navigate the world of poster prints NZ offers, so you can turn your ideas into a seriously effective marketing tool.
Why Quality Poster Prints Matter for Your Business
In a marketplace flooded with visuals, a well-designed poster is your secret weapon. It’s a physical piece of your brand that can literally stop a potential customer in their tracks, whether it’s in your shop window, at a trade show, or hanging in the office. Unlike a digital ad that's gone in a flash, a physical print takes up space and leaves a lasting impression.
Think of it as your silent salesperson, working 24/7 to get your message across. For a real estate agent, it’s that stunning photo of a property that makes a buyer start dreaming. For a café owner, it’s the vibrant image of the daily special that draws people in off the street.
The Power of Tangible Marketing
While digital marketing is a must, physical media connects with people on a different level. A high-quality poster print engages more than just sight; the feel of the paper stock can deepen brand recall and build trust. It shows you’ve invested in your image, which signals professionalism and a commitment to quality.
This guide is designed to be your partner through the whole process. We’ll cut through the technical jargon, breaking down everything from paper weights to colour profiles into plain, easy-to-understand advice. Our goal is to give you the confidence to explore all the printing options available across New Zealand.
By understanding the fundamentals of print, you can make smart choices that align perfectly with your brand, budget, and business goals, transforming a simple idea into a tangible, professional asset.
A Thriving Industry in New Zealand
Even with all the focus on digital, the demand for print in Aotearoa is as strong as ever. The New Zealand printing industry, which covers posters and other essential visual media, is a vital $1.4 billion sector as of 2025. This steady need for things like point-of-sale displays and event signage shows there's a real opportunity for businesses to stand out with high-quality, custom prints. You can discover more insights about the NZ printing market and its key trends.
Making the right decisions from the get-go ensures your investment pays off. Throughout this guide, we'll walk you through all the crucial elements you need to consider, including:
- Material and Finish: How to pick the perfect paper to suit your poster’s purpose and where it will be displayed.
- Sizes and Specifications: Mastering the technical details for a flawless final product.
- Industry-Specific Strategies: Tailoring your posters for maximum impact in your particular sector.
- Logistics and Timelines: Getting your head around pricing, turnaround times, and delivery across NZ.
Choosing the Right Materials for Maximum Impact
The foundation of a truly great poster isn't just the design; it's the very paper it’s printed on. Think of it as the canvas for your message. The right paper and finish can completely change a poster's look, feel, and how long it lasts, turning a simple notice into a compelling piece of marketing.
This single choice is often the difference between a poster that feels a bit throwaway and one that communicates quality and permanence. It’s a sensory experience that speaks volumes about your brand before anyone even reads a word. For any business in NZ wanting their posters to make a real impression, getting this part right is non-negotiable.
What’s the Deal with Paper Weight (GSM)?
First up, you’ll need to decide on the paper weight, which is measured in GSM (Grams per Square Metre). This isn't about how heavy the poster is to carry, but rather its thickness and sturdiness. A higher GSM number means a thicker, more durable paper that feels more substantial in your hands.
Think about the difference between a flimsy takeaway menu and a premium wedding invitation. That's the kind of difference GSM makes.
Here’s a quick rundown of the most common paper weights you’ll find for poster printing here in New Zealand:
- 150gsm: This is a fantastic, versatile, and lightweight stock. It's flexible and budget-friendly, making it the perfect choice for short-term indoor promotions, signs on community notice boards, or temporary sale posters where you don't need it to last for months on end.
- 200gsm: A solid step up in durability, this mid-weight paper feels more professional without being overly stiff. It strikes an excellent balance between quality and cost, making it great for things like shop window displays or internal company announcements.
- 250gsm: Now we're talking about a robust, premium paper stock. Its thickness gives it a high-quality, almost card-like feel, making it ideal for posters that need to last—like branded art for your office walls, high-end real estate displays, or permanent informational signs.
Choosing the right GSM ensures your poster not only looks the part but also holds up in its intended environment. A thin, flimsy paper just won't cut it in a busy retail space, while a super-thick stock might be overkill for a one-day event.
Picking the Perfect Finish: Gloss vs. Matte
Once you've sorted the paper weight, it's time to think about the finish. This is the coating that goes over the print, and it completely changes how the poster interacts with light and how your colours are perceived. The two most popular kids on the block are gloss and matte, and they each bring a very different vibe to the party.
A gloss finish acts a bit like a varnish, creating a shiny, reflective surface. It makes colours look incredibly vibrant and saturated, causing them to "pop" right off the page. This finish is brilliant for designs that are heavy on photography or use bold, colourful graphics, as it really enhances the detail and contrast.
On the other hand, a matte finish has a non-reflective, smooth surface. This gives it a more subdued, sophisticated look that minimises glare, especially under direct lighting. It's the go-to choice for text-heavy posters or designs that will be placed in brightly lit spaces like galleries, corporate offices, or behind a glass frame.
Here’s a simple way to think about it: A gloss finish is like watching a brand-new 4K TV—everything looks super sharp and vibrant. A matte finish is more like a high-quality cinema screen, giving you a refined, immersive experience without any distracting reflections.
To help you figure out which is right for you, here’s a quick comparison of how each finish suits different business needs across New Zealand.
Poster Material and Finish Comparison for NZ Businesses
This quick-glance table will help you decide on the best paper weight (GSM) and finish for different business applications.
| Feature | Gloss Finish | Matte Finish |
|---|---|---|
| Visual Effect | Shiny, reflective surface that makes colours vibrant and dynamic. | Smooth, non-reflective surface for a muted and elegant look. |
| Best For | Photographic images, colourful graphics, and high-impact visuals. | Text-heavy designs, minimalist artwork, and framed posters. |
| Ideal Use Cases | Retail sale posters, event announcements, food and beverage promotions. | Corporate branding, real estate showcases, art prints, healthcare information. |
| Handling | More susceptible to showing fingerprints and smudges. | Resists fingerprints and is less prone to showing minor scuffs. |
Ultimately, the best choice really boils down to your brand's personality and what you need the poster to do. A vibrant, glossy poster might be perfect for a bustling Auckland café, while a subtle matte print could be the ideal choice for a professional services firm in Wellington. By carefully thinking through both the paper weight and the finish, you're making sure your final poster doesn't just send a message—it makes a powerful statement.
Getting Your Poster Size and Artwork Spot On
Nailing the technical details is what elevates a poster from looking like a home-job to something truly professional. This is where we get into the nitty-gritty of artwork specs, but I'll break it down so it’s easy to follow. Setting up your file correctly is the final, crucial step before your design comes to life in print.
Poster prints are a huge part of New Zealand's $16.3 billion creative sector. With Auckland alone accounting for over 50% of the industry's jobs and GDP, there's a massive need for high-quality, eye-catching designs that can stand out. In a world of digital noise, a well-designed poster still has a unique power to create the kind of tangible, emotional connection that online ads often struggle with.
Common Poster Sizes We Use Here in NZ
Choosing the right size is all about figuring out where your poster is going to live and what you need it to achieve. Here in New Zealand, we keep things simple by using the standard 'A' series of paper sizes.
Here are the most common options for Kiwi businesses:
- A3 (297 x 420 mm): The go-to for indoor spaces. Think of community notice boards, updates in the staff room, or a detailed menu sitting on a café counter.
- A2 (420 x 594 mm): This is your all-rounder. It’s big enough to be seen from a distance, making it perfect for shop window displays, point-of-sale promotions, or real estate listings.
- A1 (594 x 841 mm): When you really need to grab attention, A1 is the way to go. It's fantastic for promoting events, for signage at trade shows, or for big in-store marketing campaigns.
- A0 (841 x 1189 mm): This is the big kahuna. An A0 poster makes a massive statement and is best reserved for major event backdrops, large architectural plans, or creating serious brand impact inside a large space.
This little guide shows how the physical feel of your poster—its thickness and surface—plays a direct role in how people perceive it.
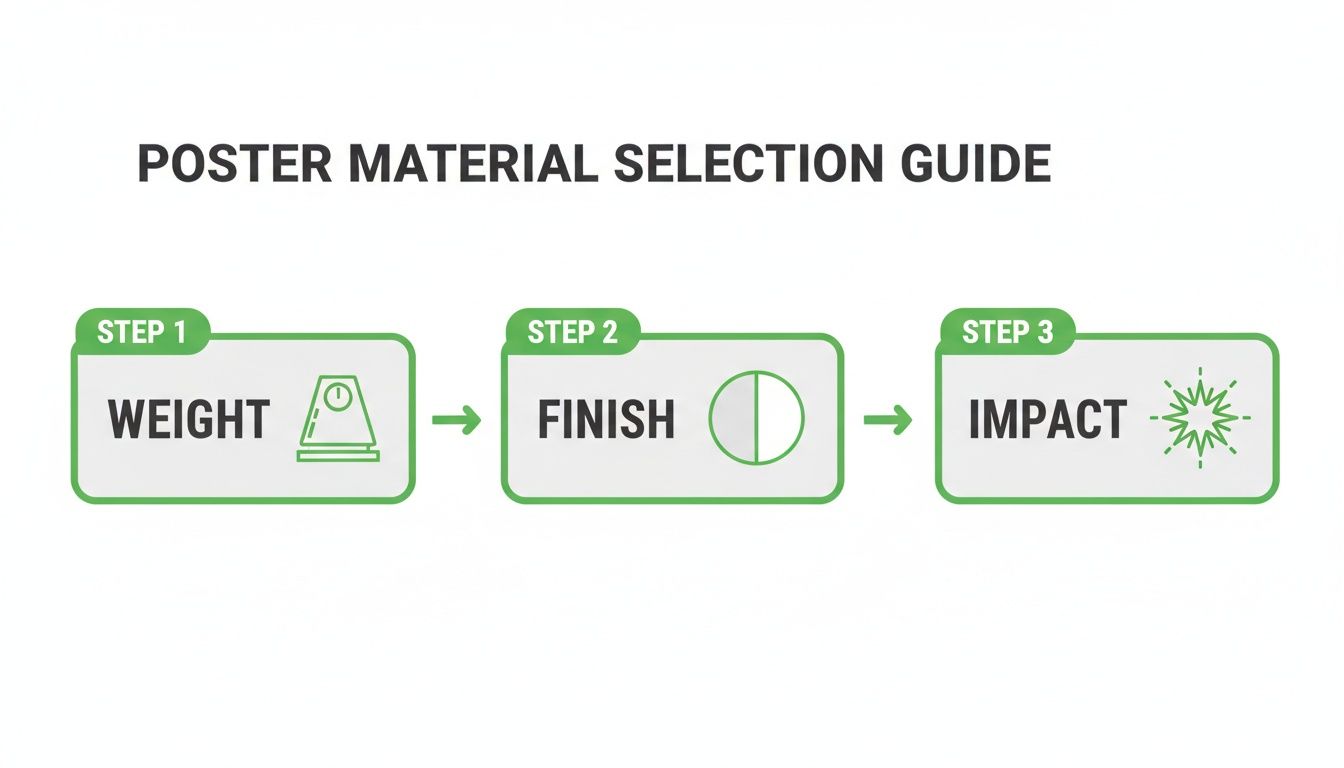
The main takeaway here? The weight and finish aren't just technical terms; they're creative tools that directly shape your poster's final look and feel.
The Secrets to a Perfect Print File
Once your design is looking sharp on screen, a couple of quick technical checks will ensure it prints exactly how you imagined. Skipping these steps is often the cause of disappointing results, like blurry images or weird white borders.
Resolution: Always 300 DPI
DPI stands for Dots Per Inch, and it's basically a measure of how sharp your image is. For print, 300 DPI is the gold standard, and it's non-negotiable. An image that looks perfectly crisp on your 72 DPI computer screen will look fuzzy and pixelated in print if its resolution is too low. Always start your design in a 300 DPI workspace.
Colour Mode: Always CMYK
Your screen creates colours using light (RGB – Red, Green, Blue), but a printer uses ink (CMYK – Cyan, Magenta, Yellow, Black). If you design in RGB, the colours can shift dramatically when they're converted for printing. To make sure that vibrant green in your design doesn't turn into a dull olive, set your document's colour mode to CMYK right from the start.
Think of it like this: Bleed is your artwork's insurance policy against tiny trimming mistakes, while the Safe Margin is the VIP area where all your important information needs to stay.
Getting Your Head Around Bleed and Safe Margins
These two concepts are absolutely essential for a clean, professional finish.
-
Bleed: Let's say you want your background image or colour to go right to the very edge of the paper. To do this, you actually have to extend your design 3-5mm beyond the final trim line. This extra bit is the 'bleed'. It gets trimmed off after printing, guaranteeing you won’t have a sliver of white paper showing if the cutting machine is off by a fraction of a millimetre.
-
Safe Margins: This is the opposite of bleed. The safe margin is a boundary inside the trim line, usually about 5mm from the edge. You need to keep all your crucial elements—text, logos, key parts of images—within this zone. It's your guarantee that nothing important will get accidentally sliced off during the final trim.
As you get your artwork ready, remember that a strong brand foundation, backed by solid New Zealand logo design expertise, can make your poster even more effective.
Smart Poster Strategies for Kiwi Industries
A great poster is a powerful tool, but its true magic is unlocked when you tailor it to a specific job. Think about it: the poster needs of a real estate agent in Christchurch are worlds apart from those of a café owner in Auckland. Getting these details right is how you create poster prints NZ businesses can rely on to get their message across and see real results.
Let’s dive into some proven strategies for different Kiwi business sectors. This isn't just generic advice; it's about making smart, industry-specific choices that turn a simple piece of paper into a hard-working asset for your brand.

Real Estate Agents and Property Managers
For anyone in real estate, posters have two main jobs: grabbing the attention of potential buyers and quietly building your brand's credibility. That means they need to feel premium and be tough enough for the job.
- For 'For Sale' Signs: You need something that can handle New Zealand's four-seasons-in-one-day weather. Go for large A1 or A2 posters printed on a sturdy, weather-resistant 250gsm paper with a protective laminate. Your listing will look sharp, rain or shine.
- For In-Office Displays: This is where you show off your best properties. Elegant A3 posters are perfect for this. I'd recommend a matte finish to cut down on glare from office lights, giving the posters a sophisticated look that matches the high-value properties you’re selling.
Retail and Hospitality Businesses
In the bustling worlds of retail and hospitality, posters are all about instant impact. Their job is to stop people in their tracks, get them interested, and nudge them towards a purchase. They need to be vibrant, clear, and easy to swap out.
The goal for a retail or café poster is simple: make the customer stop, look, and want what you're offering. This is where bold colours and high-impact finishes truly shine.
A gloss finish is often your best bet here. It makes colours pop and gives photos of food that irresistible, mouth-watering look. Here are a couple of ideas:
- Point-of-Sale Promotions: Pop an eye-catching A3 or A2 poster near the till to push special offers or new products. A lighter 150gsm gloss stock is ideal for these short-term, high-impact campaigns.
- Menu Boards: A series of A2 posters can create a really dynamic and easily updatable menu. For something that feels a bit more permanent and premium, printing on a slightly heavier 200gsm matte stock makes the text easier to read.
Event Organisers and Entertainment Venues
When you're promoting an event, your poster is often the very first thing your potential audience sees. It has to build excitement and deliver all the crucial details at a glance. Impact is everything.
This is the time to go big. An A0 poster placed at an entrance or in a busy public space creates a first impression that’s hard to forget. If your posters are going up outside, weather resistance is a must. For indoor venue posters, you can focus purely on the visuals with a stunning, vibrant gloss finish.
Healthcare, Education, and Corporate Offices
In more professional environments, the role of a poster shifts from pure promotion to communication and branding. Here, the priorities are clarity, professionalism, and creating a calm atmosphere.
- Healthcare Clinics: Use A3 posters in waiting rooms to share helpful health info. A clean design on a matte finish paper is perfect as it reduces glare, making it a calming and easy-to-read experience for patients.
- Educational Institutions: Durability is the name of the game for posters used as learning aids. A laminated 250gsm stock will stand up to the rigours of daily classroom life, whether it’s a map, a chart, or a motivational quote.
- Corporate Offices: Reinforce your brand's values and create a polished office space with A2 or A1 posters. Minimalist designs on a premium matte paper project a professional, sophisticated image.
While the wider NZ printing market is changing, there are strong pockets of demand in sectors like retail and events where physical prints remain vital for customer engagement. This is a real opportunity for businesses to use high-quality posters as a key tool to boost their visibility and connect with customers.
Of course, great posters are just one part of the puzzle. A truly effective approach often pairs print with a solid digital strategy. Learning about digital marketing for local businesses can help you integrate your print campaigns with online tactics for an even bigger impact. When you tailor your poster strategy to your specific industry, you move beyond just advertising and start building real connections with the people you want to reach.
Getting Your Posters: Pricing, Timelines, and Delivery in NZ
So, you’ve designed the perfect poster. Now for the practical bit: how much will it cost, when will it arrive, and how will it get to you? Getting your head around the logistics is the key to a stress-free print job. Let's break down what you can expect when ordering posters here in New Zealand, so you can plan your budget and campaigns without any nasty surprises.
Think of this as the final leg of the race. From getting your quote to unboxing the finished product, knowing what’s involved makes the whole process smooth and predictable.
What Goes Into the Price of a Poster?
The final price tag on your poster prints NZ order isn't just a random number; it’s a direct reflection of the choices you make. The big three cost drivers are always the poster's size, the paper you choose, and of course, how many you order. It makes sense that a massive A1 poster will cost more per print than a little A3 one, simply because it uses more paper and ink.
Likewise, opting for a premium, heavy 250gsm stock will be a bigger investment than a standard 150gsm paper. But the real game-changer for your budget? That's the quantity.
It’s a bit like baking. The setup cost—getting the ingredients out, mixing the dough, preheating the oven—is the same whether you bake a dozen biscuits or a hundred. The more you make in a single batch, the cheaper each biscuit becomes. Poster printing follows the exact same logic.
Ordering in bulk is where you’ll see the cost per poster drop dramatically. The initial setup cost for the printing press gets spread out over a larger run, making each poster much more affordable. If you’ve got recurring events or a campaign that will run for a while, printing everything you need in one go is easily the smartest move for your wallet.
How Long Does Poster Printing Usually Take?
Once you’ve given your artwork the final thumbs-up, the presses can start rolling. For most standard digital poster jobs in New Zealand, you’re generally looking at a turnaround time of 2-4 working days. This window gives your printer enough time to get the job printed, run quality checks, trim everything to size, and get it packed up for shipping.
But, a few things can add a bit of time to that standard schedule. It’s always a good idea to keep these in mind so you don't end up in a last-minute panic.
- Special Finishes: If you're adding extras like lamination or a custom shape, these extra processes need more time for application and drying. This can easily add another day or two to the job.
- Big Orders: A massive run of thousands of posters will naturally take longer on the press than a small batch of fifty.
- Artwork Hiccups: If your file has a problem—like low-resolution images or the wrong colour setup—the clock stops. The delay while you and the printer fix the file will push your timeline out.
The best advice? Just ask! Always confirm the estimated turnaround with your printer when you place the order. A quick chat ensures everyone is on the same page and your deadlines are realistic.
Shipping and Packaging Your Posters Around NZ
Getting your posters to you safely is the final, crucial step. A good professional printer takes this seriously, making sure your order arrives looking crisp and clean, whether it's heading to Auckland, down to Wellington, or all the way to Queenstown.
Posters are almost always rolled carefully—never, ever folded—to avoid ugly creases. They’re then slid into tough cardboard tubes or other protective packaging built for the bumps and scrapes of transit. This means they show up at your door ready to unroll and hang without any frustrating damage. Most printers use tracked shipping nationwide, so you can keep an eye on your delivery and know exactly when it’s due to arrive.
Right, before you hit that ‘upload’ button, let's do one last check. Taking a few minutes now can honestly save you a world of pain later – we're talking costly reprints and frustrating delays.
Think of this as the final once-over, your last chance to catch any little gremlins before your design goes to the press. It’s the difference between getting a box of stunning posters you can't wait to put up, and that sinking feeling when you spot a typo on a hundred prints.
The Non-Negotiable Pre-Print Checks
Run your eyes over these points. They might seem small, but trust me, they make all the difference in the final product.
-
Proofread. Then Proofread Again. Read every single word. Check for spelling slip-ups, grammar mistakes, and especially things like wrong dates or phone numbers. If you can, grab a colleague or a friend for a fresh set of eyes – they'll often spot something you've been staring at for hours and have missed.
-
Check Your Image Quality. Zoom right in on your design, way in. Do your photos and logos look sharp, or are they getting a bit fuzzy and pixelated? For a really crisp, professional finish, every image needs to be at least 300 DPI (Dots Per Inch) at the size it will be printed.
-
Confirm Your Colour Mode. This is a classic rookie mistake. Your design file must be set to CMYK (Cyan, Magenta, Yellow, Black) for printing. If it's left in RGB (the mode for screens), the vibrant colours you see on your monitor can come out looking dull or just plain wrong on paper.
This isn't about creating extra work for yourself. It’s about protecting your investment. A five-minute check can easily prevent a five-hundred-dollar mistake and ensure your posters make the powerful first impression they were designed for.
Finalising Your File Setup
Okay, the content is perfect. Now for the technical bits. Getting this right ensures your design prints exactly as you imagined, with no weird white edges or chopped-off text.
- Bleed and Safe Margins are Crucial: Double-check that your background images or colours stretch right out to the bleed line, which is usually 3-5mm beyond the edge of your poster. Just as important, make sure all your key info—like text and logos—is tucked safely inside the margin, well away from where the printer will trim the page.
By ticking off every item on this list, you're giving your project the best possible chance of success. You can click 'send' with the confidence that you've done everything you can to get a flawless, professional poster that will look fantastic anywhere in New Zealand.
Common Questions About Poster Prints in NZ
When you're getting posters printed for the first time, a few questions always seem to come up. That's completely normal. Getting the basics sorted out upfront is the best way to make sure your project goes off without a hitch and the final product looks exactly like you imagined.
Let's walk through some of the most common questions we get from Kiwi businesses. Nailing these details saves a ton of time, stress, and even money down the line.
What Is the Best File Format for Poster Printing?
Hands down, a high-resolution PDF is the gold standard for printing. When you're saving your design from a program like Adobe Illustrator or Canva, look for an option called 'Press Quality' or 'High Quality Print'.
This one small step is a lifesaver. It packages up all your fonts, images, and graphics into one neat file, which means nothing will go missing or look weird when we open it on our end. While we can sometimes make JPEGs or TIFFs work, a properly set-up PDF for your poster prints nz order is the only way to guarantee a flawless result.
How Do I Ensure My Poster Colours Print Accurately?
The real secret to getting your colours right is to design in the CMYK colour model from the very start. It's a classic rookie mistake to design in RGB.
Think of it this way: your computer screen creates colour by mixing light (Red, Green, Blue), but a printer creates colour by mixing ink (Cyan, Magenta, Yellow, Black). If you design using screen colours (RGB), there will always be a colour shift when it's converted for print. That vibrant blue on your screen can easily turn into a dull purple on paper.
By working in CMYK from the beginning, what you see on a properly calibrated screen is much closer to what you'll get in your hands. If you have brand colours that absolutely must be perfect, give us the Pantone (PMS) reference code. That’s the ultimate way to get dead-on colour consistency every single time.
What Is the Most Cost-Effective Way to Order Posters?
You don't have to break the bank to get great posters. There are a few simple ways to be smart with your budget.
- Order in Bulk: The more you print, the cheaper each individual poster becomes. That’s just the magic of print production efficiency kicking in.
- Stick to Standard Sizes: Opting for common Kiwi sizes like A1, A2, or A3 is always cheaper than a custom size that needs special trimming and setup.
- Choose Standard Materials: For most campaigns, a great-looking 150gsm or 200gsm gloss or matte paper does the job perfectly and costs less than specialty stocks.
- Utilise Digital Printing: If you only need a small batch of posters, digital printing is your friend. It has lower setup costs and is super quick, making it ideal for smaller runs.
Don't be shy about mentioning your budget when you talk to us. We’re full of ideas and can often suggest small tweaks to your specs that will deliver fantastic value for your money.
Ready to bring your vision to life with stunning, professional posters? The team at SONI DESIGN is here to help you every step of the way, ensuring your prints are perfect. Start your project with us today!
Leave a Comment
Stay home & get your daily
needs from our shop
Start You'r Daily Shopping with Nest Mart