
Your cart is currently empty.
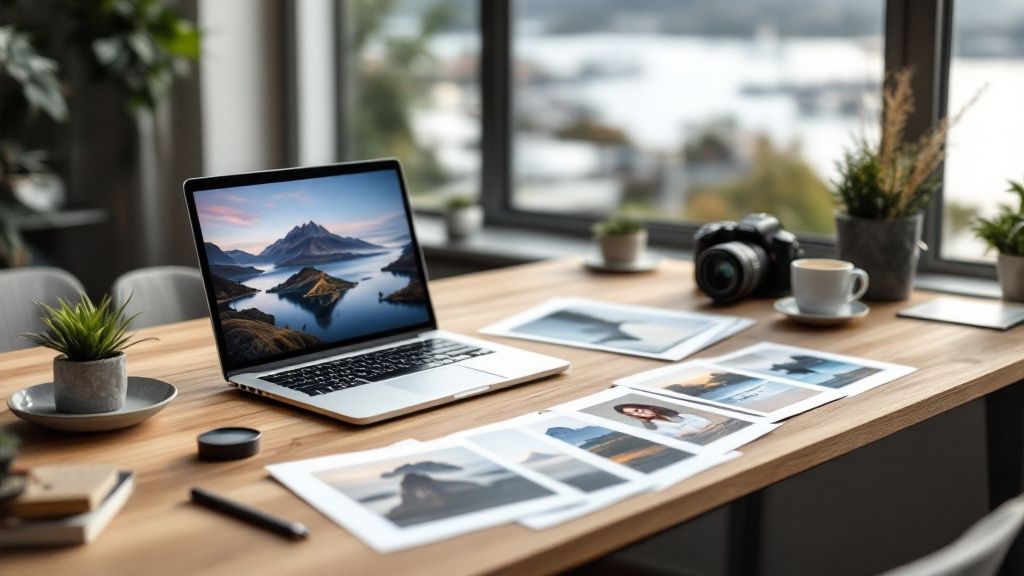
Trying to find the best place for photo printing in Wellington can feel a bit overwhelming, but the good news is the city is packed with great options. You've got everything from super-fast retail kiosks to specialist local print shops and easy-to-use online services. So, whether you just need a handful of quick 6x4s or a stunning, high-quality canvas, you'll definitely find the right fit.
Choosing the Right Photo Printing Service in Wellington
Wellington has a real creative buzz, which means you’re spoilt for choice when it comes to bringing your digital photos into the physical world. The trick is to match what you need—speed, top-tier quality, or a tight budget—with the right printer.
A last-minute gift might have you running to a big-box store with self-service kiosks. But if you're printing a professional piece for your portfolio, you'll want the eye and expertise of a specialist print shop that lives and breathes colour accuracy and archival-quality papers.
Then there are the online services. They bring the ultimate convenience and often have great pricing, which is perfect when you have a whole memory card of holiday snaps to print. Where you go will completely shape the final look, feel, and even how long your prints will last.
Navigating Wellington's Print Scene
The photo printing scene here in Wellington is a great snapshot of the wider New Zealand industry. It's a competitive field, with about 774 printing businesses running nationwide in 2024. That competition gives us a healthy mix of big chains and small, independent experts, each with their own unique strengths. You can get a deeper dive into the NZ printing industry stats on IBISWorld.
To help you decide, here’s a quick rundown of what you can expect from each type of service in Wellington.
Comparing Wellington Photo Printing Options
| Service Type | Best For | Typical Turnaround | Price Point |
|---|---|---|---|
| Retail Kiosks | Quick, standard-sized prints (like 6x4s) for albums or gifts. | Instant to 1-hour | $ |
| Specialist Print Shops | High-quality, custom work like large-format prints, canvases, or fine art paper. | 1-5 business days | $$$ |
| Online Services | Large batches of photos, photo books, and novelty items where convenience is key. | 3-10 business days | $$ |
Ultimately, online services are fantastic for convenience and bulk orders, but nothing beats the hands-on expertise you get from a local specialist for those truly important prints.
The most important question to ask yourself is: What is the primary goal of this print? Is it a quick, affordable memory for a scrapbook, or a lasting piece of art for your wall? The answer will immediately narrow down your options.
This decision tree gives a great visual breakdown of your options based on what you're printing, your budget, and how fast you need it.
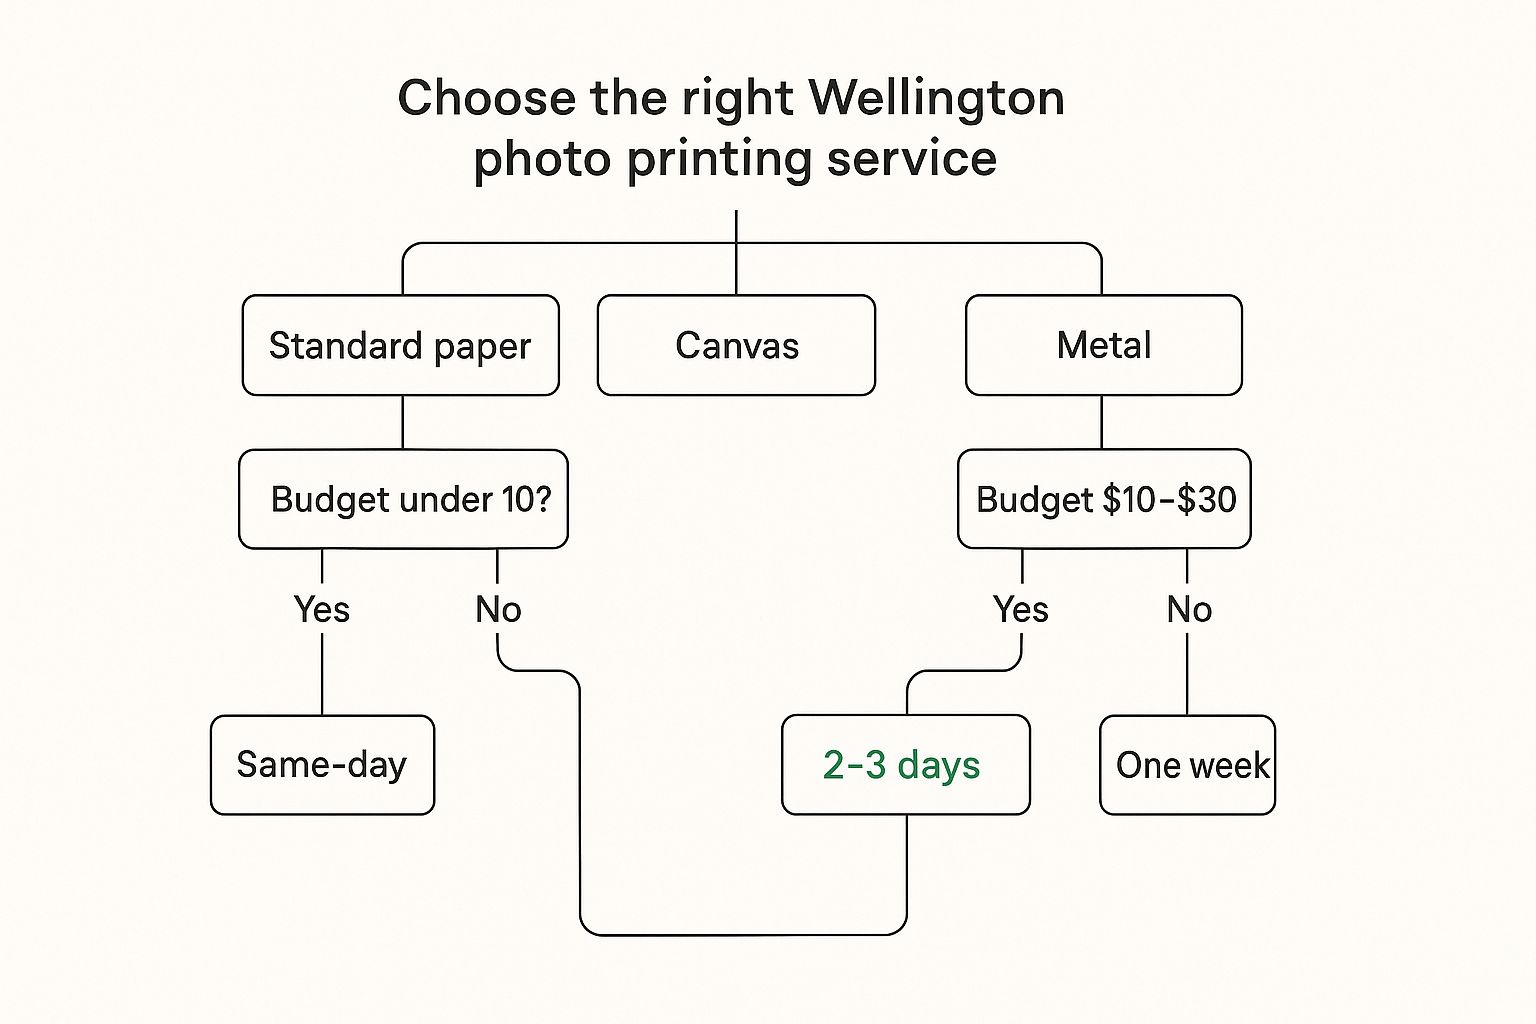
As you can see, if you're after high-end materials like canvas or metal, you’ll need to allow for a longer turnaround. But for standard paper prints, you can often get them done the same day, even on a smaller budget.
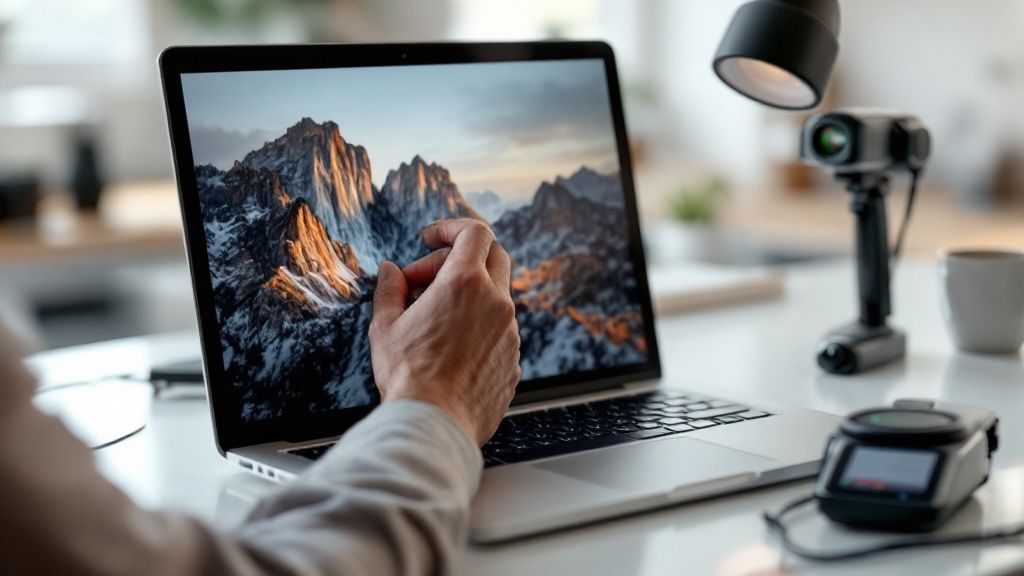
Preparing Your Digital Files for Flawless Prints
The magic of a stunning print starts long before ink ever meets paper; it all begins with your digital file. Getting this part right is the secret to avoiding that sinking feeling of disappointment and making sure the final product looks exactly as you imagined it.
Honestly, it’s less technical than you might think. It really just comes down to a few key details.
Resolution: The Key to Sharpness
The most common trip-up I see is resolution. For prints that are sharp and clear, not fuzzy or pixelated, your image needs to have enough pixels for the size you want to print.
A good rule of thumb we've always used in the industry is to aim for 300 pixels per inch (PPI). So, if you're looking to print a standard 6x4 inch photo, your image file should be at least 1800 x 1200 pixels. Anything less, and you risk a soft-looking result.
Getting the Colour and Format Right
Next up is colour. Most professional photo labs here in Wellington have their printers calibrated for files using the sRGB colour profile. The good news? This is the default setting for almost every digital camera and smartphone, so your photos are likely already good to go. Sticking with sRGB is the simplest way to ensure the colours you see on your screen are what you get in the final print.
When you're ready to save your image, you'll generally face two choices:
- JPEG: This is the go-to for almost everyone. It's perfect for standard photo prints, offering a fantastic balance of high quality and a manageable file size that won't take forever to upload.
- TIFF: Think of this as the heavyweight option. It’s a higher-quality, uncompressed format. You'd only really need to choose TIFF if you're printing a large, fine-art piece where capturing every single microscopic detail is critical. Just be ready for much, much larger files.
My advice? Don’t get lost in complicated edits. Often, simple tweaks to brightness and contrast are all you need to make your photos pop without looking over-processed. The goal here is to enhance what's already there, not completely overhaul it.
Before you send your images off, it's always worth giving them a final once-over to make sure they're looking their best. You can even find guides that show you how to improve photo quality online with some fairly simple tools.
Taking just a few minutes to double-check the resolution, colour, and format is the best thing you can do to set your photos up for printing success.
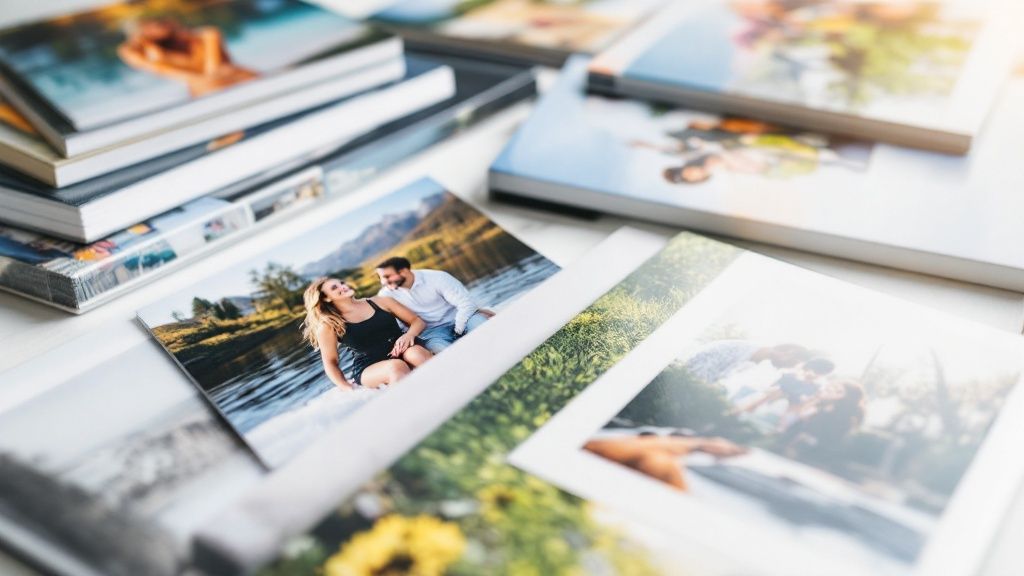
Getting to Grips with Paper Types and Print Finishes
Choosing the right paper and finish is just as much a part of the creative process as taking the photo. It’s a decision that completely shapes the final mood, texture, and lifespan of your print, transforming a digital file into a real piece of art. When you look at photo printing in Wellington, the options are huge, covering everything from a quick set of holiday snaps to a gallery-worthy showpiece for your wall.
The first big choice you’ll face is the finish. Each one plays with light and feels different to the touch, so it's really about matching the finish to what the photo is for and the feeling you want to evoke.
Glossy, Matte, and Everything In Between
If you've got vibrant, punchy images where the colours need to leap off the page, glossy is a brilliant option. Its shiny surface makes colours look incredibly rich and saturated, which works wonders for dramatic landscapes or travel photos. The catch, of course, is that it’s a magnet for fingerprints and can create a lot of glare in a brightly lit room.
At the other end of the scale, you have matte. With its soft, non-reflective surface, it's the classic choice for fine art prints, portraits, and especially black-and-white photography. Matte finishes hide fingerprints well and have a sophisticated, almost tactile quality that lends a real sense of depth and elegance.
Here's a simple way to think about it: If you want a print that shouts with colour and energy, go glossy. If you want one that whispers with elegance and detail, choose matte.
But you don't have to pick a side! There’s a fantastic middle ground called lustre (sometimes known as semi-gloss), which really does offer the best of both worlds. You get the beautiful colour saturation of a glossy print, but with a fine texture that cuts down on glare and hides fingerprints. It's an incredibly versatile and popular choice for everything from photo albums to framed prints.
Lastly, pay attention to the paper's weight, which is measured in Grams per Square Metre (GSM). A higher GSM number means a thicker, more durable paper that feels substantial in your hands. While a standard 180 GSM is perfectly fine for casual prints, stepping up to something over 250 GSM is what gives you that premium, professional quality you can really feel.
Navigating Online Orders and In-Store Kiosks
Once your digital files are polished and ready, it's time to actually get them printed. In Wellington, you've really got two main paths: ordering through a website from the comfort of your home or heading into a shop to use a self-service kiosk.
Online ordering is incredibly convenient. You can upload everything from your laptop, phone, or even pull images straight from social media without leaving the sofa. The whole process feels a lot like any other online shopping experience.
You’ll start by uploading your photos, picking the sizes and how many of each you want, and then you'll get to the fun part—customisation. This is where you put your knowledge of paper types and finishes to work before you finalise the order and pay.
Using an Online Portal
The best online platforms are designed to walk you through everything, showing you previews of how your image will be cropped. You’ll want to pay close attention here. It’s surprisingly easy to accidentally chop off someone’s head or a crucial part of the background, especially if you’re printing in a non-standard size.
A typical online order breaks down like this:
- Uploading: Drag your files into the browser or connect to a cloud service like Google Photos.
- Editing: Some sites offer basic tweaks like cropping or a quick red-eye fix.
- Customising: This is where you choose your print sizes, paper finish (glossy or matte), and how many copies you need.
- Checkout: Double-check everything, choose whether you’ll pick it up or have it delivered, and then make the payment.
Mastering the In-Store Kiosk
In-store kiosks are your best friend when you need prints in a hurry. You just pop in, connect your phone or a USB stick, and print your photos right there and then. It's incredibly fast, but the small screens can make it a little tough to judge edits or see your cropping with perfect accuracy.
Here’s a pro tip: before you even leave the house, create a "To Print" album on your phone with just the photos you want. It'll save you from the awkward experience of endlessly scrolling through your camera roll in the middle of a busy shop.
Kiosk software isn't all the same, so take a moment to get familiar with the one you're using. Don’t rush the cropping and sizing steps. What looks fine on a tiny kiosk screen can end up looking quite different on an actual 6x4 inch print.
Modern tech has made photo printing easier than ever. With amazing smartphone cameras being the norm, more people want real, physical prints, and Wellington's print shops have definitely kept up. You can read more about this trend in recent photo printing market reports.
Ultimately, whether you go for the ease of an online order or the speed of an in-store kiosk, both are fantastic ways to turn your digital memories into something you can actually hold.
How To Get The Best Value On Your Photo Prints
When you're budgeting for photo printing in Wellington, the first thing to get your head around is what actually influences the final price. It’s not just one thing; your choices on paper weight, print size, and the final finish all play a big part in the total cost.
And a word to the wise: if you need something in a hurry, expect to pay for it. Rush jobs or same-day pickups can really push the price up, so a little bit of forward planning can save you a decent amount of money.
To give you a real-world idea, ordering ten premium canvas prints might set you back around $30 each. In contrast, a stack of standard 6x4 photos for an album could be less than $5 a pop. If you're filling albums or frames, thinking in bulk is definitely the way to go.
What Really Drives The Cost?
A few key elements make up the bulk of your printing bill. Understanding them helps you make smarter choices.
- Paper Type: This is a big one. A standard glossy print might start at just $0.20, but if you jump up to fine art paper, you could easily be looking at over $1 for the same size.
- Print Size: It’s simple maths, really. A huge wall-sized poster is naturally going to cost 10 to 20 times more than a small print for your wallet.
- Print Finish: Specialised coatings or finishes like metallic or deep matte require different processes and materials, which adds to the expense.
- Turnaround Time: Need it yesterday? Most printers can do it, but it'll cost you. Expect to see a premium of 20% to 50% added for urgent orders.
- Bulk Orders: This is where you can make some great savings. Most shops offer tiered discounts once you order more than 25 or 50 copies of the same print.
It's a tough business. Local printers often operate on incredibly slim margins. In fact, their median return on assets is a razor-thin 0.1%, which shows just how tight their profitability is. You can dig into this more in the detailed full analysis on Figure NZ.
The secret to real savings isn't just hunting for the lowest price per print. It's about finding that sweet spot between the quality you want and the quantity you need.
Practical Ways To Save
I've learned a few tricks over the years to keep printing costs down without sacrificing quality.
- Try to group your prints by size and finish. This means the printer can do one single run, which helps you avoid extra setup fees for lots of different small jobs.
- Opt for a mid-range finish. Something like a lustre paper offers a great balance of durability and professional looks without the premium price tag of a full gloss or fine art matte.
- As I mentioned, schedule your orders well in advance. This is the easiest way to sidestep those pesky rush fees.
- If you're exploring different ways to capture and print memories, it's also useful to get a handle on understanding the costs associated with photo booth services as another option for events.
And here’s my final, most important tip: always, always ask for a sample proof or a small test print before committing to a big order. It’s a simple, low-cost step that can save you from the headache and expense of reprinting an entire batch. Trust me, it’s worth the tiny bit of extra time to ensure your memories look just as good on paper as they do on your screen.
Got Questions About Photo Printing? We've Got Answers
Even after you've picked the perfect shot, a few technical questions can pop up. It’s completely normal. Let's run through some of the most common queries we get about photo printing in Wellington so you can move forward with total confidence.
One of the big ones is about colour modes: "Should I send my files in RGB or CMYK?" For a long time, the industry standard for anything print-related was CMYK. But technology has moved on. Today's professional digital printers are incredibly sophisticated, and most print services actually prefer your files in RGB. Their software does a brilliant job of converting the colours, often producing a more vibrant result than if you'd converted it to CMYK yourself.
Then there's the resolution question: "What resolution do I really need for a big print?" The textbook answer is 300 PPI (pixels per inch) for perfect quality. But in reality, you can often get a fantastic-looking large print from a file that’s around 150-200 PPI, particularly if it’s going to be hung on a wall and viewed from a few steps back. The main thing is to start with a good quality image, not try to magically enlarge a tiny, low-res file.
Troubleshooting Common Print Issues
What happens when things don't look quite right? Here are a couple of quick fixes for common printing headaches.
-
"My prints look way darker than they did on my screen." This is almost always a screen brightness issue. Most of us have our monitors and phones cranked up to full brightness, which isn't a true representation of the final print. A good habit is to turn your screen brightness down to about 75% before you do your final edits—it gives you a much more realistic preview.
-
"Can I just print photos from Facebook or Instagram?" Technically, yes, but you need to manage your expectations. Social media sites compress images heavily to save space, which kills the quality. They’re usually okay for a standard 6x4 inch print, but anything bigger will likely come out looking soft, blurry, or pixelated.
If there's one piece of advice I can give, it's this: always, always work from your original, high-resolution camera files. It’s the single biggest factor in getting a sharp, stunning print, no matter what size you choose.
At the end of the day, never hesitate to ask your printer for help. Any good Wellington printing service will be happy to take a quick look at your file and offer their expert opinion before you place the order.
For professional printing services that handle everything from business cards to large-scale signage with a personal touch, trust SONI DESIGN to bring your vision to life. Explore our digital and offset printing options at https://www.sonidesign.co.nz.
Leave a Comment
Stay home & get your daily
needs from our shop
Start You'r Daily Shopping with Nest Mart