
Your cart is currently empty.
Turning a favourite digital photo into a stunning canvas print is a fantastic way to bring your memories to life. It’s not just about hitting 'print'; it's about crafting a piece of personal art that adds real warmth and character to your home. This guide will walk you through the whole process, showing you just how simple and rewarding it is to get your photo printed onto canvas.
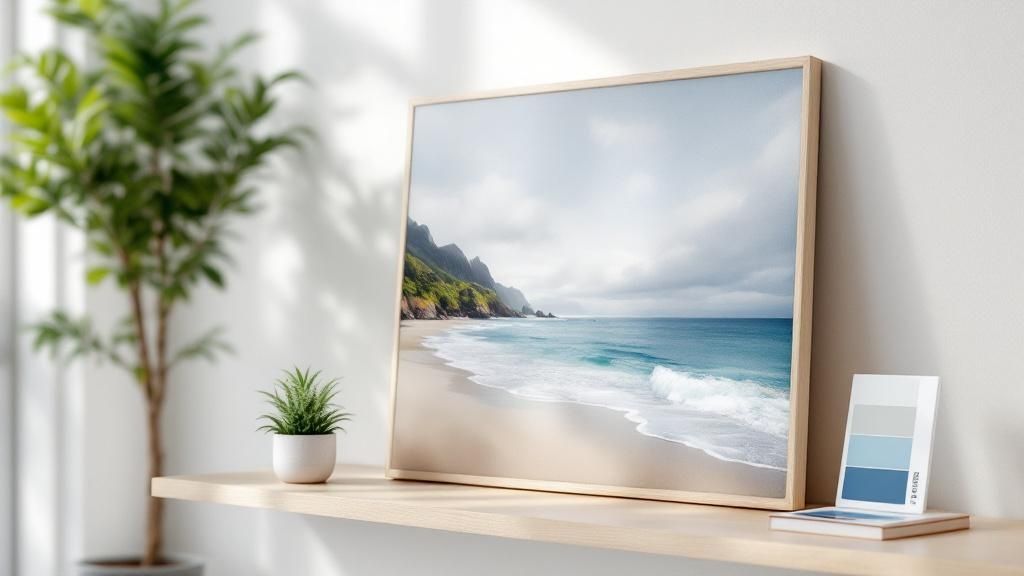
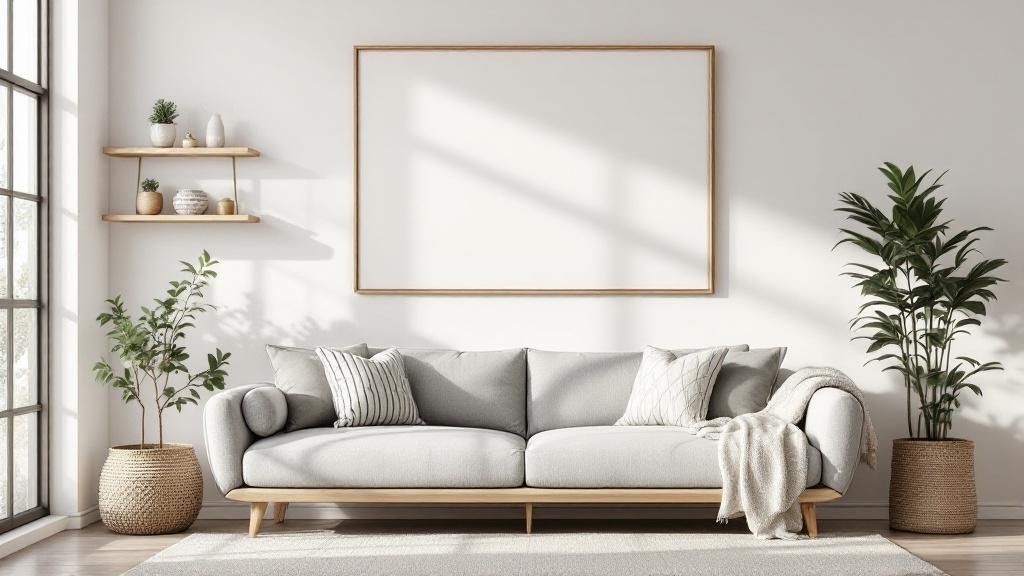
Why a Photo on Canvas Really Lifts a Room
In a world where our best photos live on phones and hard drives, a physical canvas print creates a powerful, tangible connection to the moments that truly matter. It transforms a fleeting digital file into a permanent piece of home décor, quickly becoming a talking point in any Kiwi home. A canvas has a unique texture and presence that a standard framed photo just can't match, adding a sense of depth and artistic flair to your walls.
This is your chance to create something truly lasting—an heirloom that can be passed down. Think about that gorgeous family portrait from Christmas or a breathtaking landscape from your last holiday. Those images deserve more than a life stuck on a memory card.
The Real Value of a Physical Print
There's something special about holding a physical print. You start to notice details, colours, and textures that just get lost on a glowing screen. The legendary photographer Ansel Adams put it perfectly:
“The negative is the equivalent of the composer’s score and the print the performance.”
This guide is here to give you everything you need to create a brilliant "performance" of your own. We'll cover all the essentials, making sure the final product on your wall looks every bit as incredible as you imagined.
Choosing to get a photo printed onto canvas brings a lot more to the table than just decoration:
- A Deeper Connection: It’s a daily reminder of loved ones, special events, or amazing adventures, right there in your living space.
- Artistic Feel: The textured surface gives your photo a timeless, almost painterly quality, lifting it from a simple snapshot into a genuine piece of art.
- Built to Last: High-quality canvas prints use archival inks and materials that are designed to resist fading, ensuring your memories look great for decades.
- Versatile Style: Whether your home is modern, rustic, or classic, a canvas print fits in beautifully without the fuss or expense of custom framing.
Choosing the Right Photo for Your Canvas
The journey to a stunning canvas print starts long before the ink ever touches the fabric. It all comes down to selecting the perfect digital image. Honestly, the quality of your final photo printed onto canvas is almost entirely dictated by the quality of the file you start with, making this first step the most critical one of all.
Think of it like building a house – you need a solid foundation. In our case, your digital photo is that foundation. A low-resolution image will inevitably lead to a disappointing, blurry, or pixelated print, especially when you're blowing it up to hang on your wall.
First Things First: Understanding Image Resolution
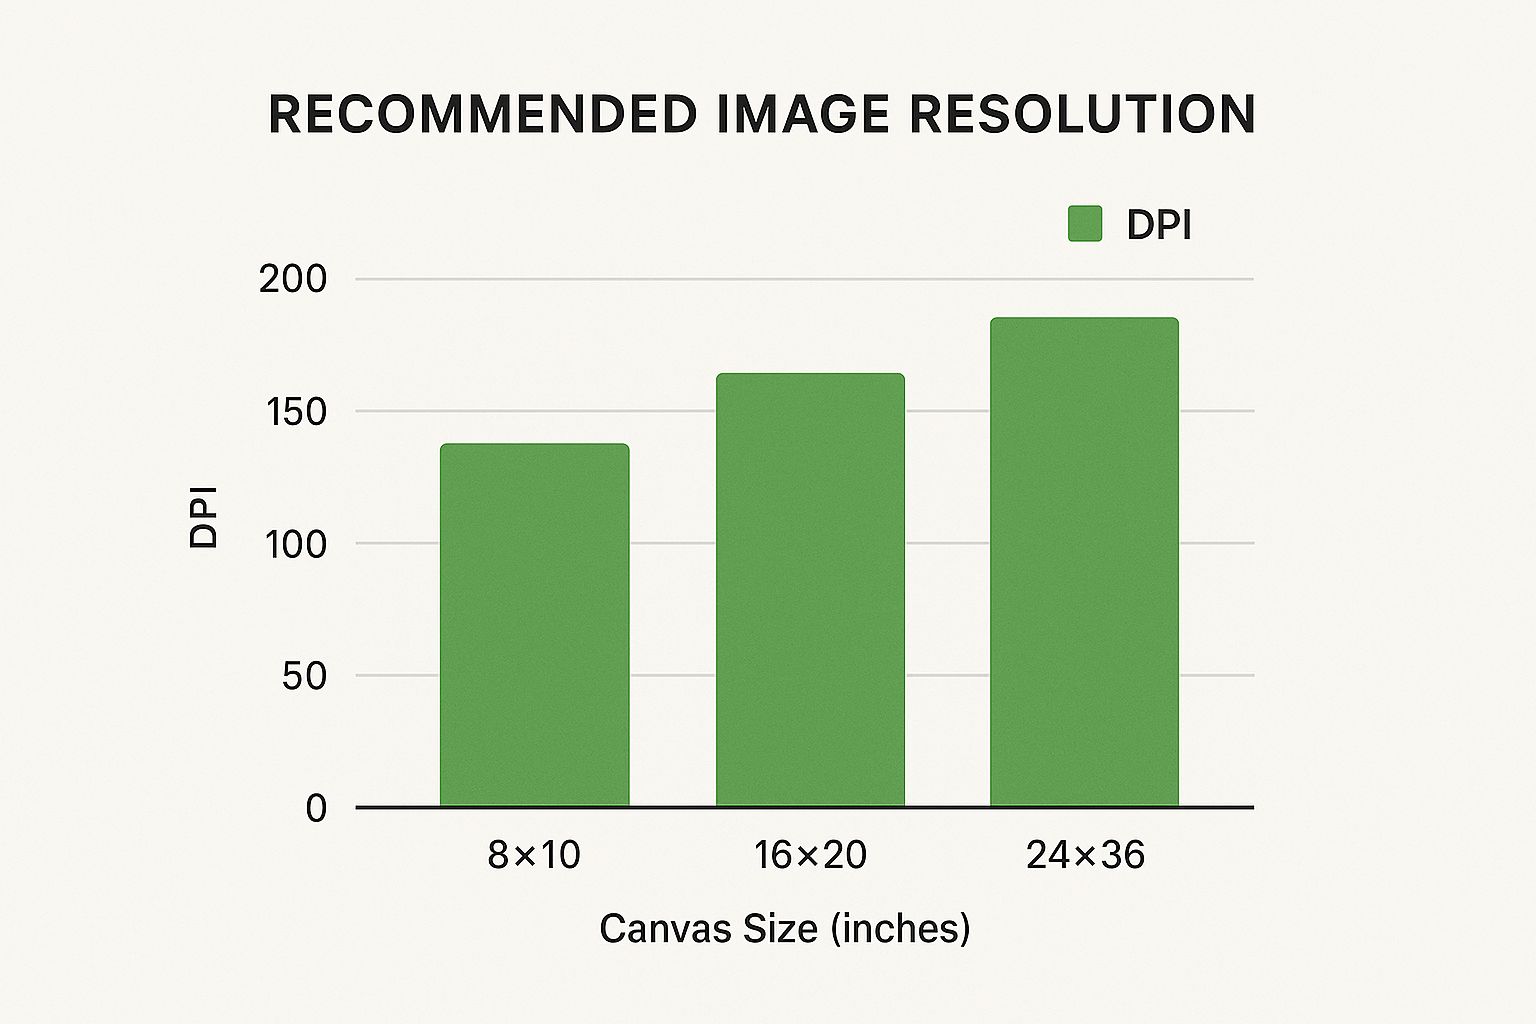
When we talk about image quality for printing, the word you'll hear most is resolution. This is simply the amount of detail packed into your photo, usually measured in pixels. For printing, this is often expressed as DPI (dots per inch). More pixels mean more detail, which gives you a sharper, clearer canvas.
For a photo printed onto canvas, the sweet spot is a resolution between 150 and 300 DPI at the final print size. While 300 DPI is the gold standard for glossy photo paper, canvas has a natural texture that’s a bit more forgiving. This means you can often get beautiful results at the lower end of that range, but you should never, ever go below 100 DPI.
Here’s a common scenario: you've got a great photo on your phone that looks amazing on the screen. But remember, your screen is only showing it at around 72 DPI. When you try to stretch that same photo across a large 60cm x 90cm canvas, the printer needs a lot more digital information to fill that space without it all falling apart. Without enough pixels, the image gets soft and "pixelated," where you can literally see the individual squares of colour.
The most common mistake we see is people pulling a favourite photo from social media. Those images are always heavily compressed to load quickly online, which crushes their resolution and makes them totally unsuitable for printing. Always track down the original, full-size file from your camera or phone.
Nailing the Technical Details: File Formats and Colour
The technical side of things can feel a bit intimidating, but getting two things right—file format and colour space—will make a world of difference. These settings are what ensure the colours on your canvas pop and look exactly as you remember them.
- JPEG (or JPG): This is the format you’ll see most often. It uses compression to keep file sizes small, which is handy but can cause a tiny loss of quality. For the vast majority of canvas prints, a high-quality JPEG saved at its maximum setting is perfectly fine.
- TIFF: This format is a favourite among professional photographers because it’s "lossless," meaning it keeps every single bit of original image data. If you have a TIFF file, it’s a brilliant choice for printing, particularly for very large canvases where every last detail counts.
Beyond the format, you'll want to think about the colour space. Most cameras and screens use sRGB, which is the web standard. While professional printers sometimes use other profiles like Adobe RGB, it’s safest to submit your file in the sRGB colour space unless your print shop tells you otherwise. This little step helps prevent any nasty surprises with colours shifting during the printing process.
For a quick reference, this table will help you see what size canvas you can realistically print from the photos you have.
Photo Resolution Guide for Canvas Prints
| Camera/Phone Megapixels (MP) | Minimum Image Dimensions (Pixels) | Excellent Quality Print Size (cm) | Acceptable Quality Print Size (cm) |
|---|---|---|---|
| 6 MP | 2800 x 2100 | Up to 35 x 28 cm | Up to 50 x 40 cm |
| 8 MP | 3260 x 2450 | Up to 40 x 30 cm | Up to 60 x 45 cm |
| 12 MP | 4200 x 2800 | Up to 50 x 40 cm | Up to 75 x 50 cm |
| 16 MP | 4900 x 3200 | Up to 60 x 40 cm | Up to 90 x 60 cm |
| 24 MP | 6000 x 4000 | Up to 75 x 50 cm | Up to 120 x 80 cm |
| 36 MP+ | 7300 x 4900 | Up to 90 x 60 cm | Up to 150 x 100 cm |
As you can see, the bigger the print you want, the more megapixels you’ll need to start with to keep it looking sharp and professional.
Making a Few Essential Pre-Print Edits
Before you hit "upload," a couple of simple tweaks can take your final print from good to great. You don’t need to be a Photoshop wizard; the basic tools on your phone or computer are more than enough.
Cropping to the Right Proportions
First up, think about the shape of your canvas. If you’re planning a square 50cm x 50cm print but your photo is a wide rectangle, you'll need to crop it. Figure out what part of the image you want to be the hero and crop it to the correct aspect ratio. This avoids any nasty surprises where the printer’s automated system chops off something important.
Adjusting Brightness and Contrast
Images on a backlit screen always look brighter than they do in print. A great rule of thumb is to slightly boost the brightness and contrast of your photo before sending it off. This simple adjustment compensates for how ink soaks into the canvas fabric, ensuring your print doesn't end up looking flat or darker than you expected. It's especially important for photos taken in low light.
It's interesting just how much we still value physical media here in New Zealand. A 2017 survey revealed that the average Kiwi employee prints around 94 pages per week. This shows a huge demand for printed materials in the workplace and points to a wider appreciation for tangible items, which naturally extends to personalised products like a photo printed onto canvas for our homes and offices. You can dig into the numbers yourself in the full business survey from Brother.
Getting to Grips with Canvas Materials and Printing Tech
Once your digital file is looking sharp, it's time to think about what your photo will actually be printed on. The final quality of a photo printed onto canvas comes down to the raw materials and the technology behind the print. Nailing this part is what separates a breathtaking piece of art from something that looks cheap and fades before you know it.
The world of canvas printing can seem a bit technical, but it really boils down to three things: the canvas fabric, the ink, and the wooden frame it’s stretched over. Let's walk through what you need to look for in each to make sure your print is gallery-quality and built to last.
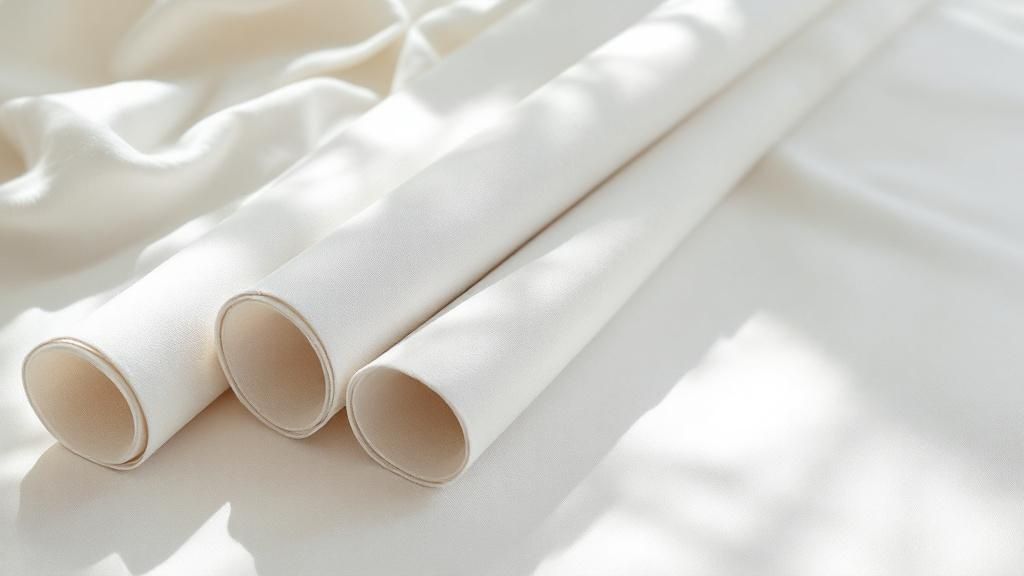
The Fabric of Your Artwork
Think of the canvas as the soul of your print. Its makeup has a huge impact on the final texture, colour depth, and how long it will last. You'll typically come across three main types, and each has its own personality.
-
100% Cotton Canvas: This is the classic choice, favoured by artists for its traditional, painterly feel. Cotton has a beautiful, slightly uneven texture that absorbs ink wonderfully, giving you deep, rich colours. The downside? It can be a bit sensitive to moisture, so a good protective coating is an absolute must.
-
Polyester Canvas: As a more modern material, polyester offers a very bright and consistent finish. Its smooth surface is perfect for capturing pin-sharp details and making colours really pop. It’s also much more resilient against humidity and won’t stretch or shrink over time, which makes it a really durable option.
-
Poly-Cotton Blends: This is where you get the best of both worlds. By blending the two, you get the lovely artistic texture of cotton combined with the strength and colour consistency of polyester. It’s a fantastic balance, which is why it has become the go-to for most professional photo printing services.
For most projects, we find ourselves recommending a high-quality poly-cotton blend. It gives you that archival quality and rich texture art lovers want, but with the structural integrity needed to look fantastic for decades to come.
Ink That’s Made to Last a Lifetime
How the ink gets onto the canvas is just as crucial as the fabric itself. For the absolute best results, you should always seek out printers who use giclée printing (pronounced "zhee-clay"). It might sound fancy, but it’s simply a high-end inkjet process that uses a wider range of colours to achieve incredible accuracy.
The real magic of giclée is the ink itself. These printers use archival pigment inks, which are fundamentally different from the standard dye-based inks you find in cheaper prints.
- Dye-based inks soak right into the canvas fibres. While they can look vibrant at first, they're notorious for fading, especially when exposed to sunlight. A print made with dye-based inks can look noticeably dull in just a few years.
- Pigment inks, on the other hand, are made of tiny, solid particles of colour that sit on top of the canvas surface. This makes them far more stable and incredibly resistant to fading. We’re talking a lifespan of 100 years or more without any real colour loss.
So, when a printing service mentions they use "archival inks," this is what they mean. It's your guarantee that a treasured memory won't slowly vanish from your wall.
Why the Frame Matters More Than You Think
Tucked away behind your print is the stretcher bar frame. This wooden skeleton is what keeps your canvas tight, flat, and free from warping. Especially in New Zealand’s humid climate, the quality of this timber is non-negotiable.
You should always make sure the frame is built from kiln-dried timber, like New Zealand Pine. The kiln-drying process removes most of the moisture from the wood, which drastically reduces the chances of it twisting or bowing with changes in humidity. A cheap, undried frame will almost certainly warp, leaving you with a saggy, sad-looking canvas.
You also get to choose the frame's thickness, often called the "profile" or "wrap depth."
| Frame Type | Typical Thickness | Best For |
|---|---|---|
| Standard Wrap | 20-25mm (0.75") | Smaller prints or any canvas you plan to put inside a separate “floating” frame. |
| Gallery Wrap | 35-40mm (1.5") | Larger prints where you want a bold, substantial look on the wall. It creates a much stronger three-dimensional effect. |
The choice is mostly aesthetic. A thicker gallery wrap gives the artwork more presence and looks brilliant on larger pieces, while a standard wrap is a bit more subtle and often a little friendlier on the wallet.
Interestingly, while demand for personalised art like canvas prints is still strong, the broader printing industry in New Zealand has seen some changes. In 2024, the number of printing businesses actually decreased by 3.4% from the previous year. This trend makes it even more important to pick a reputable printer who invests in the best materials and technology to deliver a superior product. You can read a bit more about these industry trends on IBISWorld.
Getting the Edges and Finishes Just Right
The finishing touches are what really transform a simple print into a piece of art you’d be proud to hang on your wall. Getting your photo printed onto canvas is just the start; the magic really happens when you decide how to present it. These crucial choices—from how the image wraps around the edges to the final protective coat—give your canvas its unique personality.
Think of it like choosing a frame for a traditional painting. The right frame can completely change the mood of the art. With a canvas, the edge wrap and surface finish do the same job, giving your photo a clean, modern look without needing a separate, bulky frame.
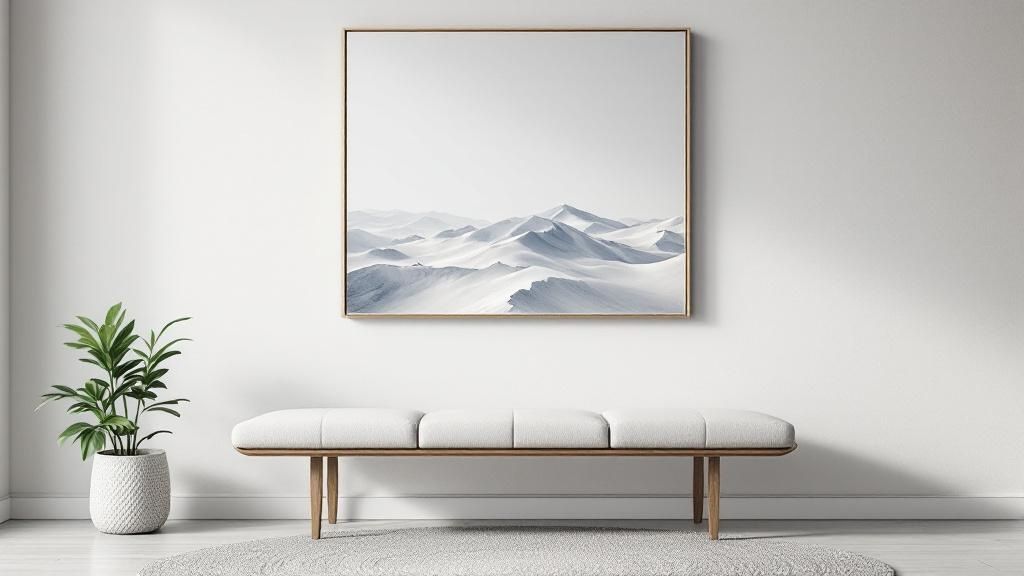
Deciding on Your Canvas Edge Style
The edge of the canvas—the bit that wraps around the wooden stretcher bars—plays a surprisingly big role in the final look. There’s no single "best" option here; what works best really depends on your photo's composition.
- Gallery Wrap: This is easily the most popular choice for a seamless, continuous look. Your image extends right around the sides of the frame, creating a beautiful three-dimensional effect. It's perfect for landscapes or abstract shots where losing a few centimetres of the image from the front view isn't a big deal.
- Mirror Wrap: What if your photo is tightly cropped, and you can't afford to lose any of the main subject? That's where a mirror wrap comes in. The printer cleverly duplicates the outer edge of your image and flips it to cover the sides. This gives you that same continuous look as a gallery wrap but keeps your entire original photo visible on the front.
- Solid Colour Wrap: For a clean, defined border, you can opt for a solid colour on the edges. Black is a classic choice that makes colours pop, while white offers a softer, more contemporary feel. This style is fantastic for portraits or any photo where you want a clear visual break between the image and the wall.
For instance, a stunning shot of Mitre Peak with its reflection in the water would be a perfect candidate for a gallery wrap, letting the scenery flow naturally over the sides. On the other hand, a tight family portrait from a wedding is much better suited to a mirror wrap to avoid awkwardly cropping out someone’s arm or shoulder.
A quick tip from experience: Always, always check the digital preview of your chosen wrap before finalising your order. It'll show you exactly how much of your image will be used for the edges, so there are no nasty surprises when your canvas arrives.
Selecting the Perfect Surface Finish
Once you've sorted the edges, it’s time to think about the surface finish. This is a clear protective coating applied over the printed canvas. Not only does it guard against UV light and moisture, but it also has a huge impact on how your colours and details look in the final piece.
Matte Finish
A matte finish has a flat, non-reflective surface, giving the canvas a soft, subtle, almost velvety look. Many people feel it looks more "painterly" or artistic. It’s an excellent choice for rooms with lots of natural light, as it completely eliminates glare from windows or lamps. This makes it perfect for black and white photos or any image where you want to emphasise texture and emotion over high-impact shine.
Satin or Semi-Gloss Finish
Sitting right in the middle between matte and gloss, a satin finish (sometimes called semi-gloss or lustre) offers a gentle sheen. It gives your colours and contrast a nice boost without creating the mirror-like reflections you get with a full gloss. Its versatility makes it the most popular all-rounder, working beautifully for almost any type of photo, from family portraits to vibrant travel shots.
Gloss Finish
If you're after maximum impact, a gloss finish is the way to go. This highly reflective coating makes colours look incredibly rich, deep, and vibrant, much like a traditional glossy photograph. The trade-off is that it can create significant glare under direct light. A gloss finish is best for images where you really want the colours to leap off the canvas and is ideally placed in a room with controlled, indirect lighting.
To make things a bit clearer, here’s a quick comparison to help you weigh up the options for your specific photo.
Canvas Wrap and Finish Comparison
| Feature | Gallery Wrap | Mirror Wrap | Matte Finish | Gloss Finish |
|---|---|---|---|---|
| Best For | Landscapes, abstracts, photos with "breathing room" around the subject. | Tightly cropped images, portraits, where every detail on the front matters. | Rooms with bright, direct light; black & white photos; achieving an artistic, "painterly" feel. | Making colours pop; images where vibrancy is key; rooms with controlled lighting. |
| Look & Feel | Seamless, three-dimensional effect. The image flows over the edges. | Continuous look without sacrificing any of the main image. | Soft, non-reflective, and subtle. No glare. | High-impact, vibrant, and reflective, similar to a glossy photo. |
| Consideration | A small portion of your image will be wrapped around the sides. | Can sometimes create a slightly repetitive or unnatural pattern on the edge if the border is complex. | Colours are slightly more subdued compared to gloss. | Can be distracting due to glare if placed opposite a window or under a direct light source. |
Ultimately, the best combination comes down to your personal taste and where you plan to hang your canvas.
Elevate Your Canvas with a Floating Frame
Want to give your photo printed onto canvas that final touch of gallery-quality class? Consider a floating frame. This is a special type of frame where the canvas sits inside with a small gap, creating the illusion that it's "floating".
This little gap adds a wonderful sense of depth and pulls the viewer's eye straight to the artwork itself. It offers the polished, finished look of a traditional frame but with a modern, minimalist twist. Floating frames usually come in simple colours like black, white, or natural wood tones, so they're sure to complement your image rather than compete with it. It's a brilliant way to turn your canvas into a true centrepiece.
How to Look After and Display Your Canvas
Your stunning new canvas has finally arrived. That moment of unboxing is always exciting, but what comes next? You need to figure out how to keep it looking pristine and where to hang it for the best effect. A little bit of care and thoughtful placement will ensure your photo printed onto canvas remains a beautiful centrepiece in your home for decades.
The great news is that looking after a canvas print is surprisingly simple. With a few basic precautions, you can easily protect your new artwork from dust, damage, and the elements.
Gentle Cleaning and Maintenance
It's inevitable that your canvas will gather a bit of dust over time. The trick is to be gentle.
Whatever you do, don't reach for chemical cleaners, solvents, or even a damp cloth. These can react with the archival inks or the protective coating, causing smudges, discolouration, or permanent damage. All it really needs is a light dusting every now and then.
- Your Go-To Tool: A soft, dry, lint-free cloth or a feather duster is perfect. I find a microfibre cloth works wonders.
- The Right Touch: Wipe the surface very lightly. Avoid pressing down, as this could stretch or even dent the canvas.
A quick wipe-down every month or two is all it takes to keep your artwork looking as vibrant as the day it was printed.
Finding the Perfect Spot in Your Home
Where you decide to hang your canvas makes a huge difference, not just for how it looks but also for how long it lasts. The two biggest enemies of any print are direct sunlight and humidity—something we know all about here in New Zealand.
Even with a protective coating, constant exposure to direct UV rays will eventually cause the brilliant colours to fade. To avoid this, pick a wall that isn't blasted by the sun for hours every day. A spot in a well-lit room with plenty of indirect light is the ideal situation.
High humidity, like you'd find in a bathroom or a poorly ventilated kitchen, is another major no-no. Moisture in the air can make the canvas sag and cause the wooden stretcher bars to warp. Stick to dry, temperature-stable locations for your artwork.
A Quick Guide to Hanging It Right
Getting your canvas hung securely and perfectly level is the final piece of the puzzle. First, let's talk height. A good rule of thumb is to hang the artwork so its centre is at eye level, which is usually somewhere around 145-155 cm from the floor.
Next, you'll need the right hardware for your wall.
- Gib or Plasterboard: A standard picture hook rated for the weight of your canvas will do the job. If you've got a particularly heavy piece, using a wall anchor gives you that extra peace of mind.
- Concrete or Brick: This requires a bit more effort. You’ll need to drill a hole and use a masonry plug and screw for a solid anchor point.
Once your hook is securely in the wall, you can hang the canvas from its top stretcher bar or a pre-installed wire. Grab a spirit level and place it on top of the frame to get it perfectly straight. It's a small step that makes all the difference.
Creating an Eye-Catching Gallery Wall
Why stop at just one photo printed onto canvas? Creating a gallery wall by grouping several canvases is a fantastic way to tell a bigger story and make a real statement.
Imagine a series of three vertical portraits of your kids along a hallway, or a clean grid of four square travel snaps above the sofa. Before you even think about hammering nails, lay your canvases out on the floor. Play around with different arrangements and spacing until you find a layout that feels balanced and just right. This little bit of planning turns separate prints into a cohesive, impactful art installation.
A Few Common Questions About Canvas Prints
Even after you've decided on the perfect photo, size, and finish, it's natural to have a few last-minute questions. Getting a photo printed onto canvas is an investment, after all, and you want to be sure it's going to look amazing.
To put your mind at ease, I've rounded up some of the most common queries we get from customers all over New Zealand. Think of this as a final check-in before you hit "order", making sure there are no surprises—just a beautiful piece of art you'll love for years to come.
What Happens If My Photo Resolution Is Too Low?
This is easily the number one worry I hear, and for good reason! What if you place your order, only for the print team to discover the file isn't good enough for the size you've chosen?
Let me be clear: any reputable printing service will never knowingly print a low-quality file that will end up looking blurry or pixelated. It’s bad for you and bad for their reputation.
Instead, their quality control process should catch it. When that happens, you’ll get an email or a call explaining the issue. They’ll typically suggest a few options:
- Send a better file: If you have the original, higher-resolution version tucked away on a hard drive, now’s the time to find it.
- Go for a smaller size: Your photo might not work for a huge 100cm print, but it could look absolutely stunning as a 40cm piece.
- Pick a different photo: You might have another favourite shot that's a much better technical fit for the size you want.
A good printer is a partner in the process. They’ll work with you to find a solution rather than just sending out a subpar product.
How Long Does Printing and Shipping Take?
Waiting for a special delivery can be tough! So, when can you expect your new canvas to arrive? The timeline for getting a photo printed onto canvas and delivered to your door in New Zealand can vary slightly, but here’s a general breakdown of what to expect from most local printers.
Production Time (2-5 Business Days) This is the hands-on part. It’s the time it takes for the team to check your file, print it with archival-quality inks, apply a protective coating, let it dry perfectly, and then carefully hand-stretch it over a kiln-dried wooden frame.
Shipping Time (1-4 Business Days) Once your canvas is finished and safely packaged up, it’s off with the courier. Delivery to main city centres is usually a bit quicker than to rural addresses. Most companies will send you tracking info so you can watch its progress.
All up, you can generally expect your canvas to arrive within 3 to 9 business days from the day you order. If you need it for a specific date like a birthday or anniversary, it’s always smart to check the printer’s website for their current turnaround times.
The Growing Demand for Personalised Prints
The desire to bring our digital photos into the physical world is stronger than ever. It's a trend that's booming worldwide.
While it's tricky to find hard data for New Zealand alone, the global numbers tell a compelling story. The worldwide photo printing and merchandise market was valued at around USD 23 billion in 2023 and is only expected to grow. Kiwi buying habits often reflect these global trends, showing a real love for unique, personalised items like a photo printed onto canvas. If you're interested in the bigger picture, you can explore more insights into the global photo printing market.
Can I Order a Custom Size?
Yes, absolutely! While most print services list a range of standard sizes (like A3, A2, and A1), many are more than happy to create a custom-sized canvas that’s a perfect fit for your wall.
Maybe you need a long, panoramic print to hang above your bed, or a unique square size for that awkward little nook in the hallway. A custom order is almost always possible.
The best way to go about it is to contact the printing company directly with your measurements. They’ll be able to give you a quote and let you know if your photo's resolution is up to the task for that specific size. This kind of flexibility is one of the best things about working with a dedicated local printer.
Ready to turn your favourite photos into stunning works of art? The team at SONI DESIGN is passionate about bringing your vision to life with exceptional quality and care. Start creating your beautiful custom canvas print with us today!
Leave a Comment
Stay home & get your daily
needs from our shop
Start You'r Daily Shopping with Nest Mart