
Your cart is currently empty.

If you've ever dealt with printing in New Zealand, you'll know that A4 (210 x 297 mm) is the go-to size for almost everything. But A4 is just one piece of a much larger, incredibly clever system based on the international ISO 216 standard. This is the framework that underpins virtually all professional and personal printing across the country.
Decoding New Zealand's Paper Size System
Ever wondered how a massive poster and a tiny flyer can share the same design proportions, just scaled up or down? It's not a coincidence. Here in New Zealand, we use a system built on a brilliant, logical foundation known as the ISO 216 standard. This is what governs the "A series" of paper sizes—like A3, A4, and A5—that you see every day.
The Logic Behind the A Series
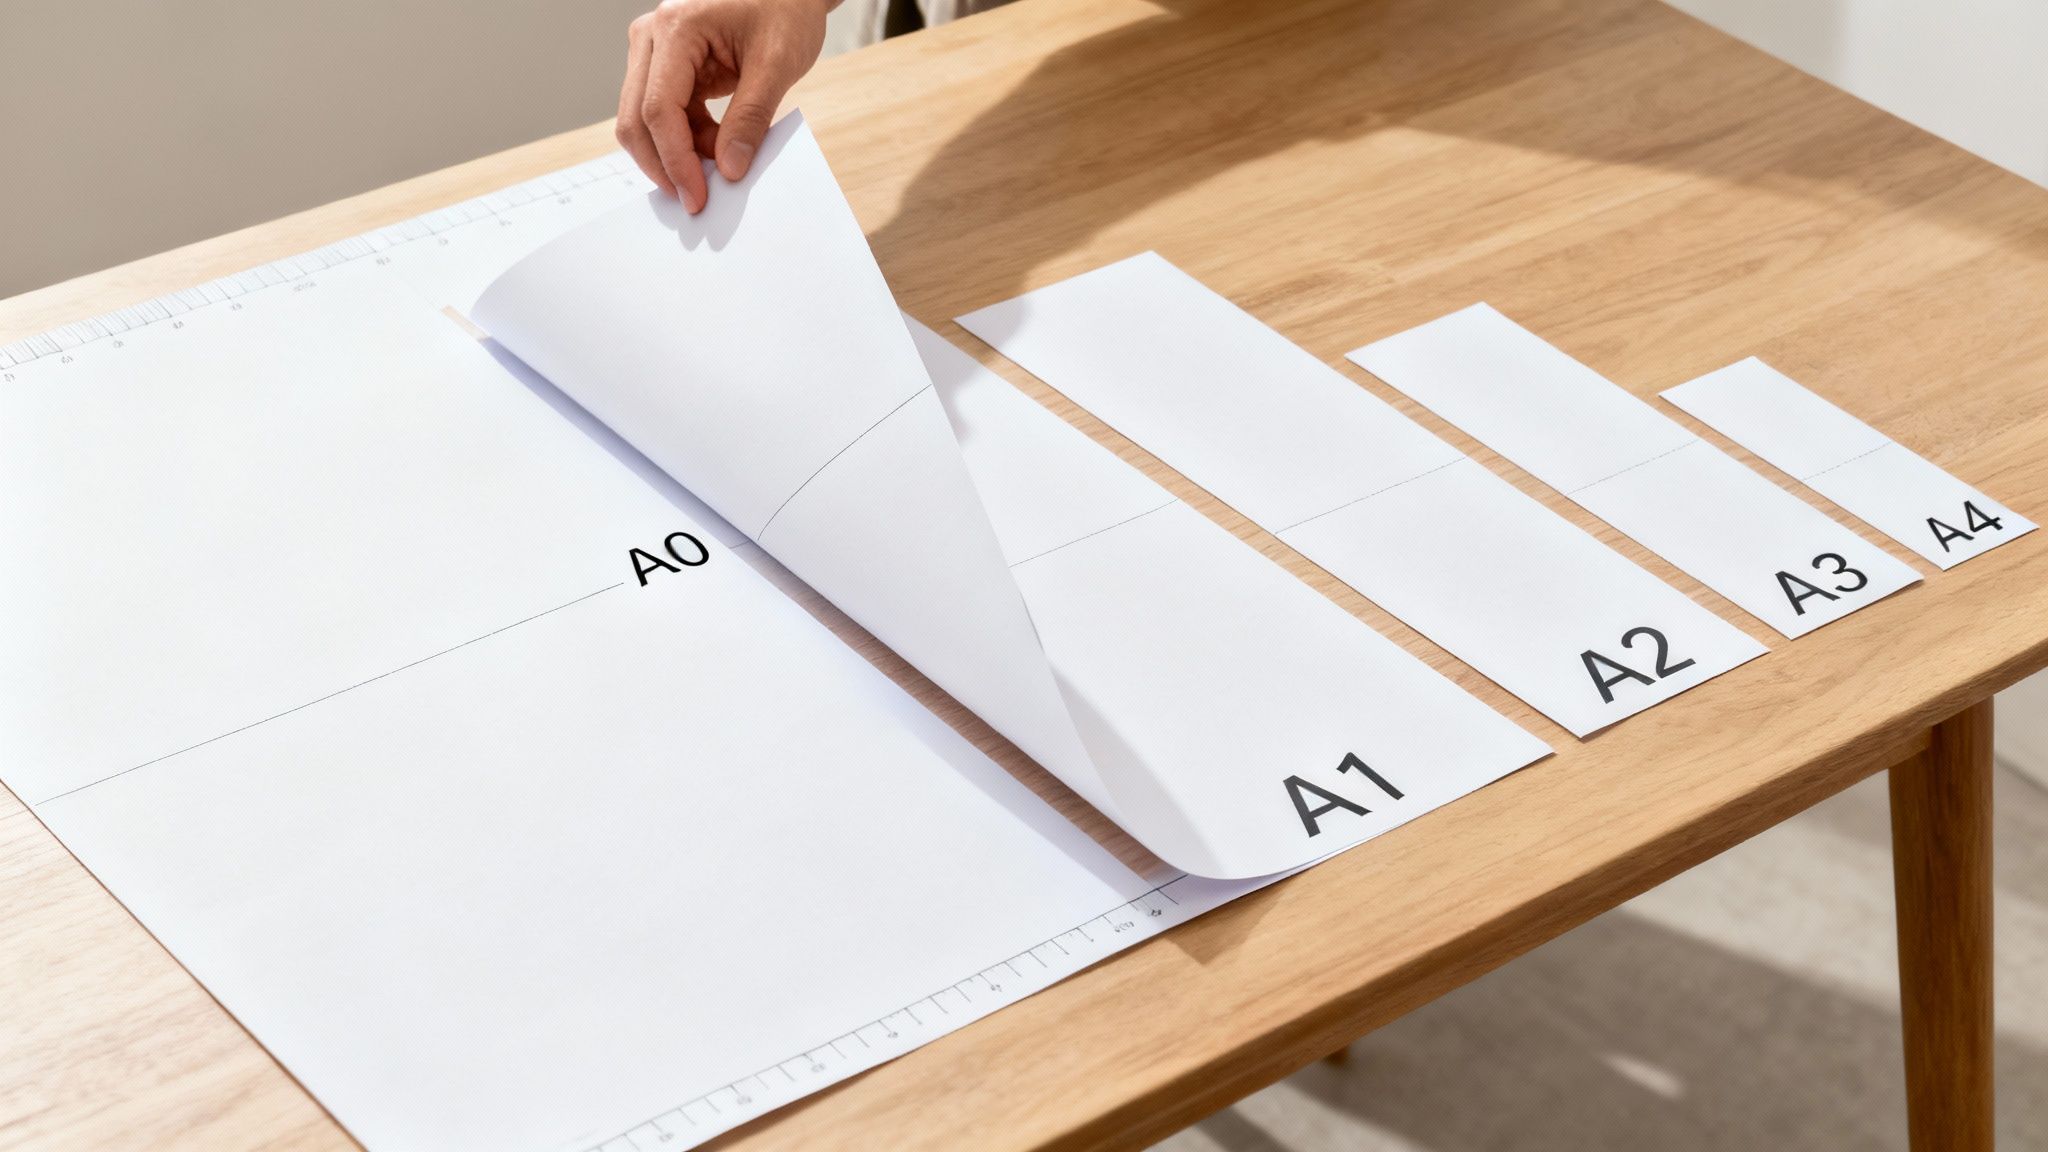
The beauty of the A series lies in its simplicity. Start with a huge sheet of paper, A0. If you fold it perfectly in half along its longest side, you get the next size down, A1. Do the same with an A1 sheet, and you’ve got an A2. This elegant halving process continues all the way down the line, creating a family of paper sizes that are always perfectly proportional to one another.
This consistency is the secret sauce. It means a design you create for an A4 page can be flawlessly scaled up to an A3 poster or shrunk down to an A5 flyer without any weird stretching, cropping, or distortion. For designers, printers, and anyone putting together a document, this makes life infinitely easier.
New Zealand's Shift to a Global Standard
This streamlined system wasn't always the way things were done. New Zealand officially adopted the ISO 216 standard back in the 1970s, joining a global move towards harmonisation. The switch allowed Kiwi businesses and government departments to standardise their documents, which improved compatibility with international partners and simplified everything from printing to filing.
The change was a huge success. By the early 1980s, over 90% of office printing in the country was already being done on A4 paper, showing just how quickly and effectively the standard was embraced. You can dig deeper into the history of international paper standards on papersizes.io.
Key Takeaway: The entire A series is based on a single, constant aspect ratio. This is a game-changer because it means your designs can be perfectly scaled up or down, keeping your branding and layouts consistent across all printed materials, from a small leaflet to a massive architectural plan.
A Practical Guide to the A Series Paper Sizes
It’s one thing to know the logic behind the A series paper system, but it’s another to see it in action around New Zealand. Each size, from the massive A0 to the tiny A8, has a job it’s perfectly suited for. Let's break down where you’ll find these sizes in the real world and why they work so well.
This journey from posters to postcards really brings the numbers to life, showing how each format serves a unique purpose.
Large Format: The Heavy Hitters
At the top end of the scale are the big players—the sizes designed to grab attention from across the room or down the street. These are the canvases for your biggest ideas.
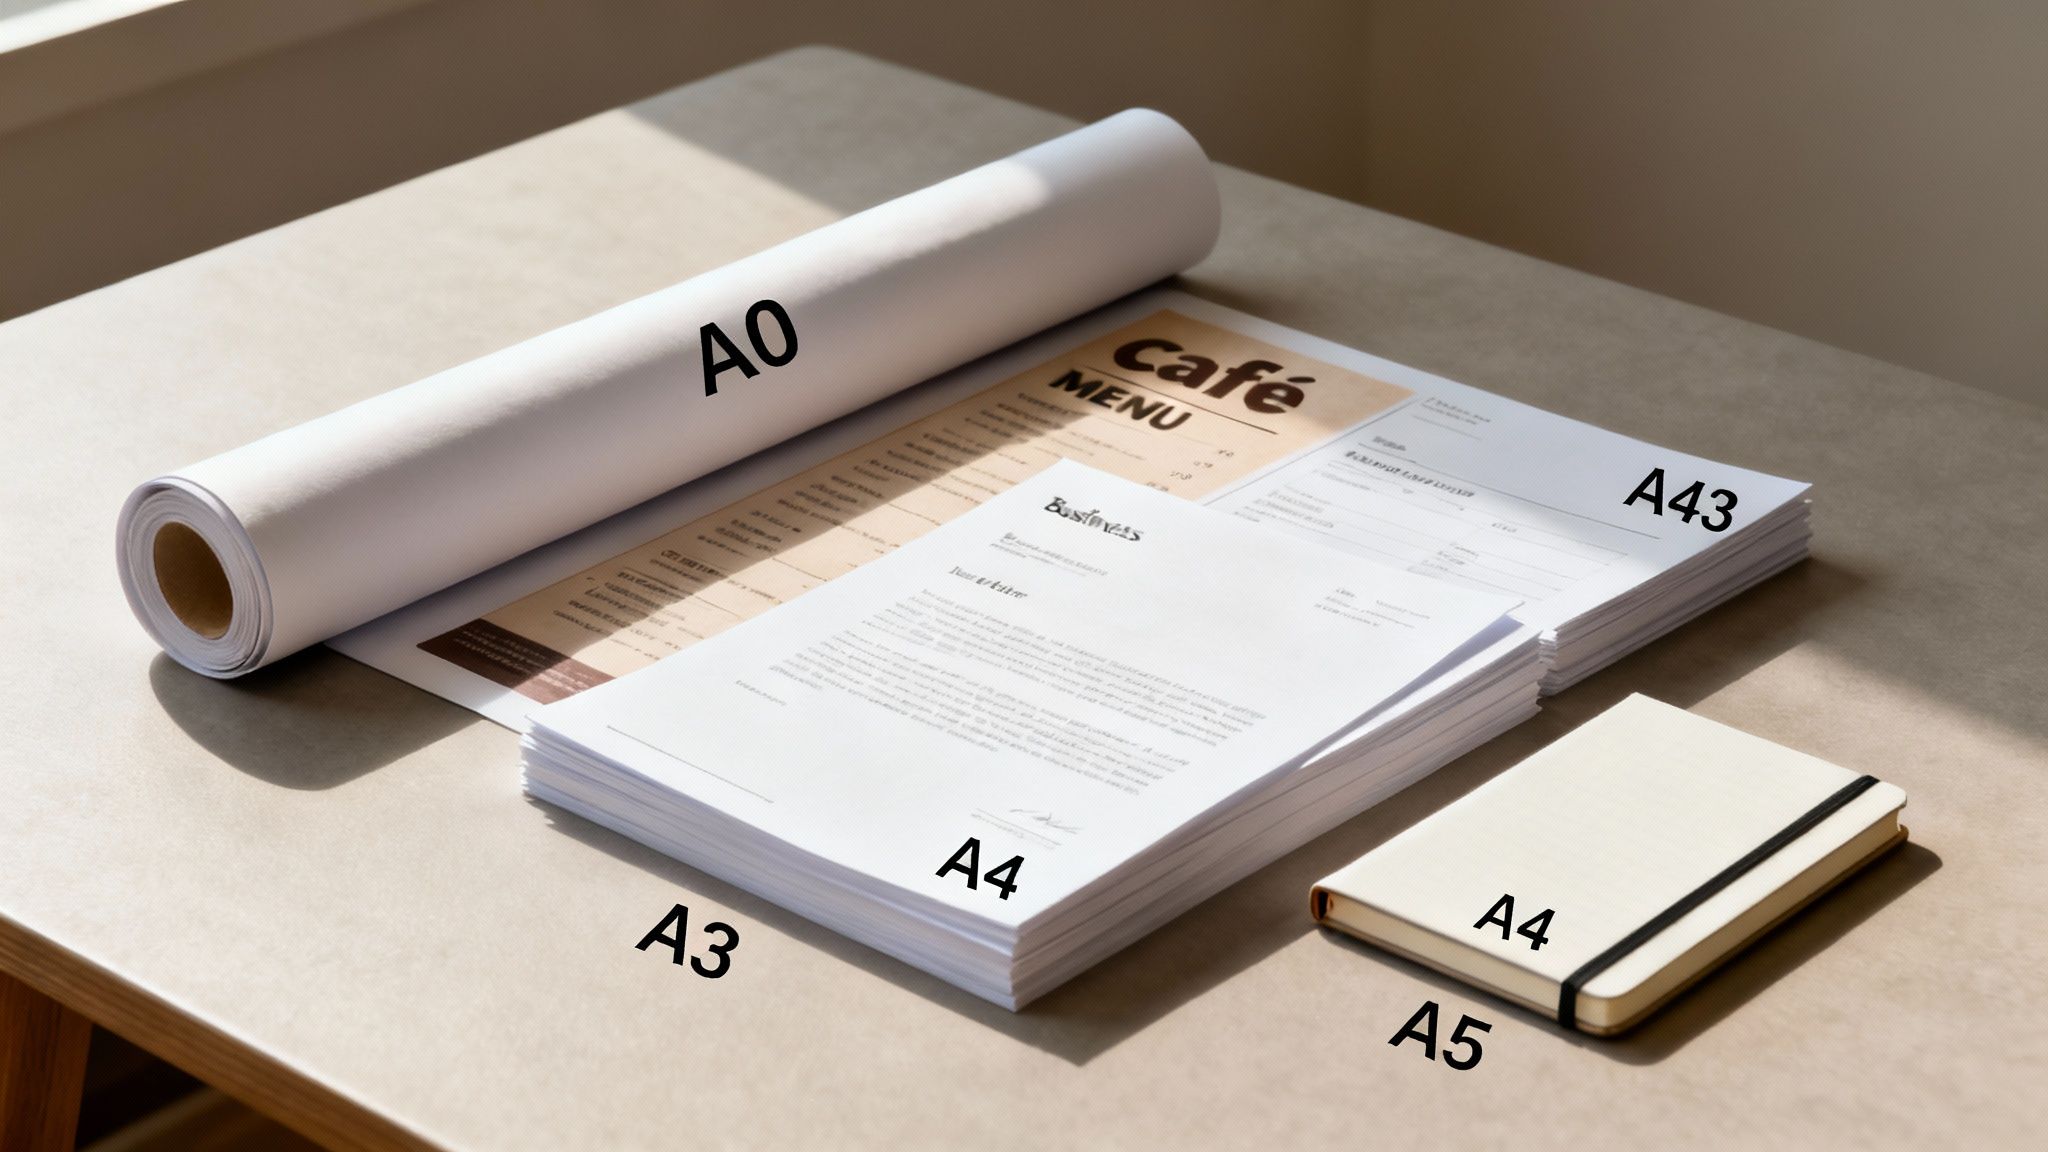
- A0 (841 x 1189 mm): This is the behemoth, the largest standard size you’ll typically encounter. It’s the go-to for technical drawings like architectural plans and engineering schematics where every single detail has to be crystal clear.
- A1 (594 x 841 mm): Half the size of an A0, the A1 is a Kiwi favourite for eye-catching event posters, retail window displays, and big conference charts. It makes a serious impact without completely dominating a space.
- A2 (420 x 594 mm): Another popular choice for posters, especially for art prints or professional charts. There’s plenty of room to balance stunning visuals with important information.
These larger paper sizes NZ printers like SONI DESIGN work with are all about making a bold statement and getting your message seen loud and clear.
Medium Format: The Everyday Workhorses
As we move down the scale, we get to the sizes that form the backbone of office life, marketing, and hospitality. These are the formats you handle every single day.
First up is A3 (297 x 420 mm). Being exactly double an A4, it’s incredibly versatile. Picture it as the perfect canvas for a stylish café menu, a detailed presentation handout, or a small promotional poster. The larger format gives you more creative freedom without being a hassle to handle.
Then there’s A4 (210 x 297 mm)—the undisputed champion of paper in New Zealand. It's the standard for just about everything: company letterheads, reports, flyers, school assignments, and official documents. It strikes the perfect balance between readability and portability, making it the default for most day-to-day printing.
For any Kiwi business, getting A3 and A4 right is non-negotiable. A3 lets you lay out complex information visually, while A4 holds its ground as the professional standard for all formal communication.
Small Format: The Pocket Powerhouses
Finally, we arrive at the smaller, more personal sizes. These are designed to be portable, fitting neatly into hands, pockets, and letterboxes for direct and personal engagement.
- A5 (148 x 210 mm): This is the ideal size for notebooks, journals, booklets, and personal organisers. A5 flyers are also incredibly popular because they’re cost-effective and super easy to hand out.
- A6 (105 x 148 mm): Think of the classic postcard—that’s an A6. It’s also perfect for invitations, greeting cards, and little promotional handouts that need to pack a punch in a small package.
Choosing the right size is all about matching the paper to its purpose. An A6 handout is brilliant for a quick, sharp message, whereas an A3 presentation gives you the space to build a detailed, compelling argument.
Complete A Series Paper Size Chart with NZ Uses
To make things even clearer, here’s a full rundown of the A series, from the largest to the smallest, with dimensions and their common uses right here in New Zealand.
| Size | Dimensions (mm) | Dimensions (inches) | Common NZ Use Cases |
|---|---|---|---|
| A0 | 841 x 1189 mm | 33.1 x 46.8 in | Architectural plans, large-scale maps, technical drawings |
| A1 | 594 x 841 mm | 23.4 x 33.1 in | Event posters, retail displays, conference flip charts |
| A2 | 420 x 594 mm | 16.5 x 23.4 in | Art prints, smaller posters, professional charts, window displays |
| A3 | 297 x 420 mm | 11.7 x 16.5 in | Menus, presentation handouts, newsletters, small posters |
| A4 | 210 x 297 mm | 8.3 x 11.7 in | Letterheads, reports, flyers, brochures, magazines, documents |
| A5 | 148 x 210 mm | 5.8 x 8.3 in | Notebooks, booklets, journals, flyers, promotional leaflets |
| A6 | 105 x 148 mm | 4.1 x 5.8 in | Postcards, invitations, greeting cards, small handouts |
| A7 | 74 x 105 mm | 2.9 x 4.1 in | Tickets, large labels, pocket-sized flashcards |
| A8 | 52 x 74 mm | 2.0 x 2.9 in | Business cards (less common), stickers, small labels |
By understanding these common applications, you can confidently pick the perfect canvas for your next project, ensuring your message lands exactly as you intended.
Of course, here is the rewritten section with a more natural, human-written feel, while preserving all the original information, links, and formatting requirements.
Going Beyond A4: Specialty and Niche Paper Sizes
While the A-series covers most of our day-to-day printing, sometimes a project just needs something different. Stepping outside these common standards opens up a whole world of specialty paper sizes, each with a specific job to do. This is where you’ll run into the B and C series, along with a few other formats unique to certain industries.
It might sound complicated, but understanding how these systems work together is actually quite straightforward. The best way to think about it is like a perfectly matched set of nesting boxes.
The Supporting Cast: The B and C Series
The C series was designed for one primary job: making envelopes for A-series paper. It’s a beautifully simple system. A C4 envelope is made to perfectly hold an unfolded A4 sheet. A C5 envelope fits an A5 sheet (or an A4 folded in half), and a C6 is the ideal home for an A6 postcard. This clever design takes all the guesswork out of mailing, ensuring you get a snug, professional fit every single time.
Then you have the B series, which acts as a helpful middle-ground between the A sizes. For example, a B4 sheet is bigger than an A4 but smaller than an A3. This makes the B series a fantastic choice for things like posters, books, and presentation folders where an A-series size might feel a little too cramped or, conversely, a bit too big and wasteful. For a deeper dive into book printing, a guide on standard book size dimensions shows just how much thought goes into picking the perfect format for different types of books.
The Simple Relationship: The 'A' series is your document, the 'C' series is the envelope you mail it in, and the 'B' series is your go-to when you need something with a bit more presence.
Industry Favourites and Custom Dimensions
Beyond these international standards, many industries have developed their own go-to sizes. Take New Zealand's newspaper industry, for instance. They've largely settled on a specific format that local readers are used to. The AU/NZ Broadsheet size (420 × 594 mm) is used by major players like The New Zealand Herald and makes up over 70% of broadsheet production in the region. Standardising like this helps make printing and distribution much more efficient across both New Zealand and Australia. If you're curious about the history of paper standards around the world, Papersizes.org is a great resource.
Finally, some of the most common things we print don't follow any formal system at all. Their dimensions are purely practical, chosen for a specific function or simply because of tradition.
- Business Cards: The standard size here in NZ is 90 x 55 mm. Why? Because it fits perfectly into wallets and card holders. Simple as that.
- DL (Dimension Lengthwise): Measuring 99 x 210 mm, this is exactly one-third of an A4 sheet. It's the classic format for brochures, flyers, and compliment slips that are designed to slip neatly into a standard DL envelope.
- Wedding Invitations: These are a world of their own! While a size like 120 x 180 mm is popular, invitations often use custom dimensions to create a unique and memorable first impression for the big day.
How to Prepare Your Designs for Printing
Picking the right paper size is a great start, but getting a truly professional print finish all comes down to how you prepare your digital file. Get this part wrong, and you can end up with frustrating and costly mistakes. Think of this section as your pre-print checklist—we’re here to cut through the jargon and guide you to a flawless result.
Your digital design file is like the blueprint for a building. For everything to line up perfectly, the instructions need to be crystal clear. We'll walk through the three most critical concepts you need to know: bleed, trim, and the safe area. Honestly, they’re non-negotiable if you want a polished, professional look.
Bleed, Trim, and Safe Area Explained
Ever wondered how printers get colour or an image to go right to the very edge of the paper, with no awkward white border? That seamless, edge-to-edge look is achieved using what's known in the industry as bleed. It’s a fundamental part of professional printing.
Here’s how it works:
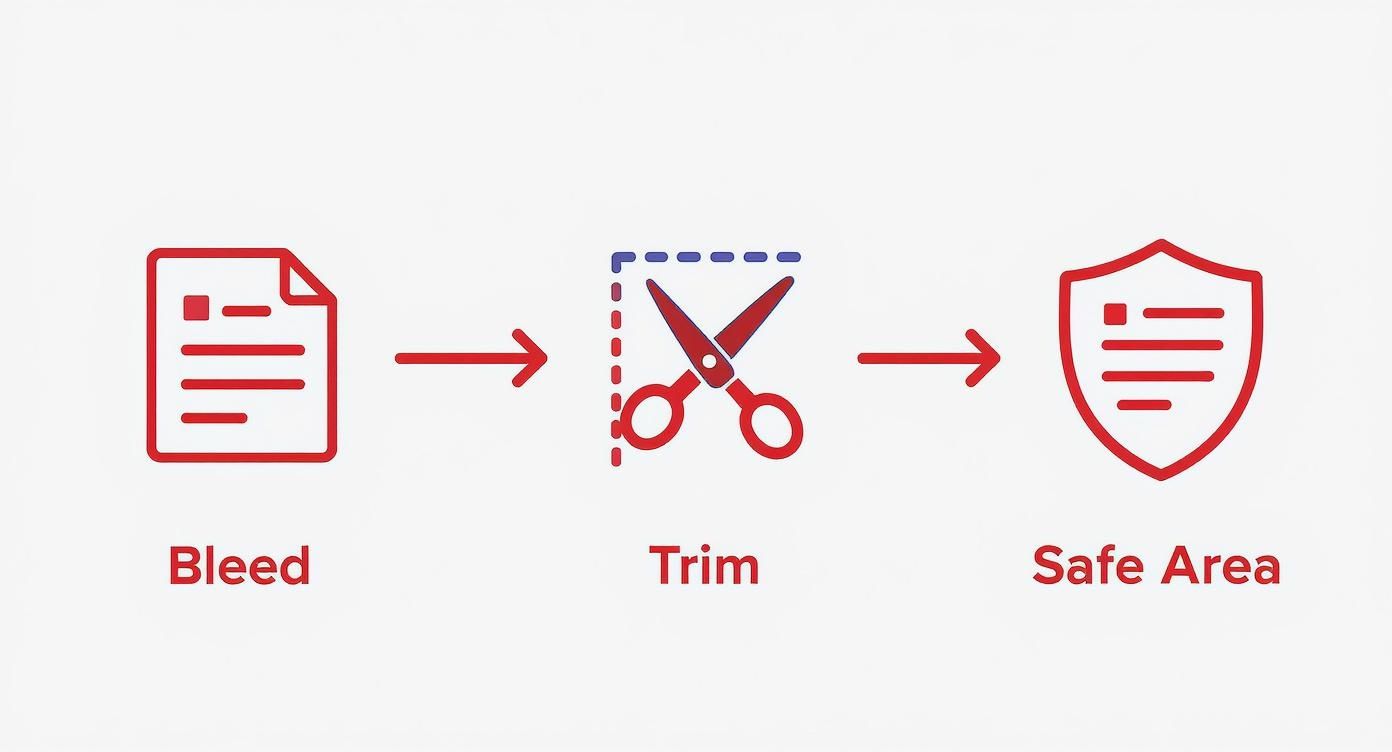
- Bleed: This is a small, extra margin you add to your design that extends beyond the final edge of the page. Here in New Zealand, the standard bleed is 3 mm on all sides.
- Trim: This is the line where the printer's guillotine will physically cut the paper to its final size, whether that's an A4 brochure or an A5 flyer.
- Safe Area: This is an inner margin, usually another 3-5 mm inside the trim line. You absolutely must keep all your important text, logos, and contact details inside this zone to ensure they don't get accidentally chopped off.
This simple diagram shows how these three elements work together to guarantee a perfect cut every time.
The bleed essentially gives the printer a tiny bit of wiggle room. Even if the cutting blade is a fraction of a millimetre off, that extra colour will ensure there are no white edges.
Why It Matters: Without bleed, even the tiniest shift during the trimming process can leave an ugly, unprofessional-looking sliver of white paper along the edge of your finished prints. By extending your background into the bleed area, you prevent this from ever happening.
Getting Your Resolution and Colours Right
Once you've set up your document with the right margins, the next check is to make sure your images and colours are ready for print. Something that looks sharp and vibrant on your computer screen can sometimes come out blurry or dull on paper if it isn’t prepared correctly.
The clarity of printed images all comes down to resolution, which we measure in Dots Per Inch (DPI). For websites and screens, 72 DPI is perfectly fine. But for high-quality print work, the industry standard is 300 DPI. If you supply a file with a lower resolution, you're almost guaranteed to get a blurry or pixelated result.
Colour accuracy is the other major checkpoint. What you see on screen isn’t always what you get on paper, and it boils down to two different colour systems. It’s well worth understanding color modes like CMYK vs RGB for print, as this directly impacts the final look.
- RGB (Red, Green, Blue): This is the colour mode for digital screens. Your monitor, phone, and TV create colours by mixing light. It’s an "additive" process.
- CMYK (Cyan, Magenta, Yellow, Black): This is the colour mode for professional printing. Printers create colours by mixing ink on paper. It’s a "subtractive" process.
Because the RGB system (light) can produce a wider, brighter range of colours than the CMYK system (ink), some vibrant colours—like neon greens or electric blues—simply can't be replicated on paper.
By converting your files to CMYK before you send them to the printer, you’ll get a much more accurate preview of the final colours and avoid any nasty surprises. For best results, always set your design software to CMYK mode right from the very beginning.
Working with Your Local NZ Printer
You've picked the perfect paper size and prepped a flawless digital file. That's a massive win, but there's one final step that brings it all together: your relationship with your printer. A strong, clear collaboration isn't just a nice-to-have; it's the secret sauce for turning what’s on your screen into something tangible you're genuinely proud of.
Think of a good local printer, like us here at SONI DESIGN, as part of your team. When you treat the process like a partnership, you sidestep expensive mistakes and ensure the final product looks exactly how you imagined—or even better.
Speaking the Same Language
To get the best results, it helps to know a bit of the lingo. It’s not about becoming an expert overnight, but understanding a few key terms ensures you and your printer are on the same page. This clarity makes quoting faster and far more accurate.
When you first get in touch, being able to nail down these details will make everything run smoother.
- Paper Weight (GSM): This is all about the paper's thickness, measured in Grams per Square Metre. To give you a feel for it, standard office paper is about 80 GSM, while a sturdy business card is usually up around 350 GSM or more.
- Paper Finish: Are you after a vibrant, shiny look or something more understated? Gloss finishes are brilliant for making colours pop, especially in photos. A matte or uncoated finish, on the other hand, has a sophisticated, non-reflective feel that's perfect if you need to write on it.
Knowing these terms transforms the conversation from a vague "I need some flyers" to a crystal-clear "I'm after 500 A5 flyers on 150 GSM gloss stock." That precision is exactly what a printer needs.
Questions to Ask Before You Start
Before you give the green light on a print run, asking a few simple questions can save you a world of time and hassle. A good printer will always be happy to walk you through the details, so don't be shy.
Pro Tip: For any large or important job, always ask for a physical proof. A digital file on a backlit screen will never look the same as ink on paper. Seeing and feeling a real sample is the only way to be 100% sure you love the colour, stock, and finish before committing to the full run.
Here are a few essential things to ask:
- What file formats do you prefer to work with (e.g., PDF, AI, INDD)?
- What's your typical turnaround time for a job like this?
- Can you show me a sample of the paper stock you're recommending?
- Do you have a pre-print checklist I can use to make sure my file is ready?
Your Pre-Conversation Checklist
Want to make that first call or email super productive? Have these details ready to go. It helps your printer give you a sharp quote and a realistic timeline right from the get-go.
- Project: What are you printing? (e.g., A4 brochures, DL flyers, business cards).
- Quantity: How many do you need?
- Paper: Do you have a paper weight (GSM) or finish in mind?
- Timeline: What's your deadline? When do you need the prints in hand?
- Budget: Is there a budget you're working towards for this project?
Coming prepared with this info shows you've done your homework and helps your printer give you their best advice. A little bit of prep work makes a huge difference in building a great printing partnership.
Your Top Questions About NZ Paper Sizes Answered
Alright, let's wrap things up by tackling some of the questions we hear most often. Think of this as a quick FAQ session to clear up any lingering confusion and get you ready to tackle your next print project with confidence. These are the real-world queries that Kiwi businesses run into all the time.
We’ve kept the answers clear and straight to the point, so you can find what you need without the waffle.
What Is the Standard Paper Size in New Zealand?
Hands down, the standard paper size for pretty much everything in New Zealand is A4. Measuring 210 x 297 mm, it’s the go-to for business, government, and everyday use. We adopted the international ISO 216 standard decades ago, and A4 has been the cornerstone ever since.
Sure, you'll see other sizes out in the wild—like A3 for cafe menus or A5 for flyers—but A4 is the default for letters, reports, and internal documents. It's the size you'll encounter most often.
Are US Paper Sizes Like 'Letter' or 'Legal' Used in NZ?
Simple answer: no. US sizes like Letter (8.5 x 11 inches) and Legal (8.5 x 14 inches) aren't used here. This is a classic trip-up, especially since a lot of software defaults to American settings.
If you try to print a document set up for US Letter on A4 paper, you’re in for a world of frustration. You'll end up with wonky margins, and parts of your content will likely get chopped off. The fix is easy: always double-check that your document's page setup in Microsoft Word or Google Docs is set to A4 before you start designing.
Here's a pro tip: The very first thing you should do when starting a new document for a New Zealand audience is check the page settings. Setting it to A4 from the get-go will save you from major headaches and costly reprints down the line.
How Do I Choose the Right Paper Weight?
Paper weight, measured in Grams per Square Metre (GSM), is all about the feel, thickness, and sturdiness of your final product. Picking the right GSM is key to making sure your print job looks and feels the part.
Here’s a quick guide to get you started:
- 80-100 GSM: This is your everyday, lightweight office paper. It's perfect for internal documents and standard printing.
- 120-150 GSM: A noticeable step up in quality. This stock feels more substantial and professional, making it great for things like résumés, formal letters, or quality flyers.
- 150-200 GSM: This range has a bit more backbone, making it a popular choice for brochures and posters that need to hold up to a bit of handling.
- 250-350 GSM: Now we're getting into heavy, card-like territory. This stock is reserved for items that need to be rigid and durable, like business cards, invitations, and presentation folders.
When in doubt, just ask us for a sample. There's no substitute for actually feeling the paper in your hands.
What’s the Easiest Way to Scale a Design?
This is where the A-series really shines. Because every size in the series shares the exact same aspect ratio, scaling your design up or down is incredibly simple, and your layout stays perfectly in proportion.
Need to take an A4 design up to A3? Just enlarge it by 141%. Want to shrink that same A4 down to A5? Reduce it to 71%. Most design software and modern printers can even do this for you automatically. It’s this clever bit of maths that makes the whole system so efficient.
Getting your head around paper sizes NZ printers use can feel a bit technical, but it’s the foundation of a professional-looking result. For help with your next project, from picking the perfect paper to getting your files print-ready, the team at SONI DESIGN is here for you. Let's create something extraordinary together!
Leave a Comment
Stay home & get your daily
needs from our shop
Start You'r Daily Shopping with Nest Mart