
Your cart is currently empty.

So, you're thinking about getting some custom mugs printed? Whether it’s a one-off for a mate's birthday or a whole run of branded mugs for your business, the process in New Zealand is actually pretty straightforward.
It really boils down to three key things: knowing what you want, getting the design sorted, and finding a great local printer to make it happen.
Your Guide to Custom Mugs in New Zealand
Taking an idea from your head and turning it into a physical, high-quality product is a pretty cool feeling. Custom mugs are brilliant for everything—personal gifts, promo gear, or even starting your own creative side hustle. They're practical, they last, and they leave a real impression.
The journey from a simple concept to a finished mug involves a few important decisions along the way, each one influencing how awesome the final product looks and feels.
This infographic gives you a quick rundown of the typical workflow.
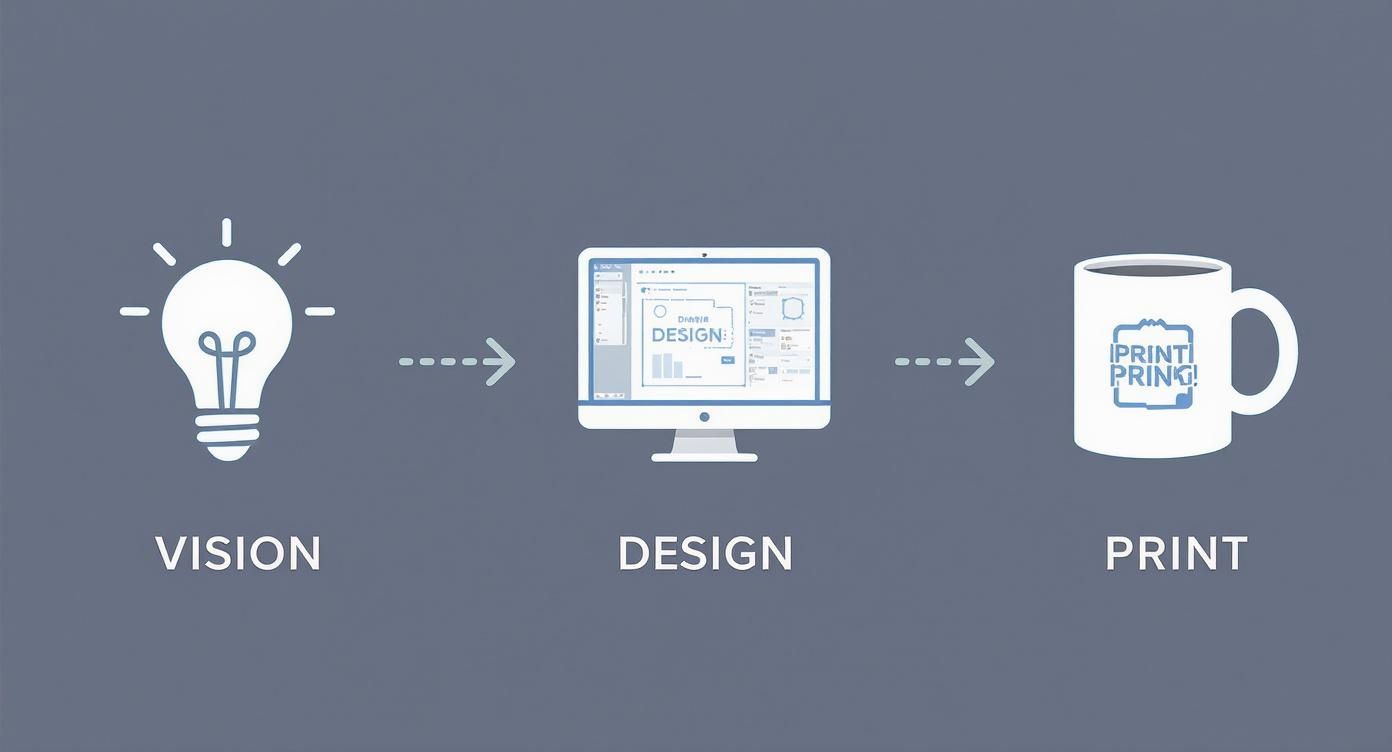
As you can see, it all starts with a clear idea. From there, you get into the nitty-gritty of the design before handing it over for professional printing. Nail each of these stages, and you'll end up with a result you can be proud of.
Why Quality Matters
Picking the right partner for mug printing in NZ isn't just about slapping a picture onto a bit of ceramic. You're looking for real durability, colours that pop just right, and a finish that feels truly professional. A properly printed mug should be able to handle daily life—we're talking countless trips through the dishwasher—without the design fading, peeling, or chipping away.
Printing is a big deal here in NZ. The industry is on track to generate $1.4 billion in revenue for the 2025-26 financial year, with around 775 businesses operating across the country. That's a lot of capability right on our doorstep, but it also means you need to be selective and find a printer who understands what modern customers expect in terms of quality. You can dive deeper into the New Zealand printing industry statistics on ibisworld.com.
Key Takeaway: Think of your custom mug as a direct reflection of your brand or the message you're sending. Putting a little extra into quality printing means it won’t just look great on day one—it'll keep looking sharp for years.
In this guide, we'll walk you through everything you need to know to get it right, from choosing the perfect mug style to prepping your artwork so it prints flawlessly.
Choosing the Right Mug for Your Project
Before you even think about the design, the first real decision is the mug itself. It might seem like a small detail, but getting this right is the foundation of a great custom product. It’s not just about what looks good; it’s about matching the mug to its purpose and the person who’ll be using it every day.
The material, size, and style you choose will all affect how your design looks and how well the mug holds up over time.
Think about the end-user. Are you creating a corporate gift for clients always on the move? A tough, insulated travel mug makes a lot more sense than a delicate ceramic one. On the other hand, if you're printing a treasured family photo, a classic ceramic mug is the perfect canvas. Every style serves a different purpose, which is why this first step is so critical for successful mug printing in NZ.
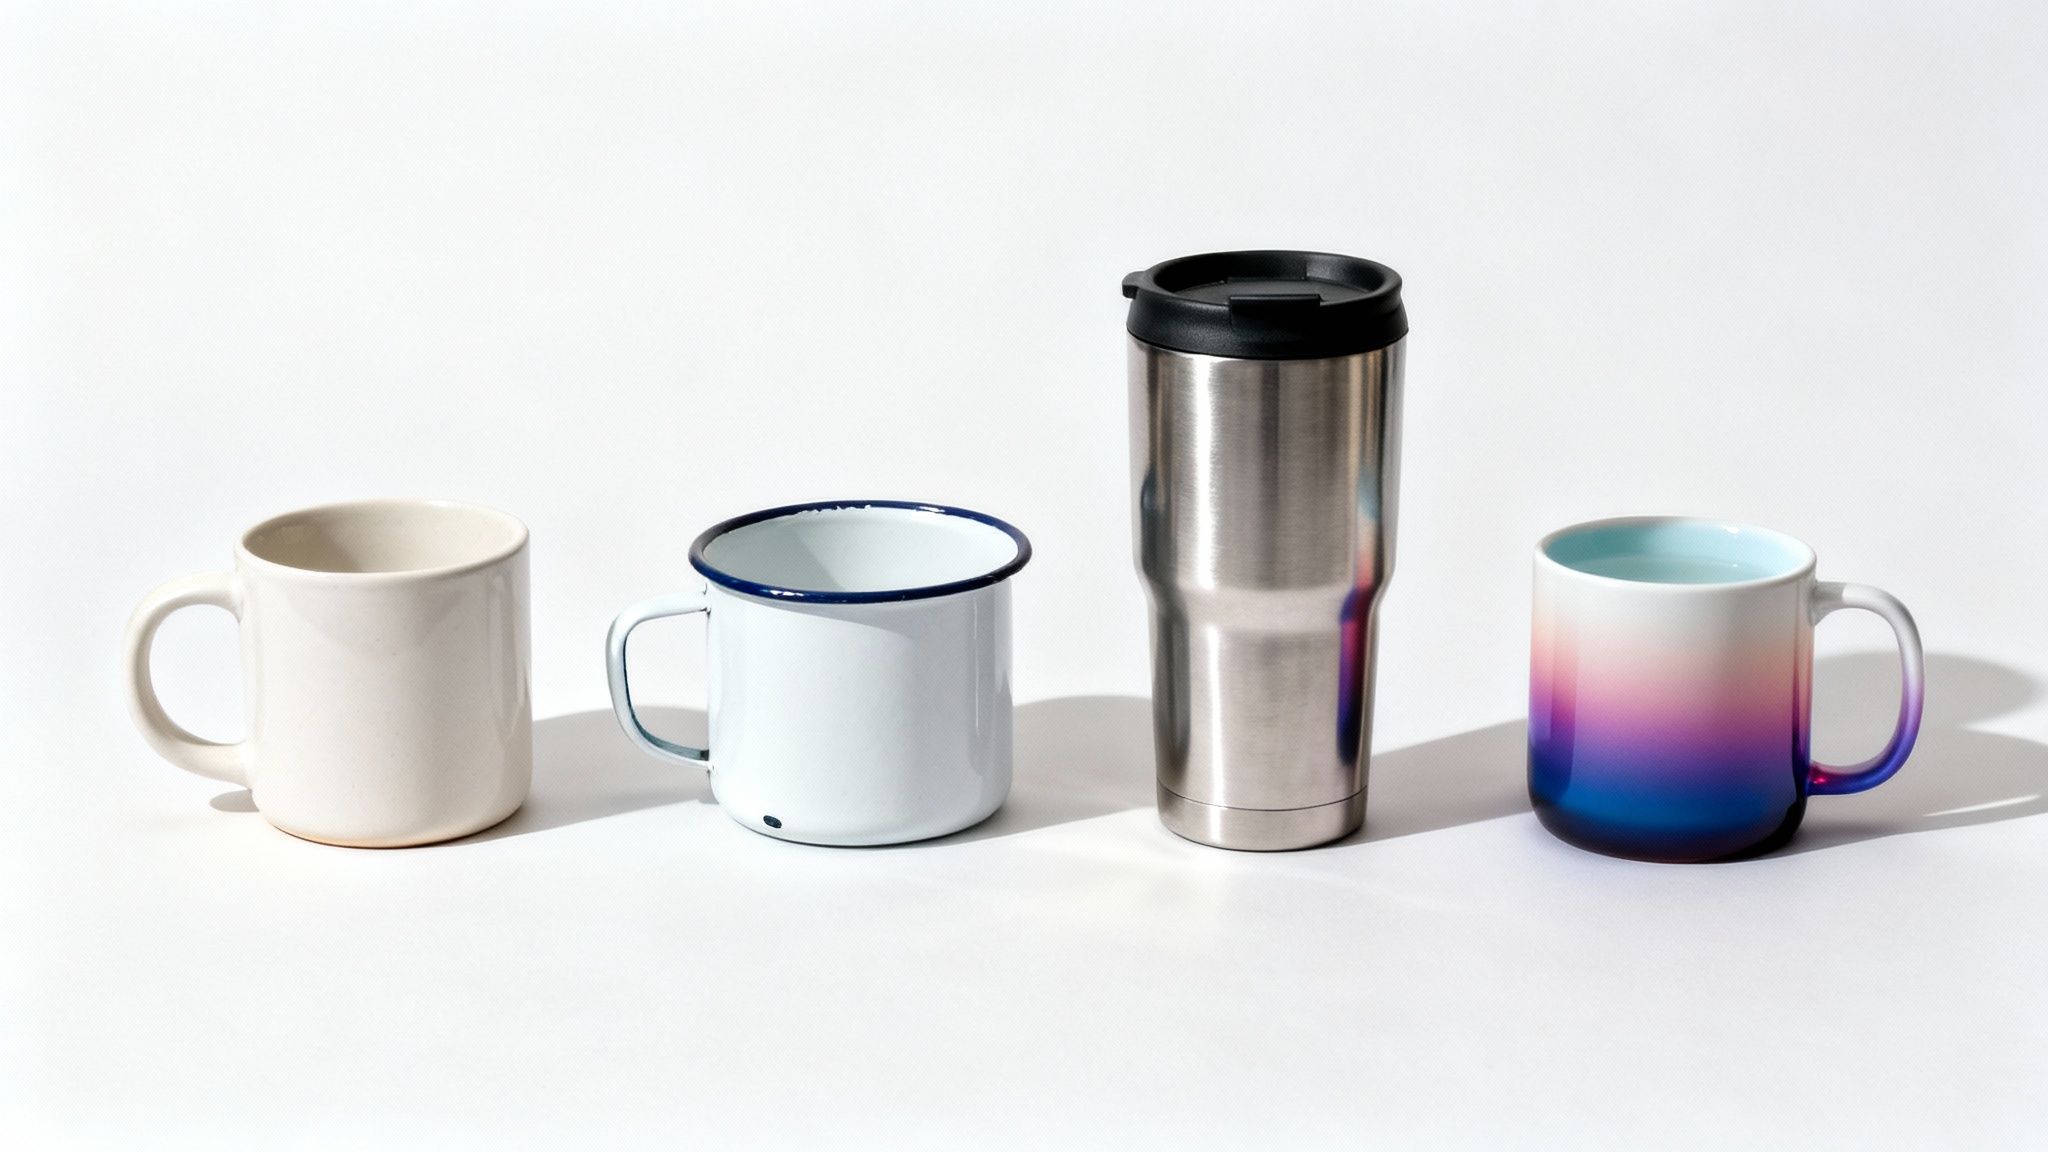
Comparing Popular Mug Styles
To help you narrow it down, let's look at the most common options you'll find from New Zealand suppliers. Each one has its own personality and practical advantages.
- Classic Ceramic Mugs: These are the undisputed champions for a reason. Their smooth, bright white surface makes colours pop, which is exactly what you want for detailed photos or vibrant company logos. They're budget-friendly and typically come in standard 11oz (about 325ml) or larger 15oz sizes for those who need a serious caffeine hit.
- Durable Enamel Mugs: If you're going for a rustic, retro feel, enamel is the way to go. Perfect for outdoor brands, camping enthusiasts, or cafés with a vintage aesthetic, these mugs are lightweight but incredibly tough. They can handle a few bumps and drops without a problem.
- Sleek Travel Mugs: Built for life on the go, stainless steel travel mugs are all about practicality. The double-walled insulation keeps coffee hot for hours, and a secure lid means no nasty spills in the car. They have a premium feel, making them an excellent choice for high-value promotional gifts.
One style that always gets a reaction is the colour-changing mug (or 'magic mug'). It starts off as a plain black mug, but as soon as you pour in a hot drink, the heat-sensitive coating fades away to reveal your hidden design. It’s a fantastic trick for surprise gifts or clever marketing campaigns that you want people to remember.
To make things even clearer, here’s a quick comparison of the top choices for your NZ project.
Mug Style Comparison for NZ Projects
| Mug Type | Best For | Material | Key Feature |
|---|---|---|---|
| Classic Ceramic | Photo gifts, promotional items, daily use | Ceramic | Bright white surface makes colours vibrant. |
| Enamel | Camping, outdoor brands, retro designs | Steel with enamel coating | Lightweight, durable, and shatterproof. |
| Travel Mug | Commuters, corporate gifts, on-the-go use | Stainless Steel | Double-walled insulation keeps drinks hot/cold. |
| Colour-Changing | Surprise gifts, memorable promotions | Coated Ceramic | Design is revealed when hot liquid is added. |
Choosing the right style is really about aligning the product with the person or brand it represents.
Key Features to Consider
Beyond the basic type, a few small details can be the difference between a good mug and a great one.
First up: is it dishwasher and microwave safe? This is a huge deal for daily use. Mugs printed using dye-sublimation are generally safe for both, as the ink is infused directly into the mug's special coating. This process ensures your design won’t fade, peel, or wash away.
Here's a key takeaway from my experience: always prioritise function. A beautiful mug that isn't practical will quickly end up at the back of the cupboard. Make sure your choice fits the user's actual lifestyle.
Finally, don't forget the handle and overall shape. A comfortable, ergonomic handle makes all the difference in that morning coffee ritual. By thinking through these simple, practical elements, you guarantee the final product is not only a good-looking mug but one that’s a genuine pleasure to use.
Getting Your Artwork Print-Ready
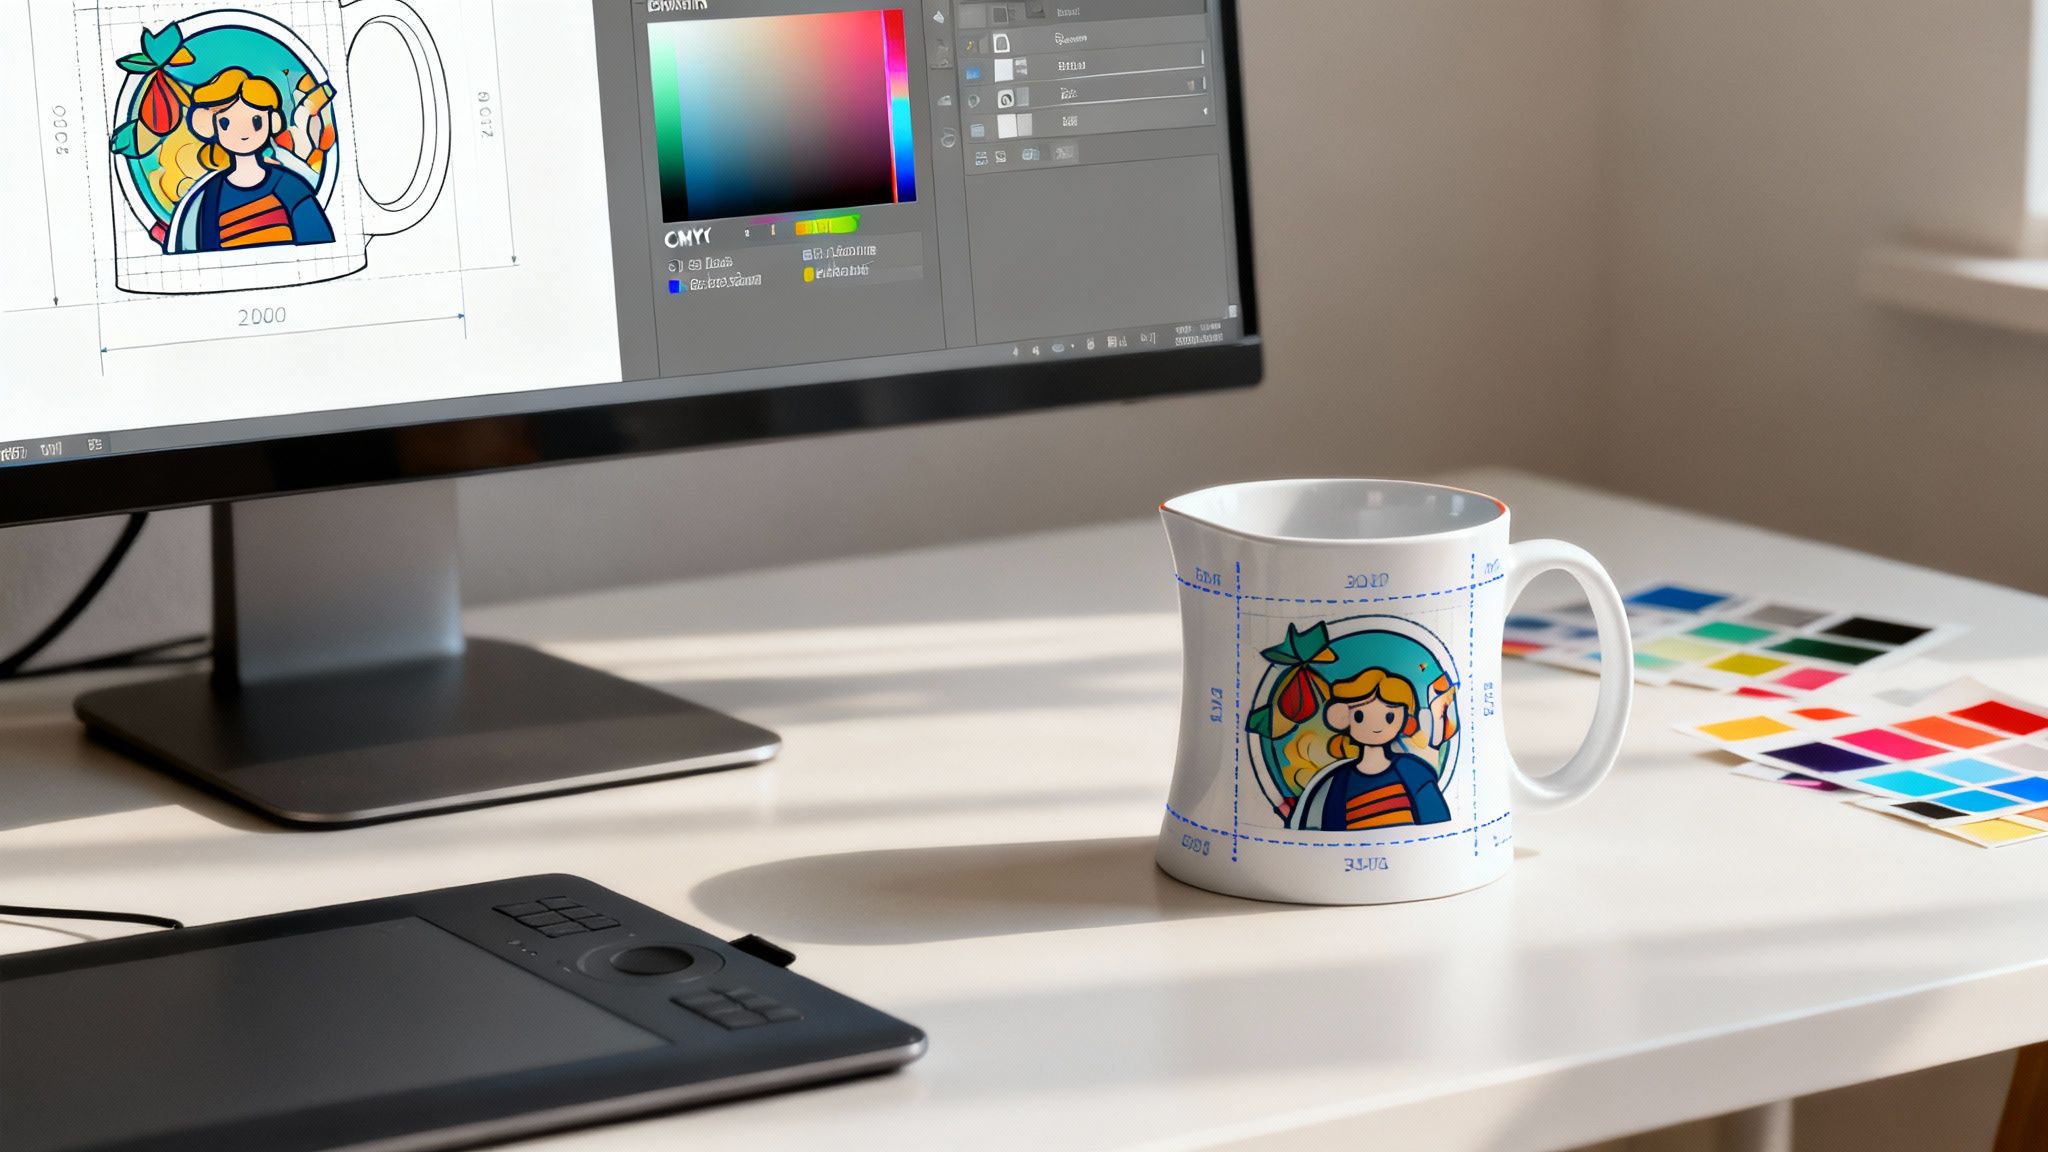
You can have the best design idea in the world, but if the artwork file isn't up to scratch, the final product will fall flat. Preparing your design for mug printing in NZ isn’t overly technical, but nailing a few key details is the difference between a professional-looking mug and a blurry disappointment.
It's all about making sure what you see on your screen translates perfectly onto a physical, curved surface. Get this part right, and you’ll avoid fuzzy images, off-brand colours, and frustrating delays.
The first thing to get your head around is the two main types of image files: vector and raster. They each have their place, and picking the right one is the foundation for a crisp, clean print.
Vector vs. Raster: Which File Do I Need?
Don't let the jargon intimidate you; this is simpler than it sounds. The easiest way to think about it is that raster images are like digital paintings made from thousands of tiny dots (pixels), while vector images are drawings built from mathematical lines and curves.
- Raster Files (JPG, PNG, TIFF): These are your typical photo files. Because they’re made of a fixed grid of pixels, they’re perfect for detailed images like photographs. The big catch? If you try to enlarge a low-quality raster image, it just stretches the pixels, resulting in that dreaded blurry, blocky look.
- Vector Files (AI, EPS, SVG): These files are created using mathematical equations. This means you can scale a vector design to any size imaginable—from a tiny logo on a pen to a massive billboard—and it will stay perfectly sharp. For logos, text, and most graphics, vector is king.
Here in New Zealand, pretty much any professional printer will tell you they prefer vector files for logos and illustrations. It guarantees the sharpest possible result every time. If you're printing a photograph, however, a high-resolution raster file is exactly what you need.
Setting Up Your File for Success
Once you’ve sorted your file type, a few technical tweaks will ensure your design survives the jump from screen to ceramic. It’s easy to overlook these details, but they make all the difference.
Resolution Is Everything
If you're working with a raster image (like a photo), its resolution needs to be 300 DPI (dots per inch). This is the gold standard for high-quality printing. An image you've pulled from a website is likely only 72 DPI and will look jagged and pixelated on a mug. Always, always start with the highest-quality version of the image you can get your hands on.
CMYK for True-to-Life Colour
Your computer screen uses an RGB (Red, Green, Blue) colour model, which is based on light. Printers, on the other hand, work with ink and use the CMYK (Cyan, Magenta, Yellow, Black) model.
A classic mistake is sending an RGB file to a printer. The printing software has to convert it to CMYK, and this often leads to noticeable colour shifts. That vibrant electric blue on your screen might turn into a dull, flat navy on the final mug. To get the colour you expect, always set your document’s colour mode to CMYK right from the start.
Respect the Bleed and Safe Zones
Finally, take a close look at the template provided by your printer. It will show two critical areas:
The bleed area is a small margin of your design that extends past the final trim line. It’s there as a safety net, ensuring no ugly white gaps appear if the print shifts a tiny bit during production.
The safe zone is the opposite—it's the inner area where all your crucial elements, like text and logos, should be kept. Placing anything important outside this zone risks it getting cut off or warped around the mug's curves.
A Look at Mug Printing Methods in NZ
Not all printing methods are created equal. The technique used for your mug printing in NZ directly affects everything from the colour vibrancy to how well the design survives the daily grind of coffee and dishwashers. To get the result you’re picturing, it’s worth understanding what’s happening behind the scenes.
When you start looking at what local Kiwi printers offer, you'll see a few different terms pop up. Each one refers to a specific process with its own pros and cons, and knowing the basics will help you match your design, budget, and quality needs with the right technology.
It's no surprise that personalised gear is a booming market. Globally, custom printing was a USD 31.48 billion industry in 2023, and it’s on track to hit USD 66.50 billion by 2032. That massive growth, which you can read more about in this custom printing market report, shows just how much people want unique products—and custom mugs are a huge part of that here in New Zealand.
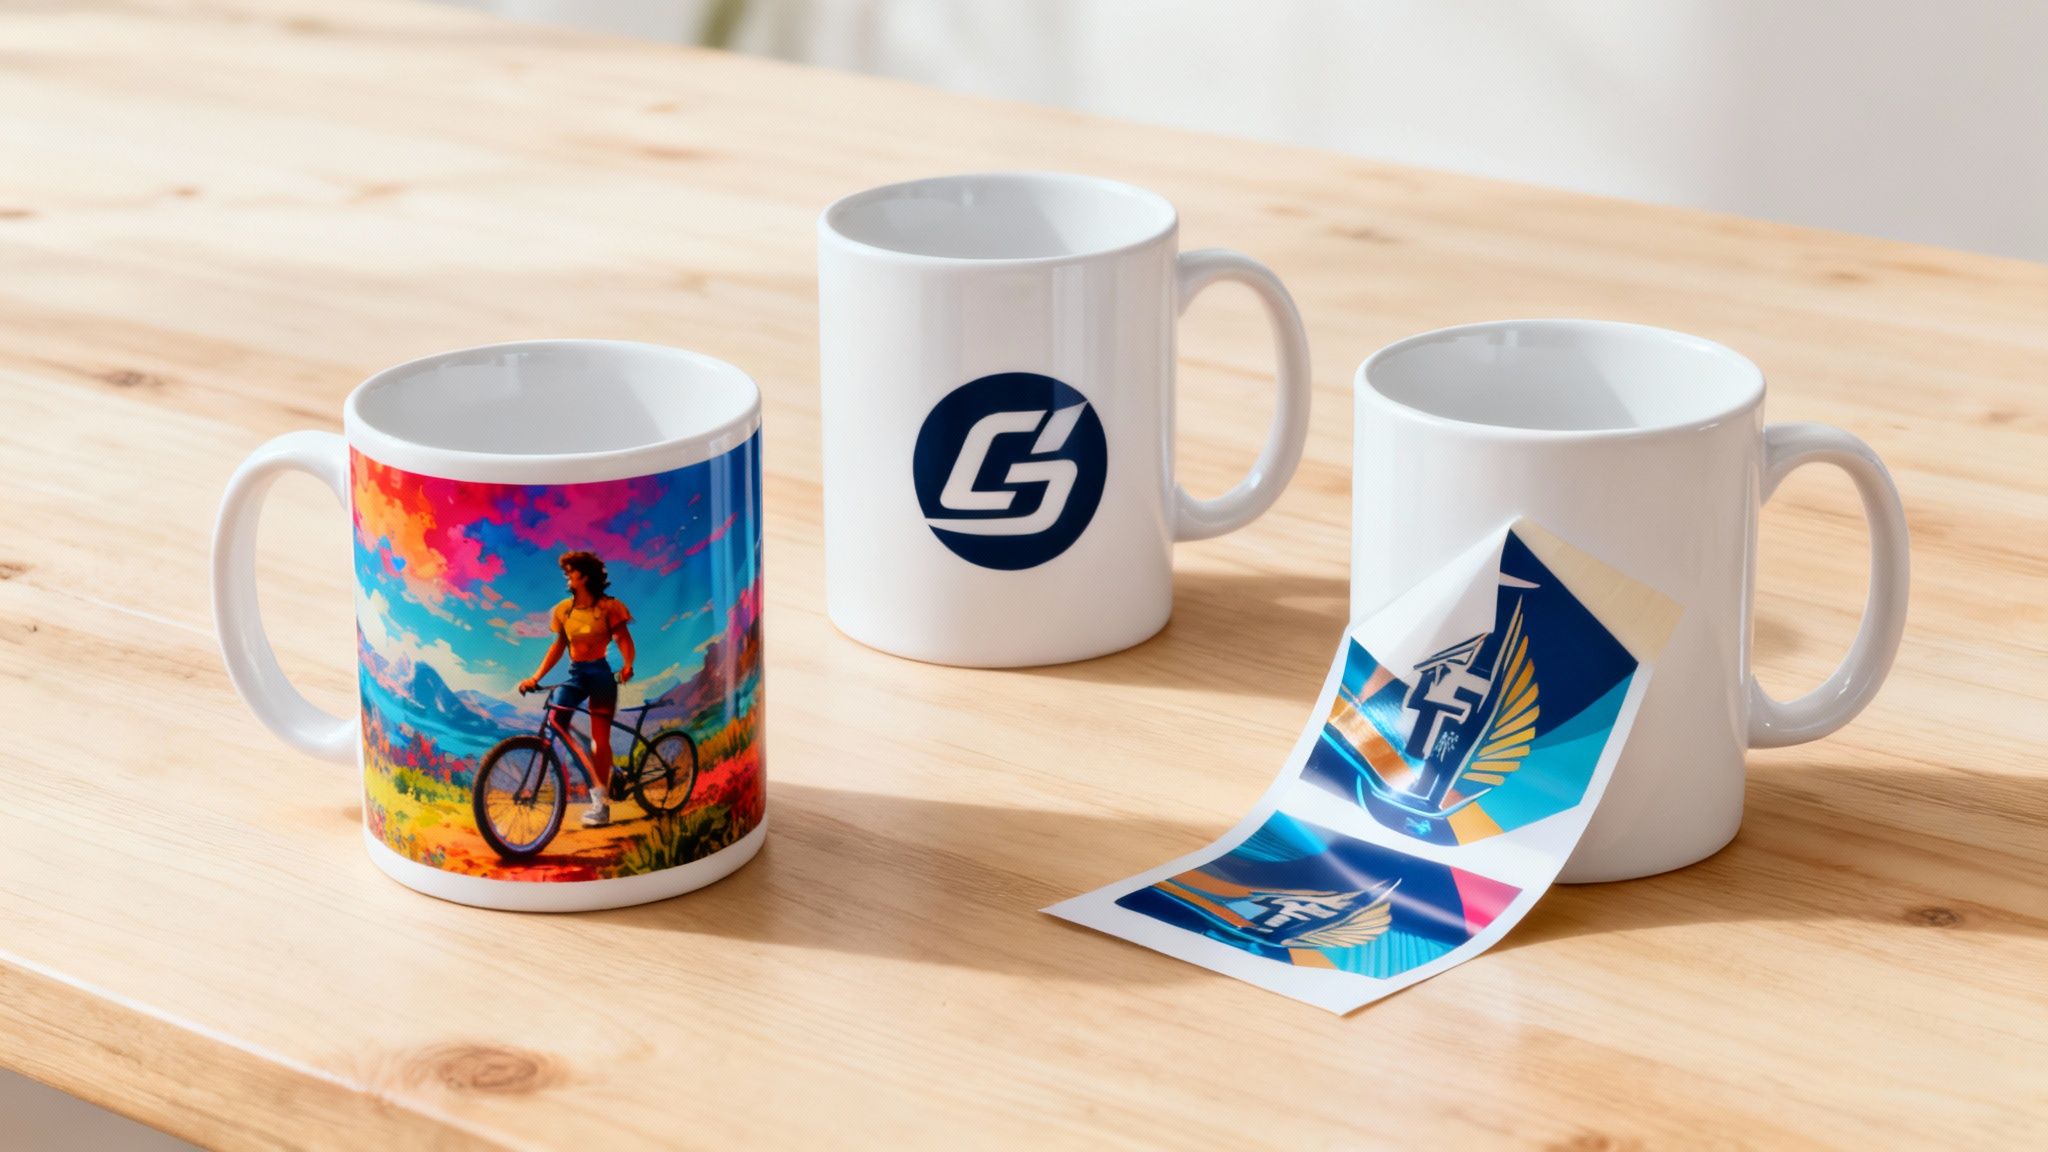
Dye-Sublimation: The Go-To for Quality
If you’re after a mug with a full-colour photo, intricate gradients, or a super-detailed logo, dye-sublimation is almost certainly the method your printer will use. It’s a brilliant process that delivers permanent, photo-quality results.
Here’s how it works: instead of just laying ink on top of the mug, dye-sublimation uses special heat-sensitive inks that turn into a gas under pressure. This gas then seeps into the polymer coating of the mug, becoming a permanent part of the surface itself. Once it cools, the design is locked in for good.
There are a few solid reasons why this technique is the industry favourite:
- Stunning, Full-Colour Prints: It’s unbeatable for reproducing vivid, photographic images with smooth colour transitions.
- Built to Last: Because the ink is fused into the coating, the design will never crack, peel, or fade away with use.
- Dishwasher and Microwave Safe: Sublimated mugs are made for the real world and can handle the heat of a microwave or a run through the dishwasher without any trouble.
Here's a pro tip: You can always spot a high-quality sublimated mug because you can't feel the print at all. Run your finger over the design—it should be completely smooth. That's the sign of a professional finish.
Screen Printing: The Smart Choice for Bulk Orders
Got a simple one or two-colour logo and need a whole lot of mugs? Screen printing is an incredibly budget-friendly way to go. This classic technique works by pushing ink through a stencilled mesh screen directly onto the mug's surface.
A new screen has to be made for every single colour in the design, which makes it less than ideal for small orders or complex, multi-coloured images. But for large runs—think corporate giveaways or event merchandise—it’s incredibly efficient and delivers a great-looking, durable result.
Other Techniques You Might See
While they’re less common for the classic ceramic mug, you might come across a few other methods. Direct-to-film (DTF) transfers, for instance, are a newer technology where a design is printed onto a special film and then heat-pressed onto the item. It's gaining popularity because it works well on a wide range of materials.
Having a bit of knowledge about these processes means you can have a much better chat with your printer. You’ll be able to make sure the method they’re using is a perfect fit for what you have in mind.
Getting Your Order Sorted and Signing Off the Proof
You’ve picked your perfect mug and have your artwork ready to roll. Brilliant. Now comes the part where it all comes together—placing the order and signing off on the design. This is the final, crucial step in any mug printing NZ project, and it's all about making sure you and your printer are on the same page.
Getting this right is your ticket to avoiding surprise costs, annoying delays, or that sinking feeling when the final product isn't quite what you had in mind. Think of it as your last chance to spot any little issues before your mugs go into production.
Nailing Down an Accurate Quote
To get a quote you can actually rely on, you need to give your printer all the key details right from the start. A vague request will only get you a vague price, so specificity is your best friend here.
Your printer will need a few key pieces of information to give you an accurate cost:
- Which mug are you after? Be specific, like an "11oz white ceramic" or a "15oz black magic mug."
- How many do you need? Pricing is almost always tiered, so the quantity is a big deal.
- Your print-ready artwork file. They need to see it to know what they're working with.
- The number of colours in your design, which is especially important for screen printing.
- Your ideal delivery date. This lets them confirm if they can hit your deadline.
It helps to know how printers work out their pricing. Things like setup fees, the cost per mug, and shipping all factor into the final number. Industry bodies like PrintNZ sometimes publish data on charge-out rates and financial benchmarks, which helps keep pricing fair across the board. You can get a sense of the printing industry's operational insights on newzealandprinter.co.nz.
That All-Important Digital Proof
After you’ve placed your order, you’ll get a digital proof back from the printer. This is simply a mockup showing how your design will look on the actual mug. Whatever you do, don't rush this step. This is your last chance to approve everything before the whole batch gets printed.
When you're looking over the proof, check these things with a fine-tooth comb:
- Spelling and Grammar: Read every single word. Then read it again. Typos are sneaky.
- Colour Accuracy: Do the colours look right? Keep in mind that your screen might show colours slightly differently, but they should be a very close match to what you're expecting.
- Placement and Size: Is your logo dead centre? Is the text exactly where it should be and scaled correctly?
- Overall Layout: Does it all look balanced and just like you imagined?
Key Takeaway: The proof is your safety net. Once you approve it, you're giving the final go-ahead and confirming every detail is correct. Any mistakes found after this point will likely be on you, so take your time and be thorough.
Once you give the green light, your order heads into the production queue. Most printers in NZ work on a turnaround of about 5-10 working days plus shipping time. Of course, this can vary depending on how busy they are and how complex your job is. A little clear communication goes a long way to making sure the whole process is smooth sailing, from quote to delivery.
Got Questions About Mug Printing? We've Got Answers
When you're ready to hit 'go' on a custom mug order, a few last-minute questions always seem to pop up. Getting these sorted is key to making sure there are no surprises and that the final product is exactly what you envisioned.
Let's run through some of the most common queries we get about mug printing in NZ. This should help you lock in those final details with confidence, whether you're ordering a single heartfelt gift or a big batch for a corporate giveaway.
What's the Minimum Order for Custom Mugs?
This is a big one, and honestly, the answer varies quite a bit from one printer to the next. It really comes down to who you're working with and what they specialise in.
Some printers are set up perfectly for one-off personalised gifts, making it easy to create a single, unique mug for a birthday or special occasion.
On the other hand, most New Zealand printers doing promotional or business orders will have a minimum order quantity (MOQ). You'll typically find this sits somewhere between 12 and 36 mugs. Why? Well, there's a fair bit of setup involved in any print job, and spreading that initial cost across a larger batch makes each individual mug much more affordable.
A good rule of thumb to remember is that the price per mug almost always drops as your order quantity goes up. Ordering 100 mugs will be significantly cheaper per unit than ordering just 20. It never hurts to ask about price breaks for larger quantities!
Are the Printed Mugs Dishwasher and Microwave Safe?
The durability of a printed mug all comes down to the printing method. For most custom mugs you'll find in NZ, the answer is a resounding 'yes'—and you can thank the dye-sublimation process for that.
- Dye-Sublimation: Mugs printed this way are generally dishwasher and microwave safe. The ink is actually infused into a special coating on the mug, so it becomes a permanent part of the surface. It won’t peel, crack, or fade with everyday use.
- Specialty Prints: Now, if your design involves things like metallic inks, glitter finishes, or other special effects, it might need a bit more TLC. These types of mugs often need to be hand-washed to keep the finish looking its best.
Any reputable printer will give you clear care instructions. If convenience and durability are your top priorities, just double-check that your chosen mug and print style are good to go in both the dishwasher and microwave.
How Long Does Mug Printing Take in New Zealand?
Planning your timeline is super important, especially if you have a specific event or deadline looming. A standard turnaround time for most printers in New Zealand is between 5 to 10 working days, starting from the moment you sign off on the final artwork proof.
Remember, that doesn't include shipping time, so be sure to factor that in. A few things can influence the timeline:
- Order Size: A massive order of 500 mugs will naturally take longer than a small batch of 20.
- Design Complexity: A simple, one-colour logo is much quicker to set up than a detailed, full-wrap photographic print.
- The Printer's Schedule: During busy seasons like the lead-up to Christmas, production times can sometimes stretch out a bit.
If you find yourself in a tight spot, don't panic. Many companies offer an express or rush service for an extra fee. It's always worth asking if you're up against a tight deadline.
Can I Get a High-Quality Photo Printed on a Mug?
You sure can! Photo mugs are incredibly popular for everything from Mother's Day gifts to Secret Santa presents. The secret to a stunning result is all in the quality of the image file you provide.
For the best possible outcome, you have to start with a high-resolution photo. A picture you've saved from a social media feed will almost certainly look pixelated and blurry when it's printed. Instead, track down the original file from your digital camera or smartphone.
Make sure it’s saved at a resolution of at least 300 DPI (dots per inch) at the size it will be printed on the mug. The dye-sublimation method is fantastic for reproducing photos with sharp details and vibrant, true-to-life colour.
Ready to bring your creative vision to life? At SONI DESIGN, we specialise in creating high-quality, custom-printed mugs that tell your story. Let's create something extraordinary together!
Leave a Comment
Stay home & get your daily
needs from our shop
Start You'r Daily Shopping with Nest Mart