
Your cart is currently empty.

A magnetic and dry erase board is one of those brilliantly simple tools that punches way above its weight. It’s a single surface that does two jobs perfectly: it’s a canvas for writing down your thoughts and wiping them away, but it's also a magnetic organiser for pinning up important papers. That double-duty capability is what makes it such a powerhouse for planning and teamwork.
Your All-in-One Visual Command Centre
Think about having one central spot where your team’s brainstorming notes, project timelines, and crucial updates all live together. That’s exactly what a magnetic and dry erase board delivers. It’s a step up from older tools because it brings together the free-flowing creativity of a whiteboard and the practical, get-it-done organisation of a bulletin board.
You can stop juggling different surfaces for different tasks. No more scribbling on a whiteboard over here and pinning memos to a corkboard over there. With this, you can sketch out a new workflow with markers and stick the printed project brief right next to it with a magnet. Everything you need is in one place, organised and easy to see.
Blending Creativity with Organisation
The real magic is how it supports both free-form thinking and structured planning. One minute it’s a blank space for a messy mind-map session, capturing those brilliant but fleeting ideas. The next, it’s a tidy dashboard showing project stages, who’s doing what, and key deadlines. This flexibility has made it a must-have in workplaces and classrooms all over New Zealand.
A magnetic and dry erase board isn't just a surface; it's a catalyst. It turns a passive wall into an active hub for communication, new ideas, and getting things done. It literally keeps everyone on the same page.
It's no surprise that these boards have become so popular in New Zealand over the past 20 years. You see them everywhere, from schools to corporate offices. Local suppliers now have a huge selection, so you can find anything from a small board for your home office to massive wall-to-wall installations. To get a feel for the options, check out the range of whiteboard sizes and options available locally from Magnets New Zealand.
Why Dual Functionality Matters
So, why is this combination of writing and sticking so powerful? Because the way we work isn't one-dimensional. A project always involves a mix of abstract thinking and concrete documents. A lesson plan needs both written notes and visual aids. A magnetic dry erase board is designed for exactly that reality.
Here’s why it works so well:
- Centralised Information: It keeps all your project materials in one highly visible spot, which cuts down on clutter and confusion.
- Enhanced Engagement: The hands-on nature of writing, erasing, and moving magnets around gets people more involved and participating.
- Improved Workflow: Teams can see an entire process laid out visually. It’s incredibly easy to track progress by simply moving a magnet or updating a note.
How Does a Magnetic Whiteboard Actually Work?
Ever stopped to wonder what’s going on behind the scenes of a magnetic dry erase board? It’s not magic, but a clever bit of engineering that’s a bit like a high-tech sandwich. Each layer has a specific job to do, and they all work together to give you that durable, versatile surface for brainstorming, planning, and teaching.
The board’s magnetic pull comes from its core. At its heart is a sheet of ferrous metal, usually steel or iron. This is the secret sauce that lets magnets stick firmly, so you can pin up documents, photos, or project notes without reaching for tape or tacks. This sturdy metal backing is really the foundation of the board's two-in-one functionality.
But the real genius is the part you write on—the surface that sits on top of this magnetic core. Its quality is what makes or breaks the board, determining how well it erases and how long it will last you.
It's All in the Surface
The writing surface is easily the most important part of the board. It has to be perfectly smooth and, crucially, non-porous. That means there are no microscopic holes for the ink to seep into and leave those annoying, stubborn stains we all hate. This non-porous quality is what allows the dry erase ink to just sit on top of the surface, ready to be wiped away cleanly.
There are a few different materials used to get this just right:
- Porcelain: This is the top-of-the-line option, sometimes called ceramic steel. A layer of ceramic is baked directly onto the steel core at incredibly high temperatures. The result is a rock-hard, scratch-resistant, and completely non-porous finish that’s often guaranteed to resist staining for decades.
- Painted Steel: A more budget-friendly choice, this involves applying a special dry erase paint directly to the steel core. It works well, but the surface is a bit softer, making it more prone to scratching and that dreaded "ghosting" if it gets a lot of heavy use.
- Glass: Sleek, modern, and naturally non-porous, glass boards are fantastic at resisting stains. To make them magnetic, a thin sheet of steel is simply placed behind the glass panel.
At the end of the day, the principle is simple: a magnetic base combined with a slick, sealed topcoat. This clever construction ensures that what you write stays on the surface, and what you stick stays put.
The Science of the humble Whiteboard Marker
The final piece of this puzzle is the ink itself. A dry erase marker isn’t just ink; it's a special formula with three key ingredients: coloured pigments, a solvent, and a polymer that acts as a "release agent."
When you write on the board, the solvent carries both the pigment and the polymer out of the pen. Within seconds, the solvent evaporates, leaving behind the dry pigment nicely wrapped up in the polymer. Because this polymer doesn't want to stick to the non-porous surface, it lifts off with a simple wipe of an eraser. This clever bit of chemistry is what stops the ink from permanently bonding with the board, giving you a clean slate every time.
It’s this kind of technology that’s key to the high-performance laminate surfaces used in many professional settings across New Zealand. For example, some Kiwi suppliers offer laminates with a glossy white finish specifically engineered for this very purpose. You can check out the technical details for these high-performance magnetic laminates from Laminex New Zealand to see how they’re made.
How to Choose the Right Board for Your Needs
Picking out the perfect magnetic dry erase board is about more than just getting the size right. It’s really about matching the board's surface to how you’ll actually be using it day-to-day. Get this part right, and you've got a tool that will serve you well for years. Get it wrong, and you’ll be battling annoying ghosting, stains, and scratches before you know it.
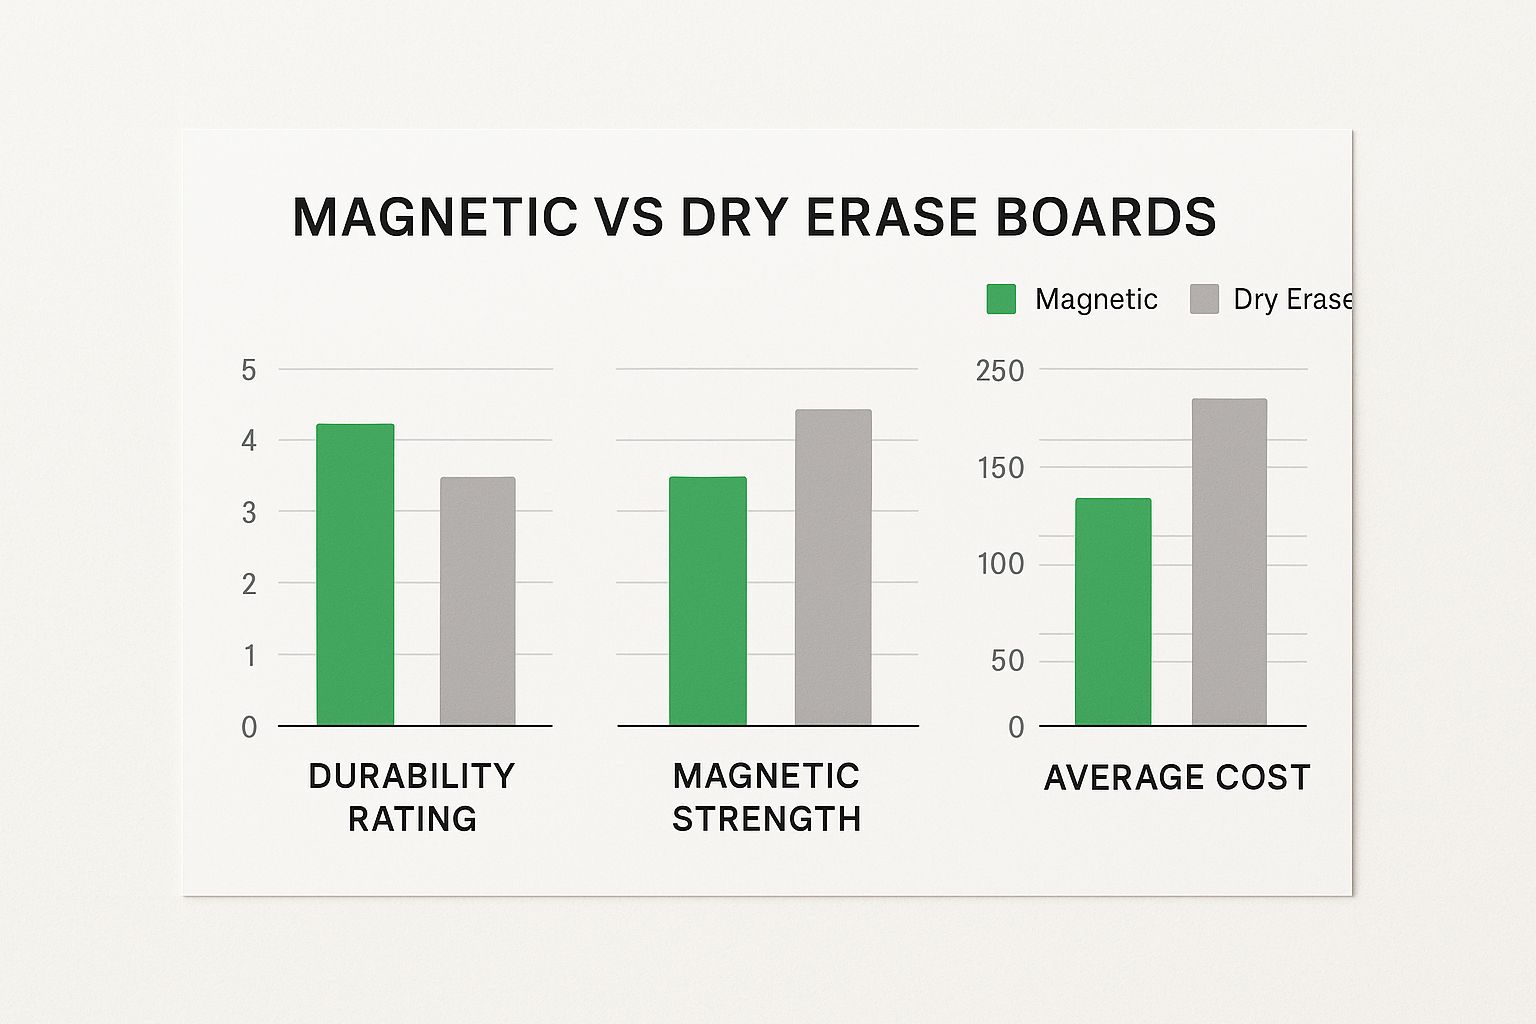
Here in New Zealand, you'll generally come across three main types of board surfaces. Each one has its own strengths, and understanding them is key to making a smart choice. We need to look at things like durability, how well it resists staining, and even how strong the magnetic pull is. After all, the demands of a busy classroom in Auckland are completely different to those of a sleek corporate boardroom in Wellington.
Let’s break down the common options so you can find the perfect fit.
The Big Three: Porcelain, Painted Steel, and Glass
When you get down to it, you’re usually choosing between porcelain (often called ceramic steel), painted steel, or glass. Each material strikes a different balance between cost, toughness, and visual appeal.
- Porcelain: Think of this as the top-tier, heavy-duty option. A ceramic finish is baked onto a steel base, creating an incredibly hard, non-porous surface. It’s tough as nails, standing up to scratches and stains like nothing else. This is the workhorse you see in universities and high-traffic offices.
- Painted Steel: This is a fantastic, budget-friendly choice that gets the job done. It's made by applying a special dry-erase paint over a steel sheet. It’s fully magnetic and works well, but with heavy use, it can be more prone to scratching and that dreaded "ghosting" where old marker lines never fully erase.
- Glass: If you’re after a modern, stylish look, glass is the way to go. The surface is completely non-porous, which means it will never stain or ghost—a huge plus. To make it magnetic, a thin sheet of steel is bonded to the back of the glass panel.
Your board's surface is the single most important factor. For a high-traffic area, investing in a better surface like porcelain or glass from the start always pays off. It saves you the headache and cost of replacing a worn-out board down the line.
To help you decide, let's put these materials head-to-head.
Comparing Magnetic Dry Erase Board Surfaces
This table breaks down the key differences between the three primary board materials, helping you pinpoint the best option for your budget and needs.
| Surface Material | Durability & Lifespan | Stain/Ghosting Resistance | Best For | Typical Cost (NZD) |
|---|---|---|---|---|
| Porcelain | Excellent (25+ years). Highly resistant to scratches, dents, and heavy use. | Excellent. Non-porous surface prevents ink from penetrating, making cleaning easy. | High-traffic areas: schools, training centres, hospitals, busy offices. | $150 - $600+ |
| Painted Steel | Good (5-10 years). Can scratch or dent more easily than porcelain. | Fair to Good. More susceptible to ghosting over time if not cleaned regularly. | Light-to-moderate use: home offices, small businesses, personal organisation. | $50 - $300 |
| Glass | Excellent (Lifetime). Scratch-proof and exceptionally durable. | Perfect. Completely non-porous, so it will never stain or ghost. | Design-forward spaces: corporate boardrooms, modern offices, architectural firms. | $250 - $800+ |
As you can see, the right choice really depends on balancing long-term performance with your initial budget.
Making the Final Call for Your Space
So, how do you pull all this information together to make a decision? Let's think about a few common scenarios.
For a bustling school, a packed training room, or a project management hub where the board is in constant use, porcelain is the undisputed champion. Its incredible durability and resistance to wear and tear make it a smart long-term investment that’s built to handle daily punishment.
If you’re setting up a home office, a small meeting room, or just need a board for occasional use, painted steel is a great, economical solution. It gives you all the magnetic and dry-erase functionality you need without the premium price tag. Just remember to clean it well after each use.
Finally, for a corporate office that needs to impress, a client-facing boardroom, or any space where style is just as important as function, a glass magnetic board is the perfect choice. It delivers flawless performance with a sophisticated, high-end finish that elevates the entire room. Just be sure to pick up some strong, high-quality magnets to go with it.
Unlocking Creative and Practical Uses
A magnetic dry erase board is so much more than just a blank surface. Its true magic happens when you stop seeing it as just a place to write and start thinking of it as the operational heart of your space. It becomes a dynamic hub for collaboration, planning, and communication—a central command centre for whatever you need to achieve.
You'll see them everywhere, from a bustling café in Christchurch showing off its daily specials with a bit of artistic flair, to a tech startup in Auckland mapping out its next software sprint. This incredible versatility is exactly why these boards have become a fixture in so many New Zealand environments. They create a shared, physical space where ideas can grow and plans can truly take shape.
Transforming Workplaces with Agile Planning
In the fast-paced world of project management, especially in tech and creative fields, a magnetic dry erase board is an absolute game-changer. Teams all over New Zealand use them to bring visual management systems like Kanban or Scrum to life in a way digital tools just can’t match.
Picture a project team kicking off their day huddled around the board. Tasks are written on magnetic cards that can be physically shifted from ‘To Do’ to ‘In Progress’ and finally to ‘Done’. This simple, tactile process gives everyone instant clarity on where the project stands, shines a light on bottlenecks, and builds a real sense of shared ownership and accomplishment.
A magnetic board turns abstract project tasks into tangible objects. The simple act of moving a card from one column to another provides a satisfying sense of progress that keeps the entire team motivated and aligned.
This hands-on approach naturally encourages everyone to participate in daily stand-up meetings. It makes even the most complex workflows easy for the whole team to understand at a glance. It's like a visual language that cuts through the clutter of emails and pings, keeping everyone focused on what actually matters.
Fuelling Engagement in Education
Nowhere has the magnetic dry erase board made a bigger splash than in education. It has completely changed the vibe in Kiwi classrooms, shifting the focus from passive listening to active, hands-on participation. Teachers can set up interactive learning stations, mixing written instructions with magnetic numbers, letters, or pictures that students can physically move around.
For instance, a primary school teacher might use the board for a maths lesson, getting students to physically arrange magnetic numerals to solve equations. Suddenly, a potentially dry subject becomes an engaging, hands-on game that helps cement concepts through kinesthetic learning. This move toward more interactive teaching isn't just a trend.
In fact, around 70% of New Zealand schools were using whiteboards as their main teaching aids by the early 2020s, thanks to a national push for more collaborative learning. The recent surge in remote work and homeschooling also drove a huge 25-30% rise in sales for home offices and learning centres between 2020 and 2022. You can read more about the growth of the whiteboard market from MarkWide Research.
Creative Applications in Daily Life
The usefulness of a magnetic dry erase board doesn't stop at the office or classroom door. It can be a powerful organisational tool in almost any setting you can think of.
- In Healthcare: Hospitals and clinics rely on them for everything from staff scheduling and patient tracking to surgical checklists. In these high-pressure environments, getting critical information at-a-glance is essential.
- In Hospitality: A stylish board in a café or restaurant is perfect for showcasing daily specials, promoting upcoming events, or even as a space for customers to share a bit of feedback.
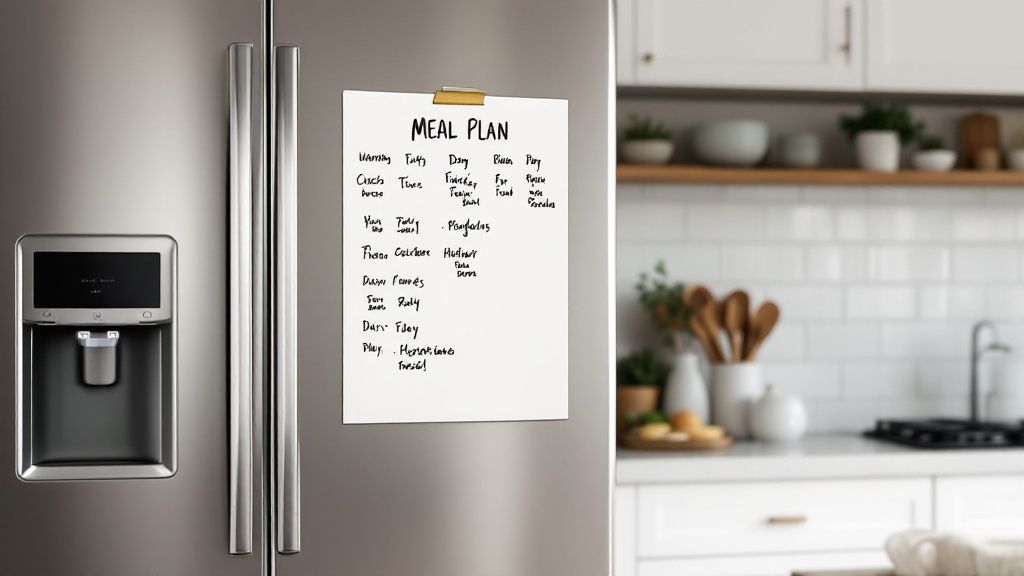
- At Home: It’s the perfect family command centre. Use it to manage weekly schedules, chore charts, shopping lists, or to proudly display your kids' latest masterpieces.
From mapping out a business strategy to simply organising family life, this humble tool provides a clear, flexible, and engaging way to manage information and spark a bit of creativity.
Simple Installation and Setup Guide
Putting up your new magnetic dry erase board is a lot easier than you might think. A bit of planning and the right tools are all it takes to get it securely on the wall and ready for brainstorming. Let’s walk through the process so you can avoid common mistakes, like ending up with a crooked board.
First things first, let's find the perfect spot for it. Think about both visibility and how easy it is to get to. You'll want the board in a well-lit area where glare from windows won't be an issue, and make sure there’s enough space for people to gather around, write, and collaborate without feeling cramped.
Preparing for a Secure Mount
Once you’ve picked your location, it's time to get your tools together and figure out what kind of wall you’re dealing with. Having everything on hand before you start makes the whole job go much more smoothly.
You'll probably need these items:
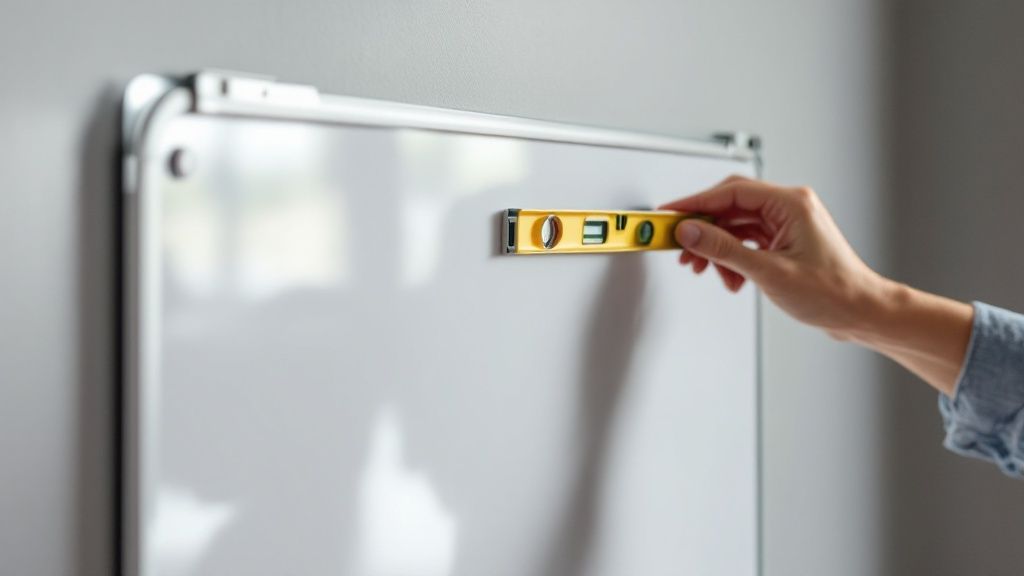
- A spirit level to make sure the board is perfectly straight.
- A tape measure for getting the positioning just right.
- A pencil for marking where you'll drill.
- A power drill with the right drill bits for your wall.
- A stud finder is a great idea, especially for bigger, heavier boards.
The kind of wall you have will dictate the mounting hardware you need. Plasterboard is common in most New Zealand homes and offices, but you could also be working with concrete or brick. Heavier boards, especially large porcelain or glass ones, must be anchored into the wall studs for safety. A stud finder is your best friend here, helping you locate those hidden wooden supports.
Step-by-Step Installation
Okay, you’ve got your tools and you're ready to go. Here’s how to get it done.
- Mark the Height: Think about how high you want the board. A good rule of thumb is to have the centre of the board at about eye level. Use your tape measure to make a small pencil mark for the bottom edge.
- Level and Mark Holes: Hold the board against the wall at the height you marked. Pop the spirit level on top and adjust it until the bubble is dead centre. Now, lightly mark where the mounting holes are with your pencil.
- Drill and Anchor: Drill pilot holes on your marks. If you've found a stud, you can screw straight into it. If you’re just going into plasterboard, you'll need to pop in some wall anchors first to give the screws something solid to grip onto.
- Mount the Board: Grab a friend to help you lift the board into position. Line it up with your holes and then securely fasten it with the screws that came with it.
A secure installation isn’t just about looking good; it's a safety essential. Taking that extra time to find studs or use the right wall anchors is what stops the board from falling down, which protects your wall and everyone using it.
The Installation-Free Alternative
If drilling holes in the wall isn't an option—or if you just want more flexibility—a mobile stand is a brilliant solution. These stands have wheels, so you can easily move your magnetic and dry erase board from room to room. It instantly turns any area into a collaboration space. Many of them even flip over, giving you twice the writing surface to work with.
Keeping Your Board Looking Brand New
A magnetic dry erase board is a real asset, but the secret to keeping it that way for the long haul comes down to proper care. Without a bit of regular maintenance, even the highest quality boards can end up with stubborn stains, scratches, and that annoying "ghosting" effect where old writing just won't fade away. A simple cleaning routine is all it takes to protect your investment and keep it looking pristine and ready for your next big idea.
It helps to think of your board's surface a bit like the clear coat on a car. You wouldn't take a harsh scourer to your car's paint job, and the same logic applies here. Avoid abrasive cleaners or rough cloths at all costs. The whole idea is to protect that non-porous top layer, which is what stops the ink from seeping in and leaving a permanent mark.
Daily Wipes and Deep Cleans
For day-to-day use, a quick wipe with a clean microfibre eraser or cloth is usually all you need. Just be sure to let the marker ink dry completely before you wipe it off – this is the key to preventing smears. This simple habit is your best defence against ink build-up.
But over time, you might notice a bit of residue, dust, or oils accumulating, making the surface feel a little dull or sticky. That’s your cue for a deep clean. Getting that original, smooth finish back is easier than you think.
- Isopropyl Alcohol: A little bit on a soft cloth works wonders. It's fantastic for cutting through stubborn marker residue and any oily films.
- Specialised Whiteboard Cleaner: You can't go wrong with cleaners designed specifically for the job. They’re formulated to clean thoroughly without damaging the surface.
- Mild Soapy Water: For a general clean, a single drop of dish soap in water can be surprisingly effective. Just make sure you follow it up with a clean, damp cloth to rinse away any soap.
Believe it or not, the most common reason a board gets ruined isn't from heavy use—it's from improper cleaning. If you consistently use harsh chemicals or abrasive materials, you're physically scratching the surface, creating tiny grooves where ink can get trapped for good.
Tackling Common Board Problems
Ghosting is easily the most common headache. It’s that faint image of old notes you see even after erasing, and it happens when ink pigment gets left behind. More often than not, it's just a sign that the board is overdue for a deep clean with a good solution like isopropyl alcohol to lift out that embedded ink.
Another common mistake is simply using the wrong tools for the job. Steer clear of any wax-based cleaners, as they leave behind a film that makes writing and erasing a nightmare. And try to resist the urge to wipe things away with your hand! The natural oils from your skin can transfer to the board and actually degrade the surface over time. Sticking with quality accessories, from good markers to clean erasers, makes a massive difference in keeping your magnetic and dry erase board in top shape for years to come.
Got Questions? We've Got Answers
When you're looking into a new magnetic whiteboard, a few questions always seem to pop up. We get it. To make sure you’re happy with your choice and know exactly how to look after it, here are the straight answers to the questions we hear most often.
What’s the Real Difference Between Surfaces?
This is the big one: porcelain versus painted steel. The simple answer comes down to durability and how well the surface resists staining over time.
Think of a porcelain board as having a ceramic shield baked right onto the steel. This creates an incredibly tough, non-porous finish that’s almost impossible to scratch and laughs in the face of ghosting. It’s the go-to for heavy, everyday use in places like classrooms or busy project management hubs.
A painted steel board, on the other hand, has a special dry-erase coating applied over the steel base. It’s still magnetic and works brilliantly, but it’s a bit more susceptible to scratches and stains with really frequent use. For a home office or areas with lighter traffic, it's a fantastic and more budget-friendly option.
How Do I Get Permanent Marker Off My Board?
It’s the classic whiteboard nightmare – someone’s accidentally grabbed a permanent marker. Don't panic! It’s usually an easy fix. The best trick is to draw right over the permanent ink with a good quality dry-erase marker. The solvent in the whiteboard ink is the key; it actually breaks down the permanent ink. Let it sit for a second, then wipe it all away with a clean microfibre cloth.
If that doesn't quite cut it, a small amount of isopropyl alcohol on a soft cloth should lift the rest. Just be sure to test it on a small, inconspicuous corner first to be safe.
The best defence against stubborn stains is a good offence. A quick wipe after each use and a proper clean once a week with a whiteboard solution will keep your board looking pristine for years.
What Kind of Magnets Should I Use?
So, can you just use any old magnet? Technically, yes, but you’ll get very different results. Those flimsy fridge magnets you’ve collected over the years often don't have the muscle to hold up more than a single sheet of paper without slowly sliding down the board.
For a reliable grip, especially on thicker glass boards, you need strong rare-earth magnets like neodymium. These little powerhouses have a serious hold, keeping your documents, plans, and photos exactly where you put them. Using the right magnets turns your board from a simple writing surface into a truly dynamic organisational tool.
Ready to bring your ideas to life on a surface that’s as versatile as you are? At SONI DESIGN, we create visual tools that help your business communicate and collaborate effectively.
Explore our custom signage and display solutions at https://www.sonidesign.co.nz and let's create something extraordinary together.
Leave a Comment
Stay home & get your daily
needs from our shop
Start You'r Daily Shopping with Nest Mart