
Your cart is currently empty.

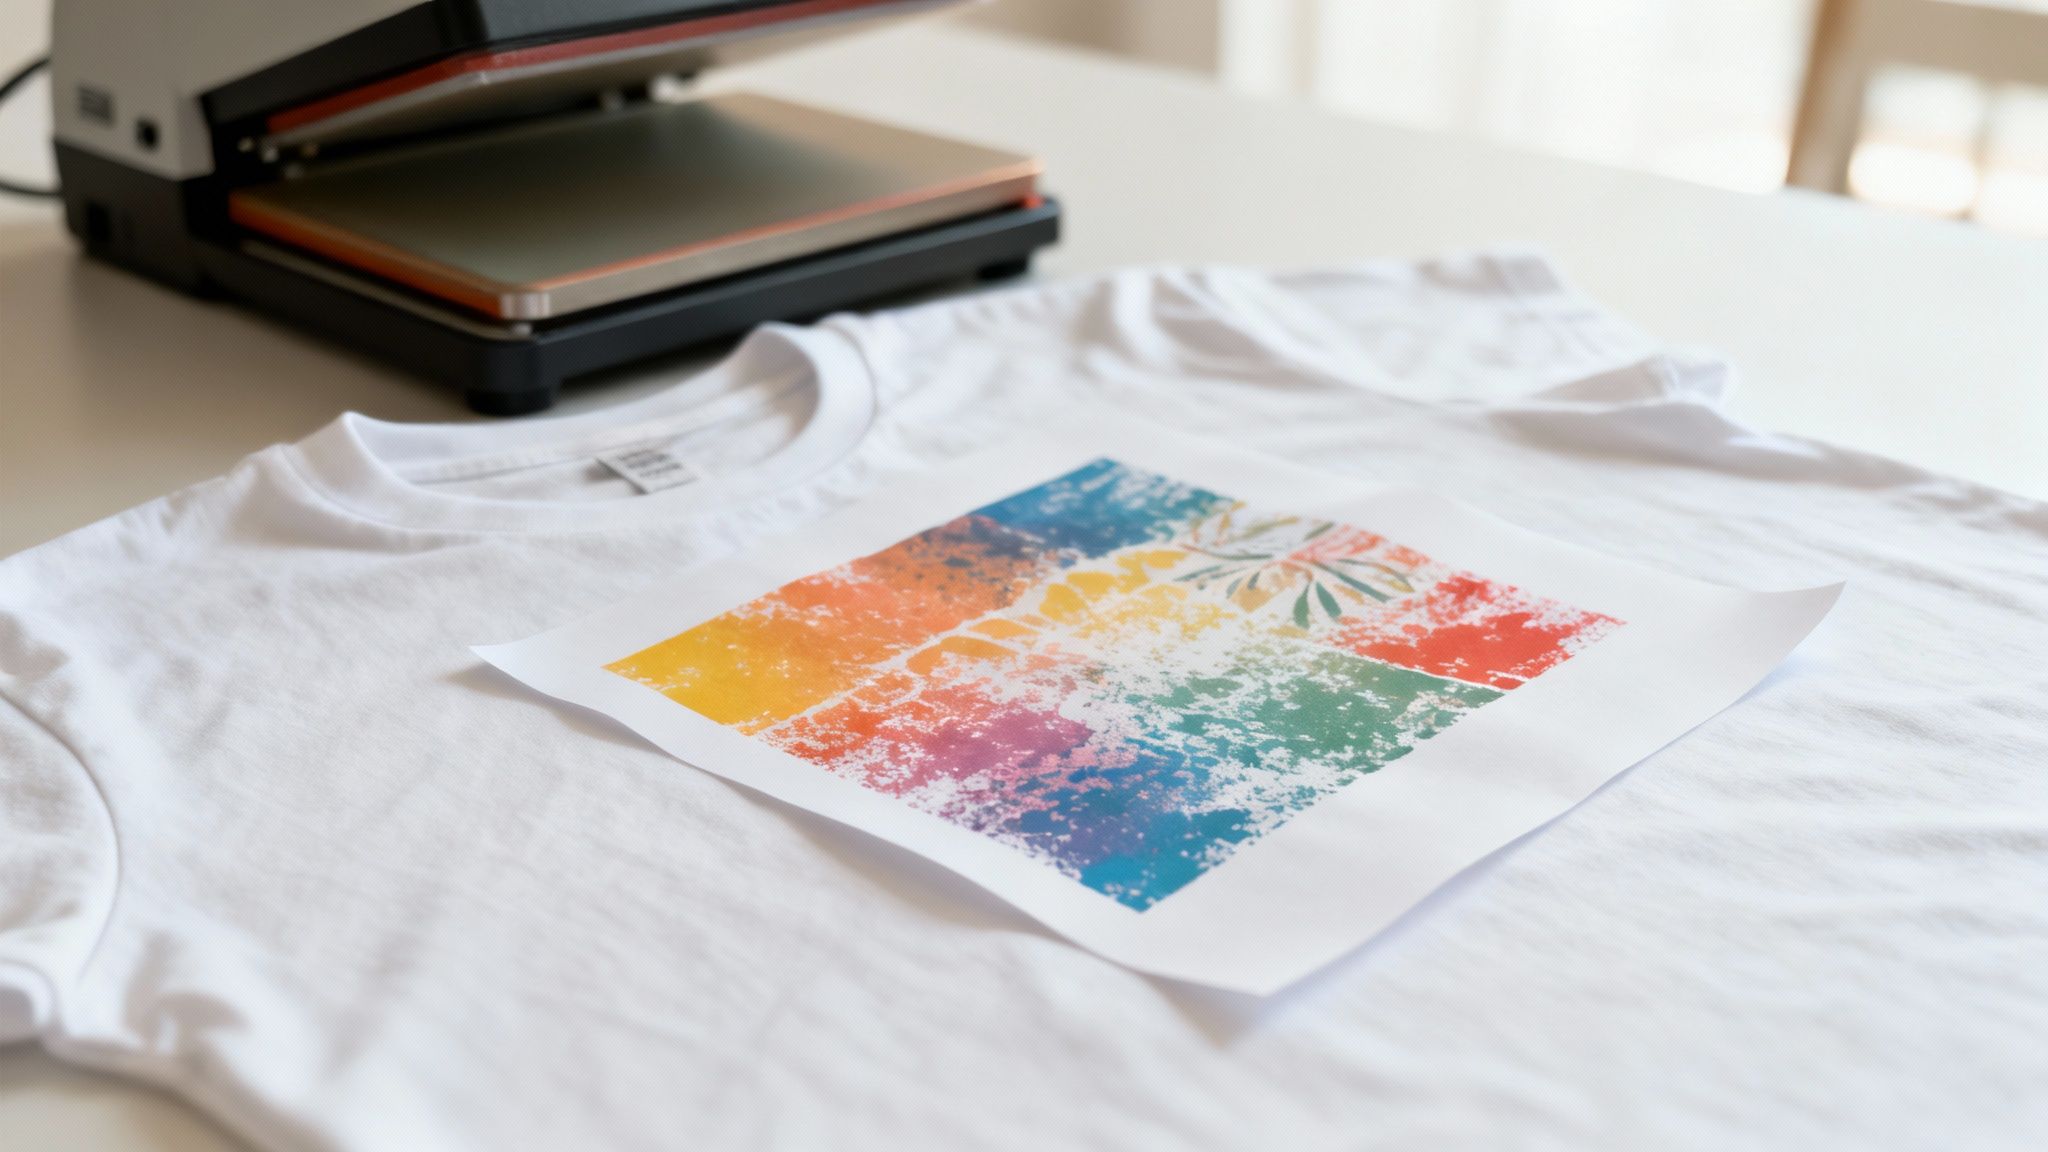
Ever wondered how those vibrant, custom-printed t-shirts get their designs? A lot of the time, the magic comes from something surprisingly simple: heat transfer paper.
This isn't your everyday printer paper. It's a special sheet with a unique coating designed to take a printed image from your computer and transfer it onto fabric using heat and pressure. It’s a straightforward and effective way to create custom apparel, turning a digital design into a wearable reality.
Understanding Heat Transfer Paper and How It Works
The best way to think about heat transfer paper is like a high-tech temporary tattoo for your clothing, only the results are permanent. The paper acts as a carrier, holding your artwork perfectly in place until you’re ready to press it. The real secret is in its coating—a polymer film that melts under heat, fusing your design directly into the fabric's fibres.
This simple process has completely opened up the world of custom printing. It allows small businesses and brands to produce detailed, full-colour designs without the hefty setup costs of traditional screen printing. Whether you’re creating promotional tote bags, branded staff uniforms, or a small run of event merchandise, the fundamental principle is the same.
The Core Components of the Process
To get professional results with heat transfer paper, you need three key ingredients working in harmony. Each one plays a crucial part in turning a file on your screen into a finished garment. Getting to grips with how they work together is the first step toward creating high-quality custom products.
Here’s what you’ll need:
- A Digital Printer: No need for anything too fancy here. A standard office inkjet or laser printer is all it takes to get your design onto the paper.
- The Specialised Paper: This is the star of the show. Its coating is specifically engineered to release the printed design cleanly when heat and pressure are applied, ensuring the image bonds properly with the fabric.
- A Heat Source: While a home iron might work for a one-off hobby project, a professional heat press is non-negotiable for business use. It delivers the consistent temperature and even pressure required for a durable, long-lasting finish that an iron just can't replicate.
The synergy between the printer, the paper, and the press is what makes this whole process click. When you get the settings just right, you're creating a solid chemical and physical bond that locks your design right into the fabric.
The Transfer Mechanism Explained
It all starts when you print your design onto the paper. One crucial tip: for light-coloured garments, you almost always need to print a mirrored version of your image. This is because you'll be placing the paper face-down on the fabric, so the image needs to be flipped to read correctly once transferred.
With your design printed, you position the paper on the garment and bring in the heat press. The heat instantly melts the polymer coating, and the pressure pushes that molten layer deep into the weave of the fabric. As it cools, the polymer hardens, trapping the ink or toner permanently within the fibres.
The result is a flexible, durable design that feels like part of the garment itself—ready to wear and show off your brand.
Choosing the Right Heat Transfer Paper for Your Project
Picking the right heat transfer paper is probably the single most important call you'll make when creating custom apparel. It’s the difference between a design that looks sharp and feels great, and one that cracks, fades, or just feels like a stiff plastic sticker.
Think of it like choosing the right paint. You wouldn't use watercolour on a car, and you can't just grab any transfer paper for any job. Your choice directly affects the final look, feel, and how long the print will last. Get this right, and your staff uniforms or event merch will look and feel fantastic.
Let's walk through the main options so you can figure out exactly what you need.
Inkjet vs. Laser Transfer Paper
The first fork in the road is dictated by your printer. Do you have an inkjet or a laser printer? These two types of paper are built for completely different technologies, and they absolutely are not interchangeable.
-
Inkjet Heat Transfer Paper: This is your go-to for vibrant, full-colour images. If your design has complex graphics, gradients, or even a photograph, inkjet is the way to go. The paper’s special coating is made to soak up liquid ink, holding the colour vividly until it’s pressed onto the fabric.
-
Laser Heat Transfer Paper: Got a design with sharp text, a bold logo, or simple vector graphics? Laser paper is a brilliant choice. Laser printers use a fine powder (toner) that fuses to the paper, creating incredibly crisp lines. The final transfer is also known for being tough as nails, holding up exceptionally well in the wash.
So, while inkjet wins for photo-realistic colour, laser often has the edge in durability and delivers a slightly smoother finish for those high-contrast designs. It all starts with the printer you’re using.
Light vs. Dark Fabric Paper
Once you know your printer type, the next decision is all about the colour of the garment you're printing on. This isn’t a minor detail—it's a technical necessity to make your design show up properly.
Paper for light-coloured fabrics (think white, grey marle, or pastels) has a transparent film. When you press it, only the ink transfers over. The clear background lets the light fabric colour show through any unprinted areas, which gives the design a softer, more integrated feel.
Paper for dark-coloured fabrics (like black, navy, or deep green) is a completely different beast. It has an opaque, white base layer. You print your design onto this white surface, and then the entire patch—your design and its white backing—gets pressed onto the shirt.
Why the white base? Imagine trying to draw on black paper with a normal felt pen—the colours would just get lost. The opaque white layer acts like a primer, giving your design a bright canvas to sit on so the colours pop against the dark fabric.
Getting this wrong is a common mistake. If you use light paper on a dark shirt, your design will look faded and ghostly. And if you use dark paper on a light shirt, you'll end up with a very obvious white box around your graphic, which rarely looks professional.
To make things a little easier, here’s a quick comparison of the main paper types.
Comparing Heat Transfer Paper Types
This table gives you a side-by-side look to help you quickly match the right paper to your printer, fabric, and what you’re trying to achieve.
| Feature | Inkjet Transfer Paper | Laser Transfer Paper | Sublimation Paper |
|---|---|---|---|
| Best For | Full-colour photos, complex graphics, gradients. | Bold logos, text, vector graphics. | All-over prints, vibrant and permanent designs on performance wear. |
| Printer Type | Inkjet printer only. | Laser printer only. | Sublimation printer with sublimation ink only. |
| Fabric Compatibility | Works best on cotton, poly-cotton blends, and canvas. | Cotton, poly-cotton blends. Some papers work on polyester. | 100% polyester or polymer-coated hard surfaces (e.g., mugs, phone cases). |
| Feel on Fabric ("Hand") | Can feel like a thin film, especially on dark fabric paper. | Often a smoother, lighter feel than inkjet, but still a layer. | Zero feel. The ink becomes part of the fabric itself. |
| Durability | Good, but can be prone to cracking or fading over many washes. | Excellent. Very durable and wash-resistant. | Permanent. Will not crack, peel, or fade. It lasts as long as the garment. |
| Colour Vibrancy | Excellent for photorealistic, rich colour. | Great for solid, bold colours. Can struggle with subtle gradients. | Unbeatable vibrancy and brightness. |
Ultimately, your project's needs will point you to the right choice. A simple logo on a work polo might call for laser, while a full-colour art print on a t-shirt is a perfect job for inkjet.
Understanding Speciality Papers
Beyond the everyday options, the world of heat transfer paper has some creative alternatives for when you need something that really stands out.
-
Sublimation Paper: Okay, this one is a different process altogether. Instead of putting a layer on top of the fabric, sublimation ink turns into a gas under the heat press and permanently dyes the actual fibres. The catch? It only works on polyester or poly-coated items. The result is a stunningly vibrant print with absolutely zero feel to it.
-
Glitter or Metallic Papers: Want to add some sparkle? These papers have a glittery or foil-like finish that transfers with your design. They’re perfect for catching the eye on promo gear or creating fashion-forward pieces.
-
Glow-in-the-Dark Paper: A fun one for events or novelty t-shirts. This paper contains a phosphorescent layer that absorbs light and, you guessed it, glows in the dark. It adds a really cool, interactive element to a design.
Choosing the right paper is all about matching its strengths to your goals. For tough workwear, a durable laser transfer is probably your best bet. For a beautiful photographic print on a cotton tee, inkjet is the clear winner. And for that high-performance activewear, sublimation is the professional standard. Once you understand these core differences, you can pick the perfect paper with confidence, every single time.
Mastering the Printing and Application Process
Getting a great result with heat transfer paper isn’t magic—it’s a methodical process. Nail the steps, and you’ll consistently turn your digital ideas into professional-quality products. It’s this attention to detail that separates a vibrant, durable print from one that just looks cheap.
Let's walk through it, starting with the most critical first step: prepping your artwork.
Step 1: Prepare Your Digital File
Long before you even think about printing, your success is decided on your computer screen. Getting the digital file right ensures your design looks as good on the fabric as it does in your head.
First up, resolution. This is non-negotiable. For a crisp, clean transfer, you absolutely need a high-resolution image. Aim for 300 DPI (dots per inch) at the final size you want to print. If you just grab a low-res image off the internet, you're going to end up with a blurry, pixelated mess.
Next comes a step that trips up so many beginners: mirroring your image. For papers meant for light-coloured fabrics, you’ll be placing the design face-down on the garment. If you don't flip the image horizontally in your software first, any text or logos will be backwards. It's such an easy mistake to avoid.
Pro Tip: Papers designed for dark fabrics work differently. You usually don't mirror the image because you peel the design off its backing and place it face-up, like a sticker. But don't just guess—always, always double-check the instructions for the specific paper you're using.
Properly preparing your artwork is a foundational skill. If you're interested in going deeper, learning about digitizing designs for fabric can be a huge help, as the principles often overlap with heat transfer work.
Step 2: Optimise Your Printer Settings
Okay, your file is ready to go. Don't just hit 'Print' and hope for the best. To get those rich, accurate colours you're after, you need to tell your printer what you’re printing on.
Jump into your printer's properties or advanced settings and look for these options:
- Paper Type: Don't just leave it on "Plain Paper." Look for something like "Photo Paper Glossy," "Matte," or a "Specialty Paper" setting. These options tell the printer to lay down more ink, which is exactly what you want.
- Print Quality: Crank this up to the highest setting available. It might be called "Best," "High," or "Photo." This forces the printer to be more precise and use more ink for a saturated, vibrant image.
These small tweaks can be the difference between a faded, mediocre print and a truly professional-looking one.
Before you even get to this stage, you need to have the right paper. The chart below breaks down how to make that choice.
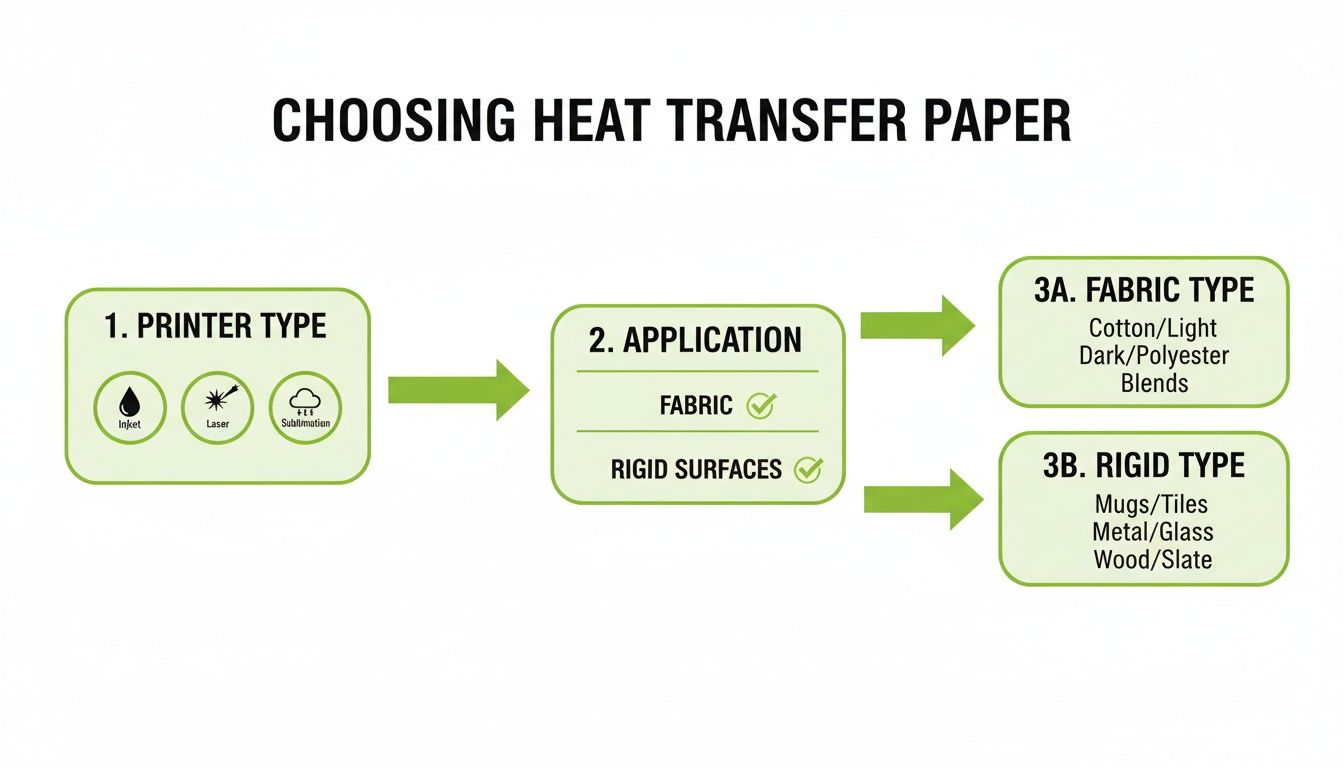
As the guide shows, everything starts with your printer—inkjet, laser, or sublimation. That one piece of equipment immediately determines which types of paper are even an option for you.
Step 3: Apply the Transfer with a Heat Press
You can use a home iron for a hobby project, but if you're running a business or want results that last, a heat press is a must-have. It delivers the three things you can’t get with an iron: consistent temperature, even pressure, and precise timing.
- Set the Temperature: First, preheat your press. Check the instructions that came with your paper for the right temperature, which is usually somewhere between 175-190°C. Guessing here is a bad idea; too cool and the design won't stick, too hot and you could scorch the garment.
- Pre-Press the Garment: Lay your t-shirt on the press and clamp it down for about 5-10 seconds. This quick step is a game-changer. It gets rid of any moisture and smooths out wrinkles, giving you a perfect canvas for your transfer.
- Position the Design: Now, carefully place your printed paper on the garment. Remember, face-down for light paper, or peel and place face-up for dark paper. Grab a ruler to make sure it's perfectly centred and straight.
- Press the Design: Close the press. You need firm, even pressure for the time specified by the manufacturer, usually 15-25 seconds. During this time, the heat and pressure work together to melt the paper's polymer coating, fusing your design right into the fabric's fibres.
Once that timer beeps, you're almost done. The next step is all about the peel.
Step 4: Understand the Peel
The moment of truth is when you pull that paper backing away. This is called the "peel," and whether you do it hot or cold will dramatically affect the final look and feel.
-
Hot Peel: This means you peel the backing paper off the second the press opens, while everything is still piping hot. This technique often leaves the design with a softer, more flexible feel and a matte finish because the ink stretches a tiny bit with the fabric as it cools.
-
Cold Peel: With this method, you have to be patient. Let the garment and transfer cool down completely before you even think about touching the backing paper. A cold peel typically gives you a glossier, sharper finish and is often the better choice for intricate designs with fine lines or bold, solid colours.
Getting the peel wrong can ruin an otherwise perfect application, causing the design to lift, crack, or look uneven. The instructions with your paper will always tell you if it’s a hot or cold peel product. Following that final piece of advice is the key to a job well done.
Troubleshooting Common Heat Transfer Problems
Even with the best gear and meticulous prep, sometimes things just don't go to plan. It’s incredibly frustrating when your final product looks nothing like what you envisioned, but don’t worry—most issues with heat transfer paper are surprisingly easy to diagnose and fix.
This is your first-aid kit for common printing mishaps. We'll walk through the most frequent issues, get to the root of what's causing them, and give you clear, practical solutions. Think of these hiccups not as failures, but as learning opportunities that will help you master the craft.
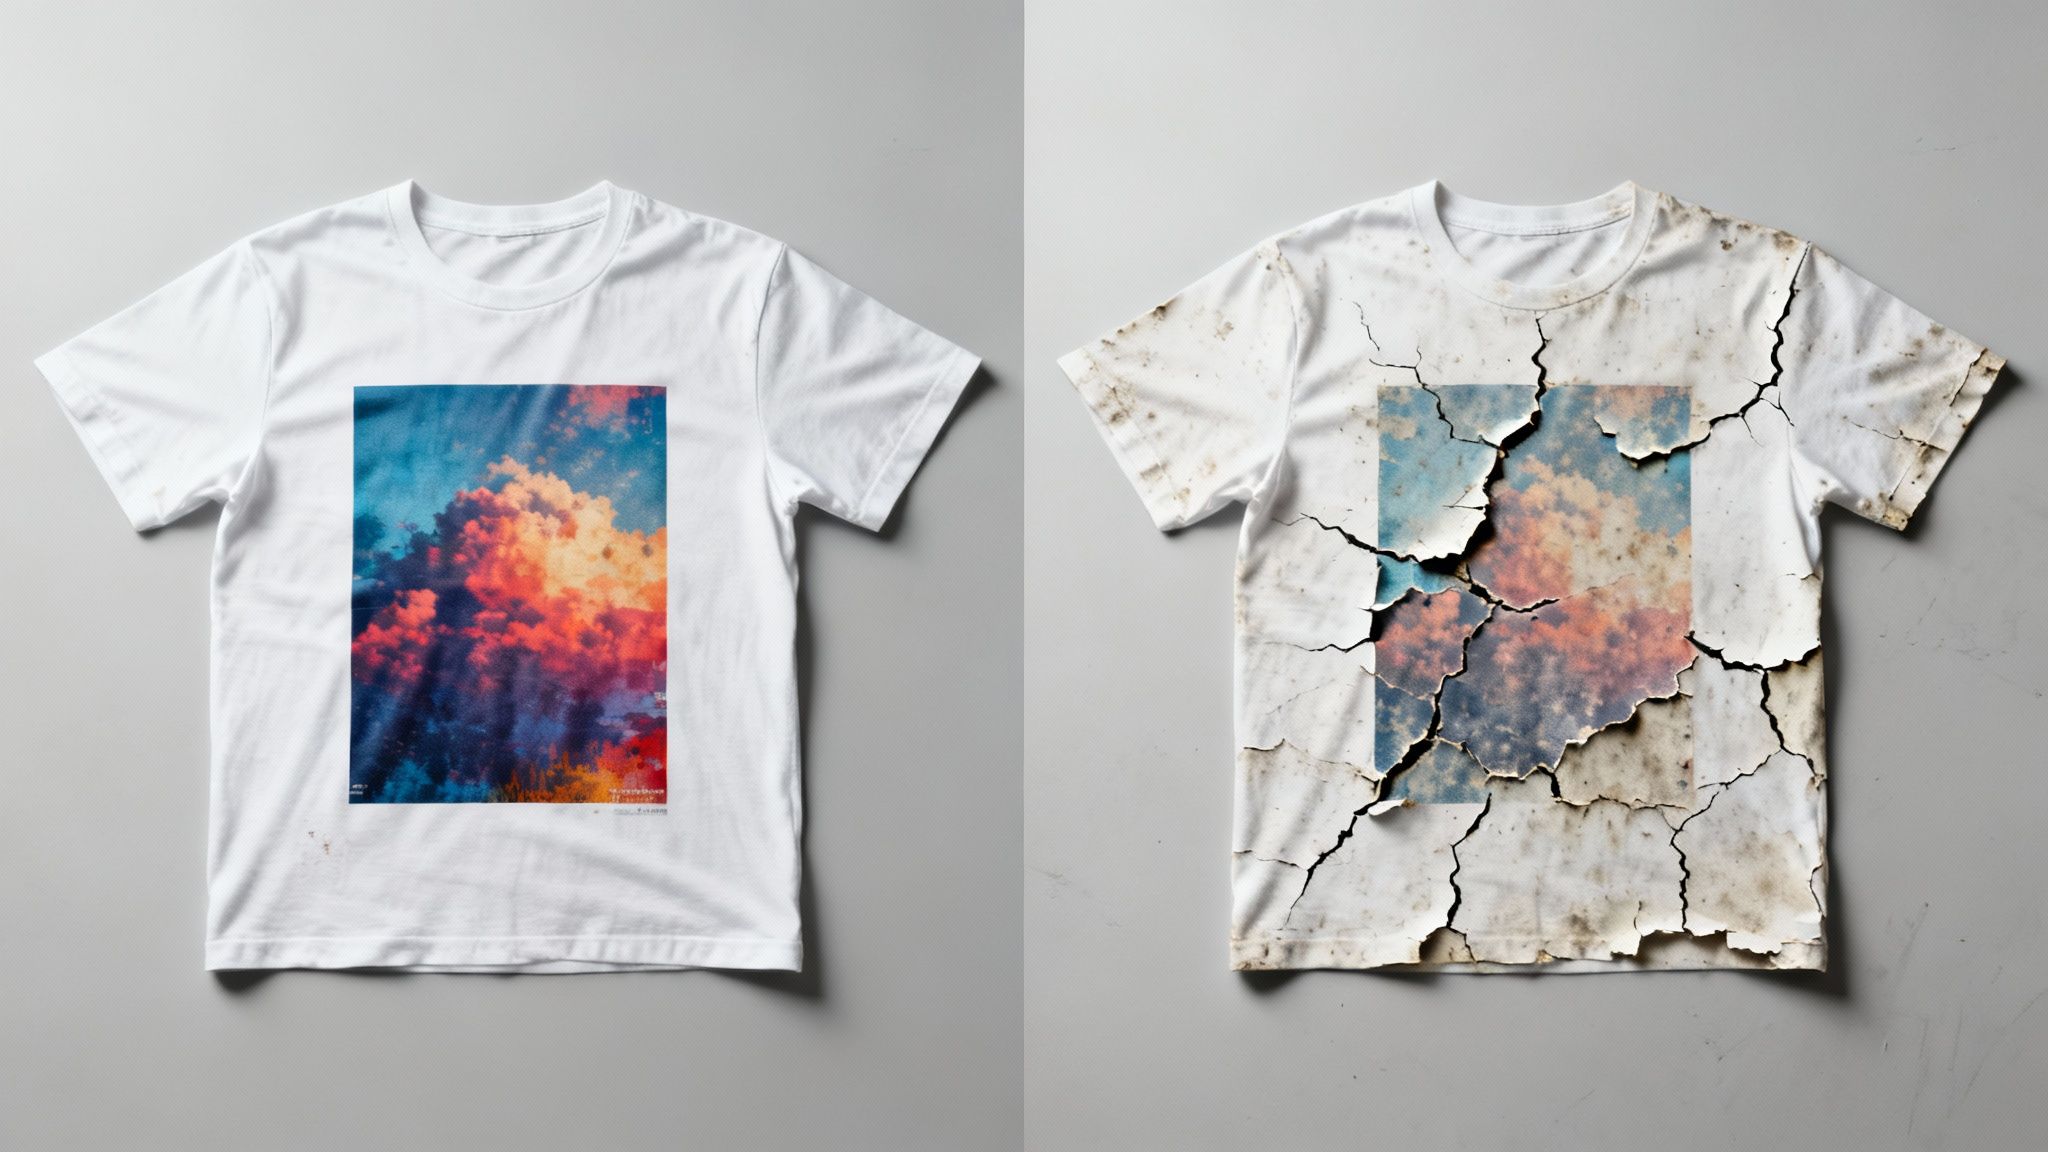
Why Is My Design Cracking or Peeling?
This is the big one. You pull a freshly washed shirt out of the machine only to find your beautiful design is cracking, lifting, or peeling away from the fabric. It’s a gut-wrenching moment, but it almost always points back to one thing: a poor bond between the transfer and the garment’s fibres.
The usual suspects are not enough heat, not enough pressure, or pressing for the wrong amount of time. If your heat press isn't hot enough, the adhesive layer on the paper won't melt properly. If the pressure is too light, that melted adhesive can't work its way deep into the fabric's weave to create a strong, lasting connection.
Quick Fixes for Peeling Designs:
- Check Your Settings: Don't guess or use generic settings. Always go back to the manufacturer's recommendations for temperature, pressure, and time for your specific heat transfer paper.
- Add More Pressure: This is the magic bullet for most adhesion problems. Your press should be set to at least a medium or firm pressure. You want to embed the design into the fabric, not just lay it on top.
- Nail Your Peel Technique: Peeling a cold-peel paper while it's still hot (or vice versa) can wreck the bond before it even sets. Follow the instructions to the letter.
Solving Dull or Faded Colours
You’ve printed a stunning, vibrant image, but after pressing, it looks disappointingly dull and washed out on the t-shirt. This problem often starts long before you get to the heat press; it’s usually an issue with your printer settings or using the wrong paper for the job.
Your printer doesn't automatically know it's handling special media. If you leave it on the "Plain Paper" setting, it won't lay down enough ink to create a rich, saturated image. It's also crucial to match your paper to your garment—using paper designed for light fabrics on a dark shirt will let the garment's colour bleed through and mute your design.
A professional-looking print is all about vibrancy. Your printer settings are your control panel for colour saturation. Selecting "Photo Quality" or "Best" mode tells the printer to prioritise rich colour output, which is essential for a great final product.
To get that brilliant colour pop, make sure your printer is on its highest quality setting and that you've told it you're using specialty paper, like "Glossy" or "Premium."
Dealing with Uneven or Incomplete Transfers
Have you ever had a transfer that sticks perfectly in some spots but is patchy and incomplete in others? This is a classic sign of uneven pressure or heat. While it’s a common issue when using a home iron, it can happen with a professional heat press, too.
Anything that gets in the way of a perfectly flat surface—seams, collars, zips, or buttons—can prevent the heat platen from clamping down evenly. This creates cooler spots where the transfer simply fails to adhere. Even a tiny wrinkle can ruin the pressure distribution, which is why pre-pressing is so important.
Ensuring an Even Application:
- Always Pre-Press: Give the garment a quick 5-10 second press to iron out wrinkles and remove any lingering moisture.
- Avoid Obstructions: Position your design well away from any seams, collars, or pockets that could interfere with the press.
- Use a Teflon Pillow: For tricky garments, sliding a heat-resistant Teflon pillow inside the shirt creates a raised, even surface, guaranteeing perfect contact with the heat press.
Sometimes, a quick-reference guide is the best way to solve a problem on the fly. Here are the most common issues you'll encounter and how to sort them out.
Heat Transfer Paper Troubleshooting Guide
| Problem | Likely Cause | How to Fix It |
|---|---|---|
| Design is cracking/peeling after washing | Insufficient heat, pressure, or time. | Verify and adjust heat press settings to manufacturer's specs. Increase pressure. |
| Colours look dull or faded | Incorrect printer settings or wrong paper type. | Use "Best/Photo Quality" printer setting. Use paper for darks on dark garments. |
| Transfer is patchy or incomplete | Uneven pressure from seams, zips, or wrinkles. | Pre-press the garment. Avoid obstructions. Use a Teflon pillow to raise the print area. |
| A faint box or outline is visible | The edge of the paper was pressed into the fabric. | Trim the paper as close to the design as possible before pressing. |
| The transfer feels too thick or "heavy" | Using the wrong type of paper (e.g., opaque paper where it isn't needed). | For light garments, use transparent inkjet/laser paper for a softer "hand" or feel. |
| The design melted or looks scorched | Temperature is too high or pressing time is too long. | Reduce the heat press temperature and/or shorten the pressing duration. |
By methodically working through these common issues, you’ll not only fix the odd mistake but also learn how to fine-tune your process for consistently brilliant results.
When to Partner with a Professional Print Provider
While DIY heat transfer projects are fantastic for getting started, testing ideas, or making a few one-offs, there’s a natural turning point for any growing venture. When "a few" becomes "a few dozen" or "a few hundred," handling everything in-house can quickly go from a fun project to a serious production bottleneck.
That’s usually the signal to start thinking about partnering with a professional print provider like SONI DESIGN. It's not just about offloading the work; it’s a strategic move to tap into a level of quality, consistency, and efficiency that’s almost impossible to achieve with a home setup. For Kiwi businesses, finding a local partner means you get access to commercial-grade gear and people who really know the local market.
Ensuring Superior Quality and Consistency
Imagine you need fifty t-shirts for your staff or five hundred for a big event. Every single one has to be perfect—and identical. This is where the pros really shine. They're not using an iron or a small hobby press; they have calibrated, commercial-grade heat presses that apply exact temperature and pressure evenly, every single time.
This level of control is what protects your brand. A professional provider will ensure your logo's specific Pantone colour looks right on the first shirt and the five-hundredth. They have the experience to know which heat transfer paper works best on a cotton-poly blend versus 100% cotton, guaranteeing a vibrant, long-lasting finish. It’s that meticulous attention to detail that makes your brand look professional and trustworthy.
Partnering with specialists isn't just about buying printed shirts; you're investing in brand consistency. Professionals eliminate the risk of misprints and wasted materials, ensuring every dollar you spend results in a flawless product ready for your customers or team.
The Economic Sense of Outsourcing
Let's be realistic: professional printing equipment is a massive investment. A commercial heat press, a wide-format printer, and the right software can easily set you back thousands of dollars. On top of the purchase price, there's the time and frustration of learning to use it all without making costly mistakes.
By outsourcing your bigger jobs to a provider like SONI DESIGN, you sidestep all of that. You get instant access to top-of-the-line technology and a skilled team, without any of the overheads. This shifts a potentially huge capital expense into a manageable, predictable operating cost. It frees you up to focus on what you do best—designing, marketing, and growing your business.
It’s just a smarter, more scalable way to operate. You can take on an order for 10 pieces just as confidently as an order for 1,000, without ever losing sleep over machine maintenance or running out of ink.
Gaining a Strategic Partner for Growth
A good print provider becomes more than just a supplier; they're a partner. They can give you genuinely useful advice on how to tweak a design for better printing, which materials will give you the look you're after, and how to get the most bang for your buck. It’s a collaborative relationship that helps bring your vision to life in the best possible way.
For businesses here in New Zealand, that local knowledge is invaluable. While you can find global market research on heat transfer paper, it rarely drills down into what Kiwi consumers and brands actually want. A local provider has their finger on the pulse. They can offer insights that you just won’t find in a generic report. If you're curious about the bigger picture, you can learn more about the global heat transfer paper market on datahorizzonresearch.com, but local expertise is what translates those trends into real-world success here.
Ultimately, deciding to work with a professional is about knowing when to bring in an expert. It lets you scale your brand, elevate your products, and ensure every garment you create is a perfect reflection of your high standards. It’s a partnership that gives you the confidence to think bigger, knowing the execution will be handled perfectly.
Your Heat Transfer Paper Questions, Answered
When you're diving into the world of custom apparel, a few questions are bound to pop up. Getting the right answers is the difference between a project you're proud of and a costly mistake.
We get these questions all the time from businesses and creators just like you. So, let's clear up some of the most common queries to help you get your process dialled in.
What Fabrics Can I Actually Use Heat Transfer Paper On?
Great question. While heat transfer paper is incredibly versatile, it definitely has its favourites. Think natural fibres and popular blends – that's where it truly shines.
It performs best on the materials you see most often in apparel:
- 100% Cotton: This is the holy grail. Heat transfer paper loves cotton, giving you fantastic adhesion and making your colours pop.
- Polyester: Many modern papers handle polyester well, although for 100% poly, sublimation is often the top choice for its unique dyeing process.
- Cotton/Poly Blends: A huge part of the market, from t-shirts to hoodies, these blends are a perfect match for heat transfer printing.
Where do you need to be careful? Materials like nylon, spandex, or rayon can be a bit tricky. Their lower melting points mean they can scorch easily, and some textures just don't create a strong, lasting bond. My advice? Always check the paper’s specs and do a small test print on a hidden spot first. It’s a simple step that can save a lot of headaches.
How Long Will My Design Really Last?
This is a big one, and rightly so. The good news is that a properly applied design using quality materials is surprisingly durable. You can expect a high-quality transfer to hold up through 25-30 washes before you see any major fading or cracking.
The secret to a long life is all in the aftercare. Make sure to tell your customers (or remind yourself!) to wash the garment inside out on a cold cycle. Stay away from harsh detergents and bleach. While you can tumble dry on low, hanging it to dry is the absolute best way to keep that print looking sharp for as long as possible.
What's the Difference Between Hot Peel and Cold Peel?
This might sound like technical jargon, but it’s a crucial step that dramatically affects the final look and feel of your print. It all comes down to when you remove the paper backing after pressing.
Hot peel means you rip that backing off the second the heat press opens, while it’s all still piping hot. This usually leaves you with a softer, more flexible design that has a matte finish. On the other hand, cold peel means you let it cool down completely before touching it. This method tends to produce a glossier, slightly thicker finish with really crisp edges.
Neither one is better than the other; they just create different effects. The golden rule is to always follow the instructions for your specific paper. It’s been engineered to work one way or the other, and trying to switch it up can cause the design to lift right off or look patchy.
Do I Really Need a Heat Press? Can't I Just Use an Iron?
For a one-off hobby project? Sure, an iron can work in a pinch. But if you're creating products for a brand, business, or event, the answer is a firm "yes, you absolutely need a heat press."
An iron simply can't compete. A heat press gives you two critical things an iron can’t guarantee:
- Consistent, Edge-to-Edge Heat: The platen on a press heats up evenly across the entire surface, so every inch of your design gets the exact same temperature. No cold spots.
- Even, Adjustable Pressure: You can dial in the precise pressure needed to permanently bond the transfer into the fabric’s fibres.
That combination is the secret to a professional, durable print that won't peel after the first wash. Think of a heat press as an investment in quality and consistency.
Ready to elevate your brand with professionally printed apparel and promotional products? The team at SONI DESIGN is here to bring your vision to life with expert craftsmanship and a passion for great design. Let’s collaborate to create something extraordinary that tells your story. Visit us at sonidesign.co.nz to get started!
Leave a Comment
Stay home & get your daily
needs from our shop
Start You'r Daily Shopping with Nest Mart