
Your cart is currently empty.
Putting a sign on the pavement outside your shop might seem straightforward, but Kiwi councils have some pretty specific rules to keep our walkways safe and clear for everyone. It's all about making sure there's enough room for pedestrians, people with prams, and wheelchair users, while also keeping our public spaces from looking too cluttered.
Getting to Grips with Footpath Sign Rules Across New Zealand
A great sign on the footpath is a classic way to pull people in, but it does come with a few responsibilities. Across the country, local councils are the ones who manage these public spaces, and they're constantly trying to strike the right balance between helping businesses and ensuring community safety. The single most important principle behind every local bylaw is maintaining a clear, unobstructed path for every single person who uses the footpath.
What this means in practice is that while your creative sign might be a fantastic sales booster, it can't get in the way of someone on a mobility scooter or a parent trying to navigate a pram. The rules aren't there to make your life harder; they're in place to keep our communities safe and accessible for everyone.
What Most Councils Look For
While the nitty-gritty details can differ from Auckland to Invercargill, you’ll find that most council regulations for footpath signs share a few common threads. Getting familiar with these will give you a solid head start before you look up the specific rules for your own district.
Most bylaws will focus on these key areas:
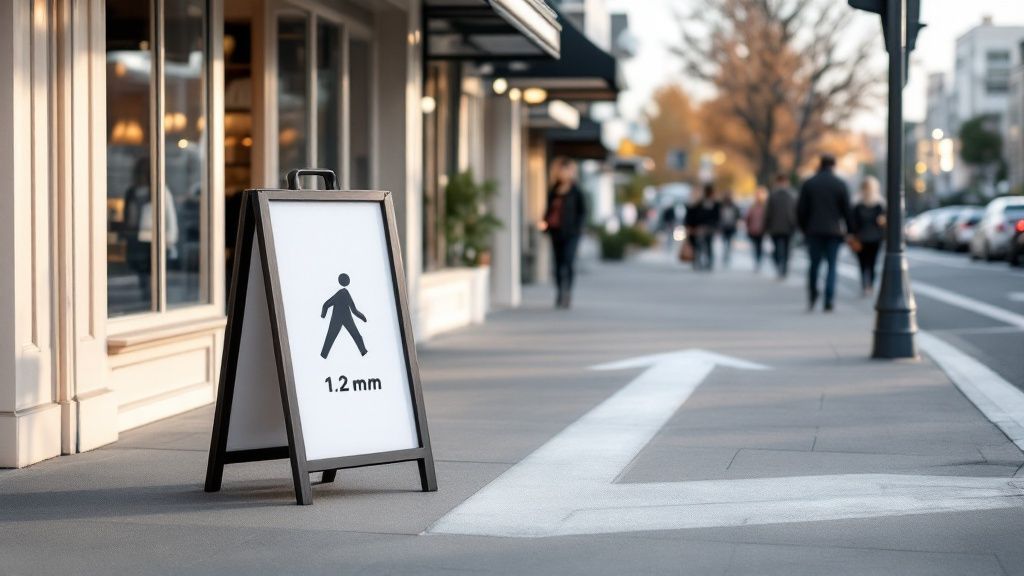
- Minimum Footpath Clearance: This is the big one. Councils always specify a minimum clear width that must be left on the footpath, which is usually somewhere between 1.2 and 1.8 metres. This is non-negotiable and ensures free passage for all.
- Where You Can Place Your Sign: You can't just pop your sign anywhere. Signs typically have to be placed either right up against the kerb or flat against your building. This creates a predictable 'shoreline' for visually impaired pedestrians and keeps the main thoroughfare clear.
- Size and Dimension Limits: To stop footpaths from being cluttered with massive obstacles, councils will have rules on the maximum height, width, and overall size. A common limit you'll see is around 0.5 square metres per display face.
- Business Hours Only: Your sign is a temporary advert. This means it needs to be brought inside as soon as you close for the day and can’t be left out overnight.
A well-placed, compliant sign is a genuine asset that draws customers in. A non-compliant one, however, can quickly turn into a headache, resulting in warnings, fines, or even having your sign taken away.
Try to think of these rules less as restrictions and more as a guide to being a good business neighbour. When you follow them, you're making sure your marketing helps brighten up the street without creating a hazard for anyone. So, before you spend any money on a new sign, the very first step is always a quick visit to your local council's website. It’s the best way to get it right from the get-go.
Right, let's get into the nitty-gritty of getting your footpath sign approved. While the goal is always the same—keeping footpaths clear and safe—how you get there depends entirely on your local council. This is where things can get a bit tricky if you're not careful.
Navigating Your Local Council Bylaws
The rules for your footpath sign in NZ aren't set nationally. Each local council has its own unique set of bylaws, which means what’s perfectly acceptable in Christchurch might be a compliance headache in Hamilton.
Don't ever assume a one-size-fits-all approach will work. It’s a common and often costly mistake. The reason for the differences usually comes down to local factors—think of the narrow, historic footpaths in a town centre versus the wide-open spaces of a newer suburban retail park. The rules are designed to fit the environment.
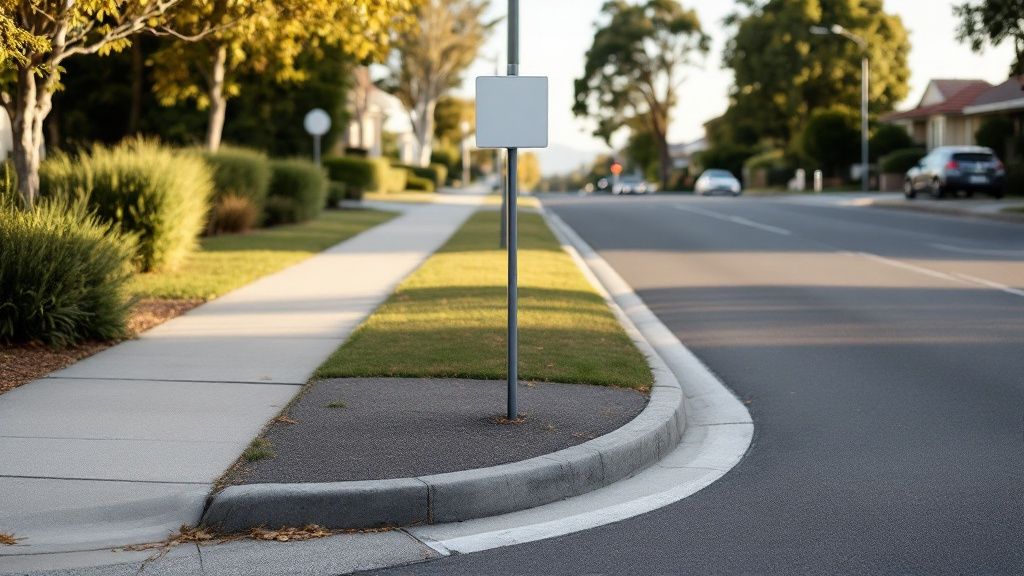
This image neatly sums up the core idea behind all these regulations: creating community spaces that are safe and accessible for everyone.
At the end of the day, every council's main goal is ensuring people can get around easily, and your sign needs to respect that.
Finding and Understanding Local Rules
Your first port of call should always be your local council's website. A quick search for terms like "footpath signs," "sandwich boards," or "trading in public places" will usually point you in the right direction. Most councils have detailed guides or specific pages laying out the dos and don'ts.
Once you’ve found the right document, zero in on these critical details:
- Minimum Clearance: This is the big one. It's the absolute minimum unobstructed width you must leave for pedestrians to pass.
- Maximum Dimensions: Councils are very specific about how big your sign can be, often detailing maximum height, width, and even total surface area.
- Approved Placement Zones: The rules will dictate exactly where your sign can go—usually either right up against your building or out by the kerb.
- Wind and Weather Provisions: Many bylaws require you to bring your sign inside during high winds or bad weather, so make sure it's stable and easy to move.
Take Dunedin City Council, for example. They have very clear conditions to keep their footpaths safe. Their rules state a sign can have a maximum surface area of 0.5 square metres. More importantly, you need to leave a 3-metre clear path in the central business district, which drops to 1.5 metres elsewhere. You can dive into the full conditions for commercial use of footpaths on their site to see just how specific these regulations get.
Key Council Footpath Sign Rule Comparison
To really drive home how much the rules can differ from one place to another, I've put together a quick comparison table. This shows why you absolutely must check your own council's rules instead of just copying what a business in another city is doing.
| Regulatory Requirement | Example Council A (e.g., Dunedin) | Example Council B (e.g., New Plymouth) | Common Practice |
|---|---|---|---|
| Minimum Footpath Clearance | 3.0m in CBD, 1.5m elsewhere | 1.2m minimum | Typically 1.2m to 1.8m, but varies hugely. |
| Max Sign Height | 1.2m | 1.0m | Usually around 1.0m - 1.2m. |
| Max Sign Width | 0.6m | 0.75m | Generally between 0.6m and 0.8m. |
| Placement Zone | Kerbside only in most areas | Must be against building frontage | Either kerbside or building line placement is common. |
| Permit Required? | Yes, annual permit needed. | Yes, permit required before placement. | Most urban councils now require some form of permit. |
As you can see, the specific numbers for clearance and dimensions can be quite different. A sign built for New Plymouth's rules might be too wide or not leave enough clearance for a busy street in Dunedin.
Always verify the exact measurements and placement rules for your specific address. A quick check can save you from the hassle of having your sign confiscated or facing a penalty.
Getting a handle on these local nuances is the key to success. It ensures your footpath sign becomes a genuine asset for your business, drawing customers in without creating an obstacle or falling foul of the rules. Before you spend a cent on a new sign, do your homework and confirm the local requirements.
Choosing the Right Type of Footpath Sign
Alright, you've waded through the council rules and have a clear picture of what's allowed. Now for the fun part: picking a sign that actually turns heads and brings people through your door. Choosing the right footpath sign in NZ goes beyond just what looks good; it's about what works for your location, your brand, and the day-to-day reality of running your business.
Let's break down the most popular options out there so you can find the perfect fit.
Think of your sign as your handshake with the street. It needs to be sturdy, easy to read, and feel like a natural extension of your brand. You also have to consider who's lugging it in and out every day and what sort of weather it's going to be up against.
A-Frame Signs: The Classic All-Rounder
The A-frame, or sandwich board, is a classic for a reason. You see them everywhere on New Zealand footpaths. Their simple, foldable design makes them incredibly easy to carry and store overnight, which is a non-negotiable for most council bylaws.
These signs are brilliant for businesses that are constantly changing their message. A cafe can scribble the daily soup on a chalkboard A-frame, while a retail shop can slide in new posters for a weekend sale. Plus, you get two display panels, doubling your advertising space.
- Best for: Cafes, retail shops, and any business that needs to move their sign easily and update specials on the fly.
- A word of caution: Standard A-frames can act like a sail in a strong gust of wind. If your spot is a bit of a wind tunnel, hunt down a heavier model or one with a lower centre of gravity.
Weighted Base Signs: The Weather Warriors
If you're dealing with a classic Kiwi southerly, a weighted base sign is going to be your best mate. These usually have a solid panel that clicks into a heavy base, which you can fill with water or sand to make it virtually immovable.
Their rugged design means they stay put, making them a reliable "set and forget" option for the day. They have a sleek, professional look and are built to last outdoors. I've even heard from a business owner in Mangawhai whose weighted sign survived a tornado – you can't get a better endorsement than that.
A sign that's constantly falling over isn't just bad for business; it's a serious safety hazard. Spending a bit more on a sign built for our unpredictable weather is an investment in your brand's image and public safety.
T-Boards and Swing Signs: The Attention Grabbers
Looking for something with a bit more life? T-boards and swing signs can add some dynamic movement. A T-board is often a lighter-weight take on the weighted base style, while a swing sign has a panel that hangs from a frame, letting it sway gently in the breeze.
That little bit of movement is surprisingly effective at catching the eye of someone walking past. They’re a fantastic choice if you want to stand out on a street already crowded with static A-frames.
Material Matters: Form and Function
Finally, the material you choose has a huge impact on the sign's look, lifespan, and how you can use it.
- Corflute: This is your lightweight, budget-friendly option. It's perfect for temporary signage or messages you need to swap out often, like for real estate open homes or weekend market stalls.
- Aluminium Composite Material (ACM): This is a more premium choice. It's incredibly durable, weather-resistant, and gives you a perfectly smooth surface for high-quality, professional-looking graphics.
- Timber/Chalkboard: Nothing beats this for a rustic, charming vibe. It’s ideal for cafes, bakeries, and artisan shops. The ability to create hand-drawn, creative messages that can be wiped clean in seconds is a huge plus.
Ultimately, picking the right footpath sign is a balancing act between practicality, durability, and personality. When you think carefully about your specific needs and the local conditions, you'll end up with a powerful marketing tool that works hard for your business, day in and day out.
Designing a Sign That Stops Foot Traffic
A powerful footpath sign does more than just announce your business; it's your silent salesperson working the pavement. To make it truly effective, the design has to be instantly understood by someone walking past at a brisk pace. You've only got a few seconds to make an impression, so clarity and impact are everything.

Think of it this way: your message has to land in about three to five seconds. This isn't the place for clutter or tiny details. Instead, you need to zero in on a single, compelling idea that grabs attention and encourages someone to act. When you're designing your sign, it's always a good idea to lean on some proven effective signage design principles to boost its visibility and make sure your message is crystal clear.
Readability Is Your Top Priority
Let's be blunt: if people can't read your sign from a distance, it's just a colourful obstacle. The secret to great readability comes down to two things: contrast and font choice.
High-contrast colour combinations are your best friends here. Think black on yellow, white on blue, or yellow on black—these pairings are proven to be the most visible from afar.
You'll want to steer clear of busy backgrounds or subtle colour pairings that just wash out in the bright New Zealand sun. Your choice of font is just as crucial.
- Go Bold and Simple: Stick with clean, sans-serif fonts. Think Helvetica, Arial, or Futura. They’re straightforward and easy to decipher from a distance.
- Avoid Complex Scripts: Cursive or overly decorative fonts might look elegant up close, but they often become a blurry mess from a few metres away, defeating the whole purpose.
- Size Matters: Your main headline needs to be big enough to be read from across the street. A good old-fashioned test is to just walk over there and see for yourself. If you have to squint, it’s not big enough.
Crafting a Message That Connects
Once you've got readability sorted, the next challenge is to write a message that actually works. A great footpath sign message is short, sharp, and has a clear goal. It has to give passersby a real reason to break their stride and step inside.
A bit of personality can make a world of difference. For a local Kiwi café, a sign that reads, "Our coffee is strong, and our Mondays are short," is far more memorable than a generic "Coffee." That playful approach creates an instant connection.
The most effective signs often pose a question, make a witty observation, or present an irresistible offer. They start a conversation before the customer even reaches the door.
For instance, a boutique could try something like, "That dress you saw online? It's in here." This creates a sense of curiosity and a little bit of urgency. A bakery might simply say, "Freshly baked sourdough. Smell that?" This appeals directly to the senses and creates an immediate craving.
Your goal is to make stopping feel like their idea. It’s about creating a small moment of delight or intrigue that makes turning into your shop feel like the most natural next step.
Where to Place Your Sign for Safety and Impact
You’ve got a brilliant message on your sign, but where you actually put it on the footpath is just as critical. The right spot can literally stop people in their tracks and pull them into your shop. The wrong one? At best, it's ignored. At worst, it’s a public safety hazard.
Getting the placement right is a balancing act between making your sign visible and respecting the public space it occupies. Your sign needs to grab attention, but it absolutely cannot be an obstacle. Think about it: for someone pushing a pram, using a wheelchair, or navigating with a visual impairment, a sign plopped in the middle of the pavement is a major problem. Always prioritise a clear, wide path for everyone.
Follow the ‘Shoreline’ for Best Practice
A fantastic rule of thumb, and one often championed by groups like Blind Low Vision NZ, is the ‘shoreline’ principle. It’s a simple but effective concept. Imagine the footpath has two edges: the building line on one side and the kerb on the other. This is the 'shoreline' where you usually find street furniture like rubbish bins, benches, and lamp posts.
By placing your footpath sign nz along this same line—typically closer to the kerb—you’re aligning it with existing objects. This naturally keeps the main central channel of the footpath clear and predictable. It’s an incredibly simple way to maintain a safe, wide thoroughfare for everyone, making a huge difference to accessibility in our communities.
Know Your Local Clearance Rules
Councils are serious about keeping footpaths clear, and their rules aren't just suggestions—they're mandatory. Many local authorities across New Zealand have strict minimum clearance widths you need to stick to.
For example, the New Plymouth District Council requires a sign to leave at least two-thirds of the footpath width clear, with an absolute minimum clear space of 1200mm. This ensures there’s enough room for pedestrians, wheelchairs, and mobility scooters to pass by without any trouble. It's always worth digging into your own council's specific guidelines on footpath signs to be sure.
Before you put your sign out, get a tape measure and check the space. A common mistake is just assuming there's enough room, which can quickly lead to a warning or a fine. It’s on you to make sure you're compliant.
Common Placement Mistakes to Sidestep
Even with the best of intentions, it's easy to get sign placement wrong. Here are a few common pitfalls I've seen business owners fall into. Keep these in mind every morning you put your sign out.
- Blocking Sightlines: Never, ever put a sign where it might block a driver's view from a driveway or stop a pedestrian from seeing traffic at a crossing. Safety first, always.
- Creating Trip Hazards: Check that the base of your sign is solid and doesn't stick out awkwardly. A heavy, flat base is much safer than a flimsy frame with splayed legs that are just waiting to be tripped over.
- Obstructing Access Points: Keep your sign well clear of shop doorways, pedestrian crossings, bus stops, and access ramps. These areas need to be completely unobstructed.
Stick to the shoreline principle, nail the clearance rules, and steer clear of these common hazards. Do that, and your sign will be a welcome part of the streetscape—one that safely brings new customers right through your door.
Got Questions About Footpath Signs? We’ve Got Answers.
Even with a solid plan, it’s completely normal to have a few questions rattling around. Council bylaws can feel a bit like navigating a maze, but getting clarity on the common sticking points makes all the difference.
Let's run through the questions we hear most often from business owners about using a footpath sign in NZ. Getting these details sorted means your sign stays a valuable asset, not a frustrating liability.
Do I Actually Need a Permit?
This is the big one, and the short answer is: it’s all up to your local council. For a standard, run-of-the-mill sign that ticks all the boxes for size and placement, you often won't need a specific permit.
But—and this is a big but—if your business is in a busy city centre, a pedestrian-only mall, or a designated heritage area, the rules almost always change. You'll likely need to formally apply for or register your sign. The only way to be 100% sure is to jump onto your local council's website. Never assume you’re in the clear. A five-minute search online can save you a world of hassle and potential fines down the track.
What If My Sign Doesn't Follow the Rules?
So, what happens if a council officer spots your sign breaking the local bylaws? Usually, the first step is a friendly chat. They’ll explain the problem and ask you to either move the sign or take it inside for the day.
Ignoring that advice is a really bad move. If you keep putting a non-compliant sign out, things can escalate quickly. The council can confiscate your sign and hit you with a fine. For businesses that repeatedly ignore the rules, some councils might even ban you from placing anything on the footpath. That’s a headache no one wants.
Remember, the rules are there to keep the footpath safe and accessible for everyone, especially people with prams, wheelchairs, or vision impairments. It's always better to work with the council, not against them.
How Can I Stop My Sign Blowing Away?
Keeping your sign secure in windy weather isn't just a good idea—it's your responsibility. We all know how quickly the weather can turn in New Zealand, and a flying A-frame sign is a serious public safety hazard.
Here’s how to keep it grounded:
- Buy the Right Gear: Don’t cheap out here. Look for a sign designed for the elements. Heavy-duty A-frames with a low centre of gravity are great, as are signs with bases you can fill with water for extra weight.
- Know When to Fold: Pretty much every council bylaw states that signs must be brought inside during high winds. Keep an eye on the weather forecast and be proactive. If it looks rough, bring it in.
- Avoid DIY Solutions: Whatever you do, don't use loose bricks, sandbags, or other random heavy objects to hold a flimsy sign down. In a strong gust, they can become dangerous projectiles themselves.
Can I Just Leave My Sign Out Overnight?
That’s going to be a hard no. Footpath signs are considered temporary advertising, which means they should only be out when your business is actually open.
When you lock up for the day, your sign needs to come inside with you. This simple rule helps keep footpaths clear and uncluttered for pedestrians after hours and ensures the streetscape is tidy and safe for everyone.
Ready to create a sign that not only ticks all the compliance boxes but also turns heads for all the right reasons? The team at SONI DESIGN is here to help you craft the perfect footpath sign that tells your unique story.
Leave a Comment
Stay home & get your daily
needs from our shop
Start You'r Daily Shopping with Nest Mart