
Your cart is currently empty.
Turning a digital photo you love into a tangible piece of art for your home is what canvas photo printing is all about. It’s the craft of taking a photograph, printing it directly onto high-quality canvas, and then stretching that fabric over a sturdy wooden frame. This technique gives your photos a classic, painterly texture, creating a beautiful piece that’s ready to hang right on your wall—no glass frame needed.
The Art of Transforming Digital Memories
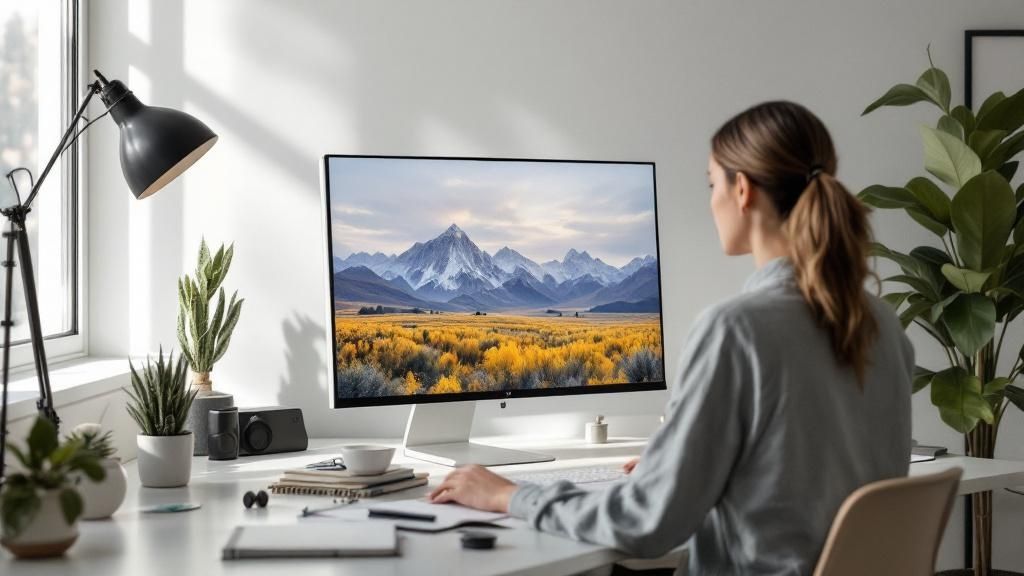
Have you ever looked at a stunning photo on your phone—a breathtaking sunset over the Southern Alps or a candid family laugh—and wished you could make it a permanent feature in your home? This guide is your complete walkthrough for creating stunning canvas prints right here in New Zealand, cutting through the technical jargon to show you exactly how it’s done.
Consider this your backstage pass to the entire process. We’ll cover everything from picking the right image and prepping it like a professional to understanding what actually happens when it goes to print.
From Early Portraits to Modern Art
While it feels very modern, this practice has a rich history. Photography in New Zealand actually dates back to 1841, just a year after the Treaty of Waitangi was signed. Early studios in Auckland and Wellington used intricate methods like daguerreotype and collodion wet plates to capture those first precious images. This deep-rooted tradition of photographic documentation laid the groundwork for modern techniques like canvas printing, helping images evolve from rare artefacts into accessible art. To get a better sense of this incredible heritage, check out the timeline on the official NZ History site.
What You Will Learn in This Guide
We’ve broken down the entire workflow into clear, easy-to-follow stages. The goal is to give you the confidence and know-how to create a professional-quality canvas you’ll be proud to display.
Here’s a glimpse of what’s ahead:
- Image Preparation: Getting to grips with resolution, colour profiles, and the essential edits that make a difference.
- Material Selection: How to choose the right canvas, inks, and stretcher bars for a lasting finish.
- Printing and Finishing: A look inside the printing, coating, and stretching process.
- Professional Display: Adding those final touches that give your canvas a true gallery feel.
By the time you're done, you’ll understand that canvas photo developing is much more than just hitting 'print'. It’s a creative craft that honours your best memories by turning them into physical, artful keepsakes.
Getting Your Photo Ready for a Flawless Print
A stunning canvas print doesn't just happen at the print shop. The real magic begins with a perfectly prepared digital file. Getting the details right before you even think about hitting 'print' is the secret behind professional-quality canvas photo developing. Honestly, skipping these initial steps is the number one reason I see prints that end up looking dull, blurry, or just plain wrong.
Think of this preparation stage as your quality control. Your digital photo is the blueprint for your final piece of art. If that blueprint is flawed, it doesn't matter how amazing the canvas or inks are—the final product will suffer.
Why Image Resolution is Everything
The single most important factor for a sharp, detailed canvas is your image's resolution, which we measure in DPI (dots per inch). This number tells you how much detail is packed into your photo. An image might look great on your phone, but when you blow it up to the size of a canvas, a low-resolution file will turn into a blocky, pixelated mess.
For canvas prints, the industry gold standard is 300 DPI at the final print size. Sure, you can sometimes get away with 150 DPI if it's a massive print that will only be seen from across the room, but aiming for 300 ensures your image looks crisp and professional, even up close.
Here’s a quick way to see how large you can print your photo without losing quality:
- Find your image file on your computer and open its properties or 'get info'.
- Note the pixel dimensions (e.g., 4000 x 3000 pixels).
- Divide each of those numbers by 300. This gives you the maximum high-quality print size in inches (e.g., 4000 ÷ 300 = 13.3 inches).
Doing this simple bit of maths upfront can save you from the disappointment of paying for a large canvas only to realise the file wasn't up to the task.
A Quick Word on Colour Mode
Screens and printers see colour in completely different ways. Your camera, phone, and computer monitor all use the RGB (Red, Green, Blue) colour model, which creates colours by mixing light. Professional printers, on the other hand, use the CMYK (Cyan, Magenta, Yellow, Key/Black) model, which works by mixing physical inks on a surface like canvas.
Sending an RGB file straight to a CMYK printer is a recipe for surprise colour shifts. Those vibrant blues and electric greens in your photo? They often come out looking much more muted and dull, simply because the range of colours CMYK can produce is smaller than RGB's.
The best practice is to convert your image to a CMYK colour profile yourself before you send it off. Most decent photo editing software, from Adobe Photoshop to free alternatives like GIMP, can do this in a few clicks. This step gives you a much more accurate preview of how the colours will actually look on the finished canvas.
The Final Pre-Print Tweaks
You don't need to be a Photoshop guru to make a few small adjustments that will have a massive impact on your final print. Canvas has a natural texture that absorbs light, which can make images look a bit darker than they do on a bright, backlit screen.
To get ahead of this, I always recommend these three simple edits:
- Brightness: Give the overall brightness of your photo a slight nudge upwards. This is crucial for preventing it from looking muddy or dark once it's on the canvas.
- Contrast: Boosting the contrast just a little will make the details pop. It deepens the blacks and brightens the whites, giving the image a real sense of depth and punch.
- Sharpening: Apply a subtle sharpening filter. This helps define the edges in your image, ensuring everything stays looking crisp and clear on the textured fabric of the canvas.
These tiny tweaks are what separate a good print from a great one. They ensure your photo makes the leap from a glowing screen to a physical, textured medium beautifully.
Choosing the Right Canvas and Printing Options
The material you print on is just as crucial as the photo itself. This is a part of the canvas photo developing process where your choices directly impact everything from the final look to how long your art will last. Getting this right is what separates a good print from a truly great one.
Think of it this way: you’ve captured a stunning, detailed landscape of Aoraki/Mount Cook. The specific canvas texture and ink quality you select will determine whether those snowy peaks look crisp and brilliant or end up looking flat and lifeless. This is where a little bit of material knowledge goes a long way.
H3: Picking the Right Canvas Material
The fabric of the canvas is the very foundation of your print. Your main options will almost always be cotton, polyester, or a blend of the two, and each one brings something different to the table.
-
Cotton Canvas: This is the traditional artist's choice. It has a slightly textured, absorbent surface that gives prints a classic, almost painterly feel. It’s perfect for portraits or fine art reproductions where you’re after a softer, more organic finish.
-
Polyester Canvas: A more modern material, polyester offers a smoother, brighter white surface. This consistency allows for incredibly sharp details and vibrant colours, making it a fantastic choice for high-resolution, punchy photography.
-
Poly-Cotton Blend: This really does offer the best of both worlds. Blends combine the subtle texture of cotton with the sharpness and robust durability of polyester. It’s no surprise this is often the go-to for professional printers, as it nails that balance between quality and longevity.
So, a warm, candid family photo might look incredible on a cotton canvas, enhancing its personal, artistic feel. On the other hand, a breathtaking photo of Milford Sound, with its deep blues and greens, would really pop on the vibrant surface of a polyester or blended canvas.
The key takeaway here is that the material directly sets the mood. Cotton brings a warm, classic texture, while polyester delivers a sharp, modern pop. There’s no single “best” option—it’s all about matching the canvas to the unique style of your image.
H3: Why Inks and Stretcher Bars Matter Just as Much
The type of ink used is absolutely critical for the lifespan and quality of your print. You'll generally be choosing between two main types: dye-based and pigment-based.
For canvas prints, pigment-based inks are hands-down the superior choice. They offer serious resistance to fading from UV light and can maintain their true colour for 100 years or more. Dye-based inks, in comparison, can start to look tired and faded in a fraction of that time.
Here's a quick comparison to help you see the differences at a glance:
Canvas Material and Ink Comparison
This table breaks down the common canvas materials and ink types, helping you choose the best options for your project's quality and longevity.
| Feature | Cotton Canvas | Polyester Canvas | Pigment-Based Inks | Dye-Based Inks |
|---|---|---|---|---|
| Texture & Finish | Slightly textured, matte, "painterly" feel | Smooth, bright white, modern finish | Excellent colour accuracy, matte finish | Very vibrant, glossy finish |
| Best For | Portraits, fine art reproductions, classic photos | High-resolution, colourful photography, sharp detail | Archival-quality prints, fine art, photography | Short-term displays, proofs, budget prints |
| Durability | Good, but can be prone to shrinking/stretching | Excellent, resistant to moisture and stretching | Highly fade-resistant (100+ years) | Fades relatively quickly, especially in sunlight |
| Colour Vibrancy | Softer, more subdued colour reproduction | Bright, vibrant, and punchy colours | Rich, deep, and accurate colours | Extremely vivid, but less stable over time |
Ultimately, for a piece you want to last a lifetime, pairing a high-quality poly-cotton blend canvas with pigment-based inks is the professional standard for a reason.
Finally, don’t overlook the frame your canvas will be stretched over. You want stretcher bars made from kiln-dried timber, like New Zealand pine. This process removes moisture from the wood, which is crucial for preventing it from warping over time due to changes in humidity—a common headache in many Kiwi homes.
The depth of these bars also plays a big role in the final presentation. A standard 2cm bar is perfectly fine, but a thicker 4cm bar gives you that "gallery wrap" look. It’s a more substantial, modern profile that makes the artwork really stand out from the wall, offering a clean and popular frameless display.
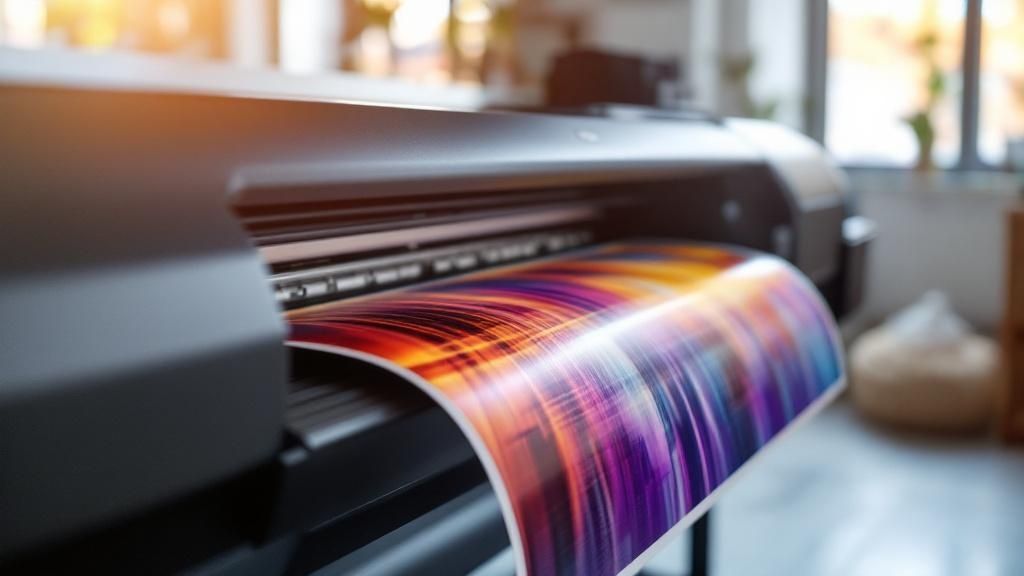
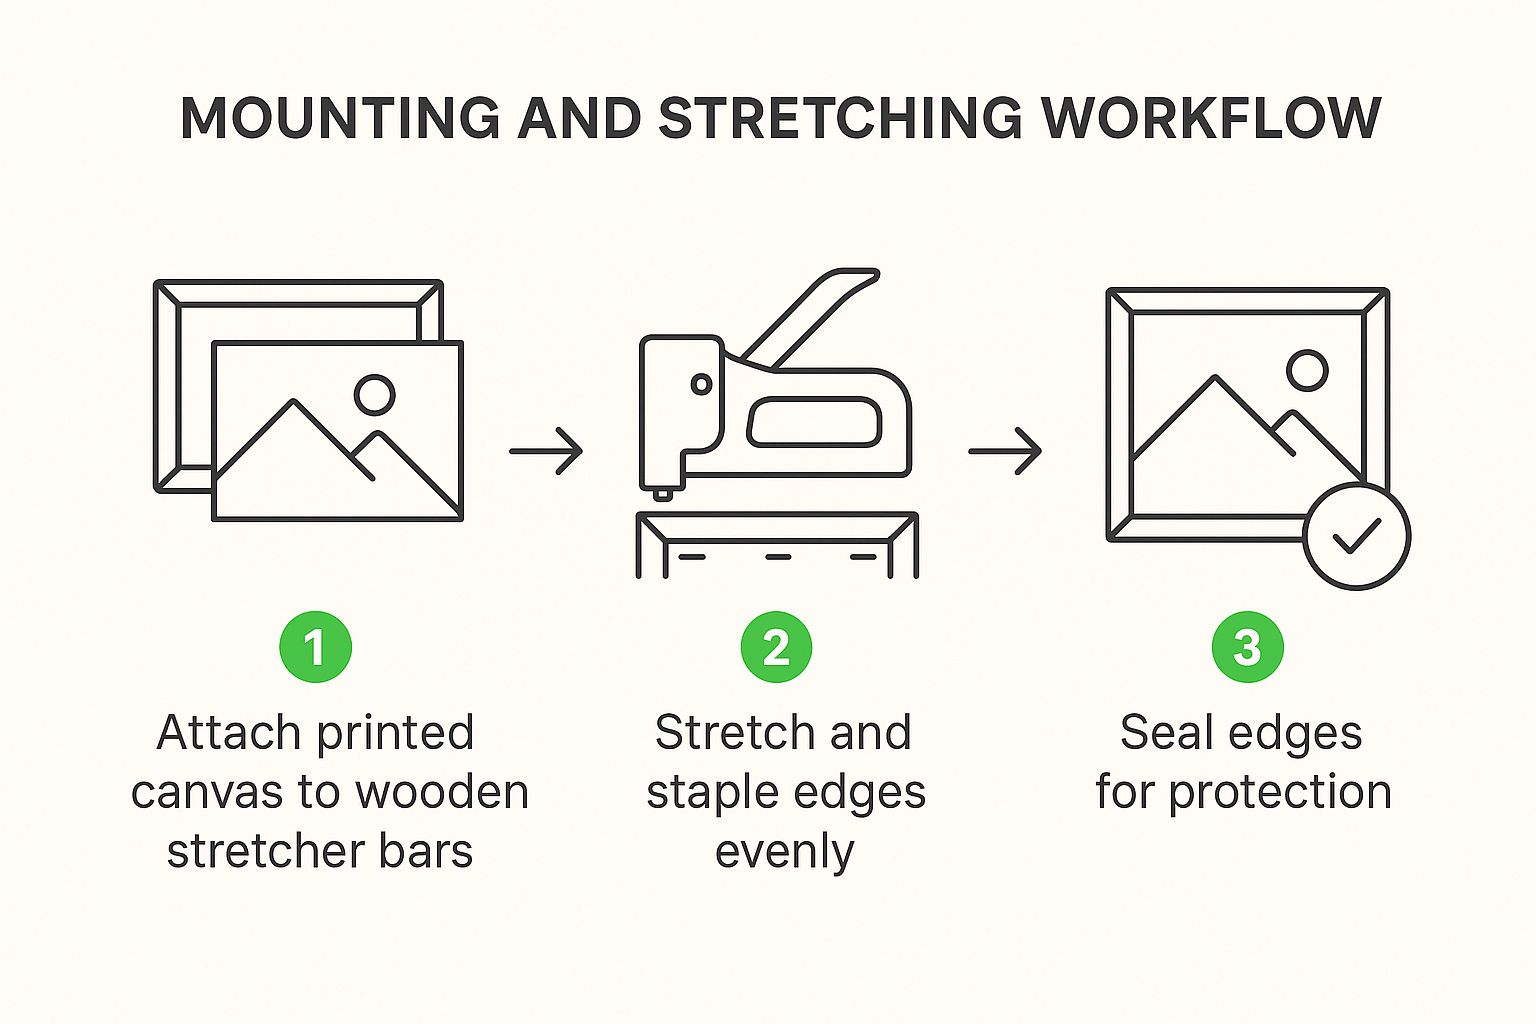
Bringing Your Image to Life: Printing, Coating, and Stretching
This is where the magic happens. Your carefully prepped digital file is about to become a real, tangible piece of art. The journey from screen to wall in canvas photo developing is a hands-on process that demands precision printing, a protective coating, and expert stretching. Whether you’re working with a great local NZ print shop like Soni Design or tackling it yourself, knowing these steps is key to getting a beautiful, long-lasting result.
It all starts with the print itself. Your high-resolution file is loaded up, and a professional wide-format inkjet printer gets to work, laying down archival pigment inks onto a roll of canvas. This is a far cry from printing on paper; the whole process is calibrated to capture rich, deep colours and crisp details on the unique texture of the canvas fabric.
Applying the All-Important Protective Coat
Once the ink has fully dried, the canvas isn't ready just yet. There’s a crucial step that ensures your print stands the test of time: applying a protective coating or varnish. This liquid laminate is like a shield for your artwork, guarding it against the realities of life.
This protective layer is absolutely non-negotiable for longevity. It provides vital UV protection to stop colours from fading under the harsh New Zealand sun and creates a barrier against scratches, dust, and moisture. Think of it as insurance for your most cherished memories.
The coating you choose also plays a big part in the final look. You'll usually get a choice of a few different finishes, and each one brings its own vibe to the piece:
- Matte Finish: Gives you a non-reflective, modern look that kills any glare. It’s perfect for brightly lit rooms or if you’re aiming for a softer, more artistic feel.
- Satin or Semi-Gloss Finish: This is a nice middle ground, offering a gentle lustre that sits between matte and high gloss. It enhances the colours without creating distracting reflections.
- Gloss Finish: If you want your colours to really pop, this is the one. It delivers a vibrant, high-impact look that makes a bold statement, though it will catch the light more.
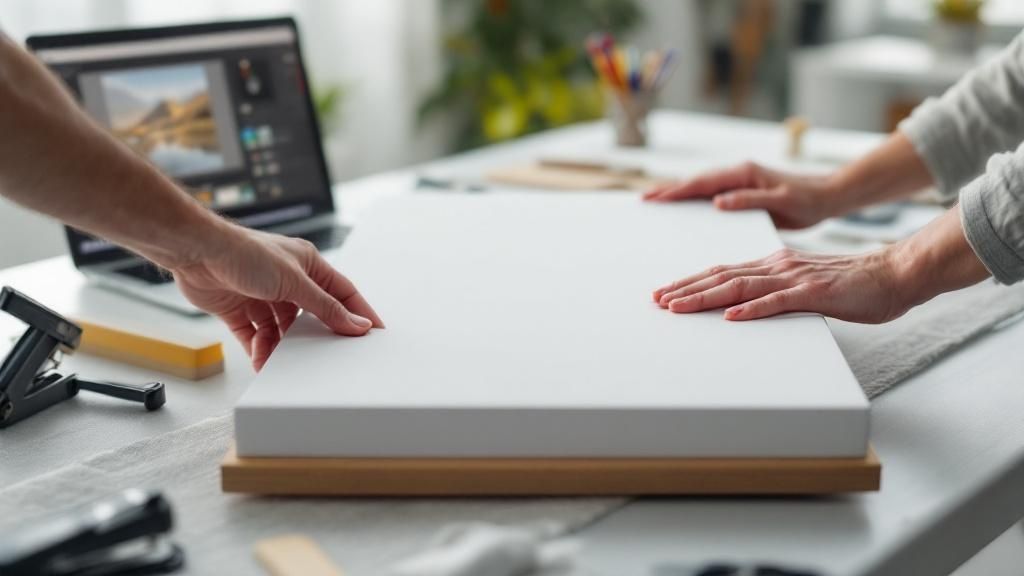
The Art of Stretching the Canvas
With the print coated and cured, it’s time to stretch it over a wooden frame. This is the moment your canvas finally takes on its three-dimensional form. The aim here is to get a perfectly taut, drum-tight surface with clean, professional-looking corners. It’s a technique that has deep roots in art history, linking today's digital photography with centuries-old presentation methods.
This connection to art history is especially relevant in New Zealand. Our own visual art traditions are heavily influenced by 19th and early 20th-century European styles, particularly British landscape painting. Back in the 1800s, painting and photography were seen as two sides of the same coin—ways to depict Aotearoa’s incredible landscapes and people. You can find more on the beginnings of painting in New Zealand on nzhistory.govt.nz. This context shows how canvas printing has evolved from a simple documentary tool into a medium that's part of our nation's unique artistic story.
Stretching a canvas properly takes both muscle and precision. Using special canvas-stretching pliers, the fabric is pulled evenly over the stretcher bars and stapled to the back. You always start from the centre of each side and work your way outwards towards the corners.
As you can see, maintaining consistent tension and stapling methodically are the secrets to avoiding any sagging or ripples and making sure the canvas sits perfectly flat.
The trickiest part? The corners. Creating clean, folded corners—especially for a gallery wrap where the image continues around the edges—is a real skill. A sloppy fold looks bulky and amateurish. The proper technique involves a precise 45-degree fold, tucked in neatly and stapled securely to create that sharp, gallery-quality edge. It’s this meticulous finishing that really separates a DIY job from a professional piece of art.
Finishing Your Canvas for a Professional Display
The final details are what transform a good canvas print into a truly great one. You’ve done the hard work of preparing your image and getting it printed; now it’s time for those professional finishing touches that make your piece wall-ready. This last part of the canvas photo developing journey is all about presentation and longevity.
How you hang, frame, and care for your canvas defines its impact in a room and ensures it looks incredible for years to come.
Installing Secure Hanging Hardware
A beautiful piece of art deserves to be hung securely. The most reliable method I always come back to is a taut wire stretched between two D-rings. You just screw them into the inside of the wooden stretcher frame.
My rule of thumb is to place each D-ring about one-third of the way down from the top edge. This simple positioning trick helps the canvas hang flush and flat against the wall, giving it a much cleaner look.
For smaller, lighter canvases, a sawtooth hanger is a perfectly fine choice. Just centre it on the top stretcher bar and tap it into place. But for anything with significant size or weight, a sturdy wire is always the safer, more professional option.
The goal is a secure and level display. A poorly hung canvas not only looks unprofessional but can also be a falling hazard. Taking five extra minutes to get the hardware right makes all the difference.
To make sure your new canvas print really shines, check out these essential interior design tips. They’ll help you find the perfect spot for maximum visual impact.
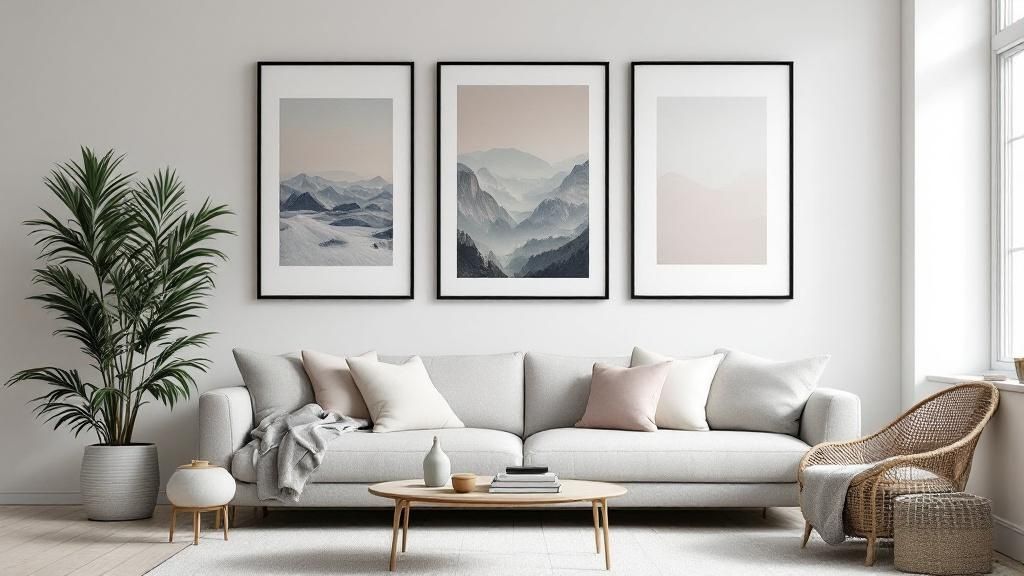
Choosing a Frame to Elevate Your Art
While a classic gallery wrap has a clean, modern appeal, adding a frame can give your canvas that high-end, gallery-quality finish. One of the most stylish options for a canvas print is easily the floating frame.
Sometimes called a floater frame, this style creates a really striking visual effect:
- Creates a Gap: It leaves a small, elegant space between the canvas edge and the inside of the frame.
- Adds Depth: This gap makes the canvas appear to "float," adding a beautiful sense of depth.
- Protects Edges: A floating frame also provides an extra layer of protection for the vulnerable corners and edges of your canvas.
Choosing a frame in a simple colour like black, white, or a natural timber finish will complement your photograph without overpowering it, adding that final layer of polish.
Long-Term Care in the New Zealand Climate
Looking after your print is crucial for preserving it, especially with New Zealand's varied climate. In fact, preserving photographic works is a significant national challenge; the Alexander Turnbull Library receives over 150 photographic collections each year but can only accept about 30% due to resource limitations. This really highlights how important it is for us to care for our own prints.
To protect your canvas, keep it out of direct sunlight, which will inevitably cause colours to fade. I’d also avoid high-humidity areas like bathrooms or kitchens, as moisture can make the canvas sag or even warp the wooden frame.
When it comes to cleaning, a gentle wipe with a soft, dry microfibre cloth is all you need to keep it looking pristine.
A Few Common Questions We Hear About Canvas Prints
Even with the best guide in hand, a few questions always seem to pop up when you're getting a photo printed on canvas. Getting these sorted out beforehand can save you a lot of headaches and ensure the final piece looks just as stunning as you imagine. Let's run through some of the things people ask us most often.
What's the Ideal Resolution for a Canvas Print?
For a really crisp, professional-looking canvas, you should always aim for an image resolution of 300 dots per inch (DPI) at the final print size. This is the gold standard.
You might hear that you can get away with 150 DPI for massive prints that will be viewed from across the room, and that's sometimes true. But for anything you'll see up close, sticking to 300 DPI guarantees your print will be sharp, clear, and free of any distracting pixelation or blurriness.
A good habit to get into is opening your image file in an editing program before sending it off. Just a quick check of the dimensions and resolution can prevent that sinking feeling of getting a fuzzy print back, especially when you're investing in a big one.
Can I Actually Use a Photo from My Phone for a Large Canvas?
Absolutely, you often can! It just comes down to the quality of your phone's camera. The cameras on most modern smartphones are fantastic and capture high-resolution images that are more than suitable for medium-sized canvases. For anything bigger than, say, 60cm, it's really important to double-check the original file's pixel dimensions first.
One crucial tip: Always, always use the original, full-size file straight from your phone's gallery. Never use a version that's been sent through apps like Messenger or WhatsApp. They compress images heavily to save data, and that compression will result in a blurry, low-quality print every time.
What Is a Gallery Wrap, Anyway?
A gallery wrap is a really popular, modern way to finish a canvas. It’s where the printed image continues around the edges of the wooden stretcher frame it’s wrapped on. This gives it a clean, frameless look that makes the artwork feel a bit more three-dimensional and means it's ready to hang right out of the box.
This is the style to go for if you're after a contemporary vibe. The only thing to watch out for when you're setting up your photo is to make sure no important bits—like someone's face or a key detail—are sitting right at the very edge of the frame. That part of the image will be wrapped around the side, so give your main subject a little bit of breathing room.
At SONI DESIGN, we specialise in bringing your memories to life with vibrant, high-quality printing. Let us help you create an extraordinary canvas that tells your unique story. Start your project with us today!
Leave a Comment
Stay home & get your daily
needs from our shop
Start You'r Daily Shopping with Nest Mart