
Your cart is currently empty.

Finding the right banner starts with knowing exactly what you need it for. Here in Auckland, whether you're after a tough-as-nails outdoor banner to brave the weather or a sleek indoor display for a trade show, getting the material and type right from the get-go is the key to making an impact.
Choosing the Right Banner for Your Auckland Business
Don't let the options overwhelm you. Picking the perfect banner really just comes down to answering two simple questions: where is it going, and what's its job?
A cafe on Ponsonby Road advertising a new flat white needs something totally different from a construction firm needing signage for a temporary fence in the CBD. Thinking about this first means your money is well spent.
Start With Your Banner's Location and Purpose
The first thing to think about is the environment. For an outdoor banner in Auckland – where you can get sun, wind, and rain all in one afternoon – durability is everything. That's where heavy-duty vinyl and mesh banners really shine.
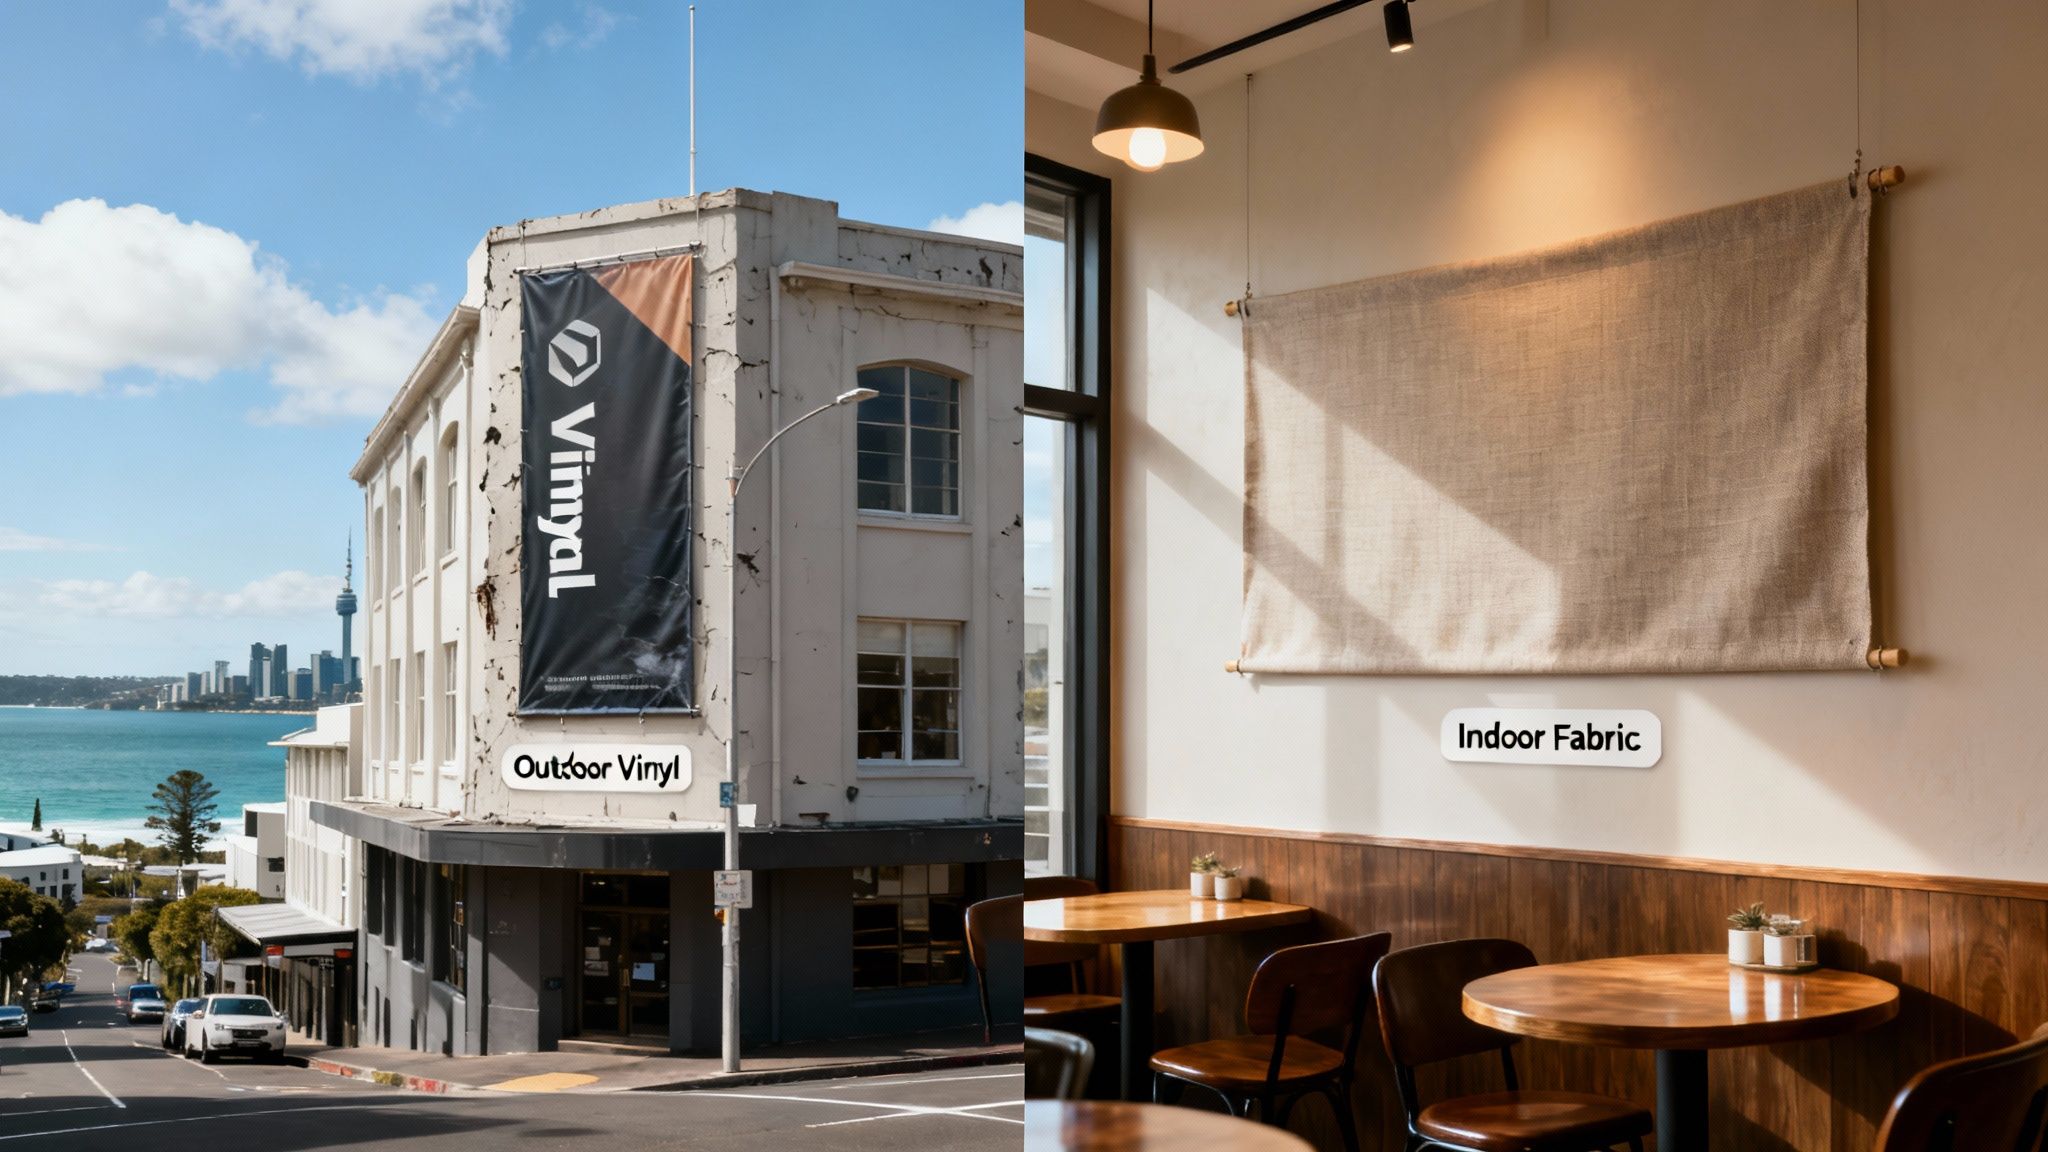
On the other hand, if you're setting up an indoor display for a conference at the Viaduct Events Centre, you'll want a professional, high-quality finish. Materials like fabric or smooth vinyl are perfect for that.
Your banner's purpose also points you to the right material. Are you running a short-term promotion, like a weekend sale, or is this a long-term fixture for your storefront?
- Short-Term Events & Sales: Lightweight vinyl is a great, cost-effective choice for temporary promotions. It’s easy to put up and gets your message across vibrantly without needing to last for years.
- Long-Term Outdoor Signage: For a banner that's going to be up for months, you absolutely need a heavy-duty, UV-resistant vinyl. This stops it from fading in the harsh New Zealand sun and makes sure it holds up against the elements.
- Indoor & High-End Displays: Fabric banners give you a sophisticated, glare-free finish that looks fantastic up close. They're ideal for trade show backdrops, retail displays, and media walls where looks really matter.
This quick guide helps break down the decision-making process.
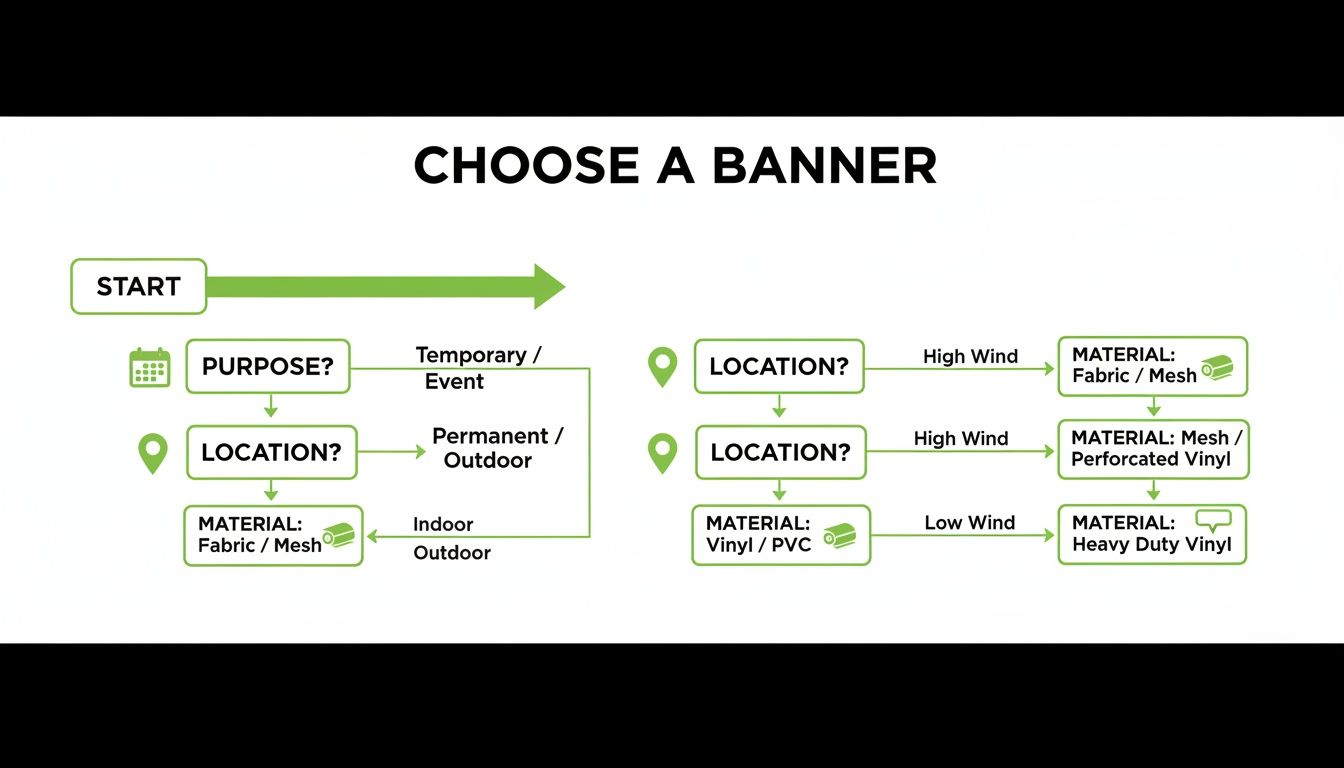
As you can see, once you've defined the banner's purpose and location, picking the right material becomes a much more straightforward decision.
Banner Material Quick-Selector Guide
To make it even easier, I've put together this quick-reference table. It's a handy way to compare common materials and see what works best for different scenarios you'll encounter around Auckland.
| Material Type | Best For | Durability | Key Feature |
|---|---|---|---|
| Standard PVC Vinyl | Short to mid-term outdoor use, general promotions. | 2-3 years | Versatile and cost-effective. |
| Heavy-Duty Vinyl | Long-term outdoor signage, high-wind areas. | 3-5+ years | Extremely tough, UV and tear-resistant. |
| Mesh Vinyl | Fences, scaffolding, very windy locations. | 2-3 years | Perforated to let wind pass through. |
| Polyester Fabric | Indoor displays, trade shows, media walls. | Long-lasting | Premium, non-glare, elegant appearance. |
| Smooth Blockout | Double-sided banners, retail displays. | 1-2 years | Opaque material prevents light show-through. |
Ultimately, this table helps you quickly narrow down the options based on your specific project, ensuring you get a banner that not only looks great but also lasts as long as you need it to.
Banners in the Auckland Market
In a bustling city like Auckland, the need for powerful visual advertising is as strong as ever. With so many businesses competing for attention, a well-designed banner can make all the difference. In fact, the New Zealand printing market was valued at $1.4 billion in 2025, with advertising materials like banners making up a huge slice of that pie. It just goes to show how vital physical media still is for local retail, real estate, and events.
A Quick Tip from the Pros: Don't forget to think about the quality of the images and text on your banner. Understanding the importance of professional photography for business marketing materials can take your banner's impact from good to great. A crisp, professional photo will always stand out.
How to Prepare Flawless Banner Artwork for Print
You can have the most brilliant banner concept in the world, but if the artwork isn't set up correctly, the final product will fall flat. Getting a digital file ready for a large-format printer isn’t rocket science, but a few small oversights can lead to fuzzy images, off-brand colours, and frustrating delays.
Here’s our insider’s guide to creating print-ready files. Follow these steps, and the banner you get back from us will be exactly the one you envisioned.
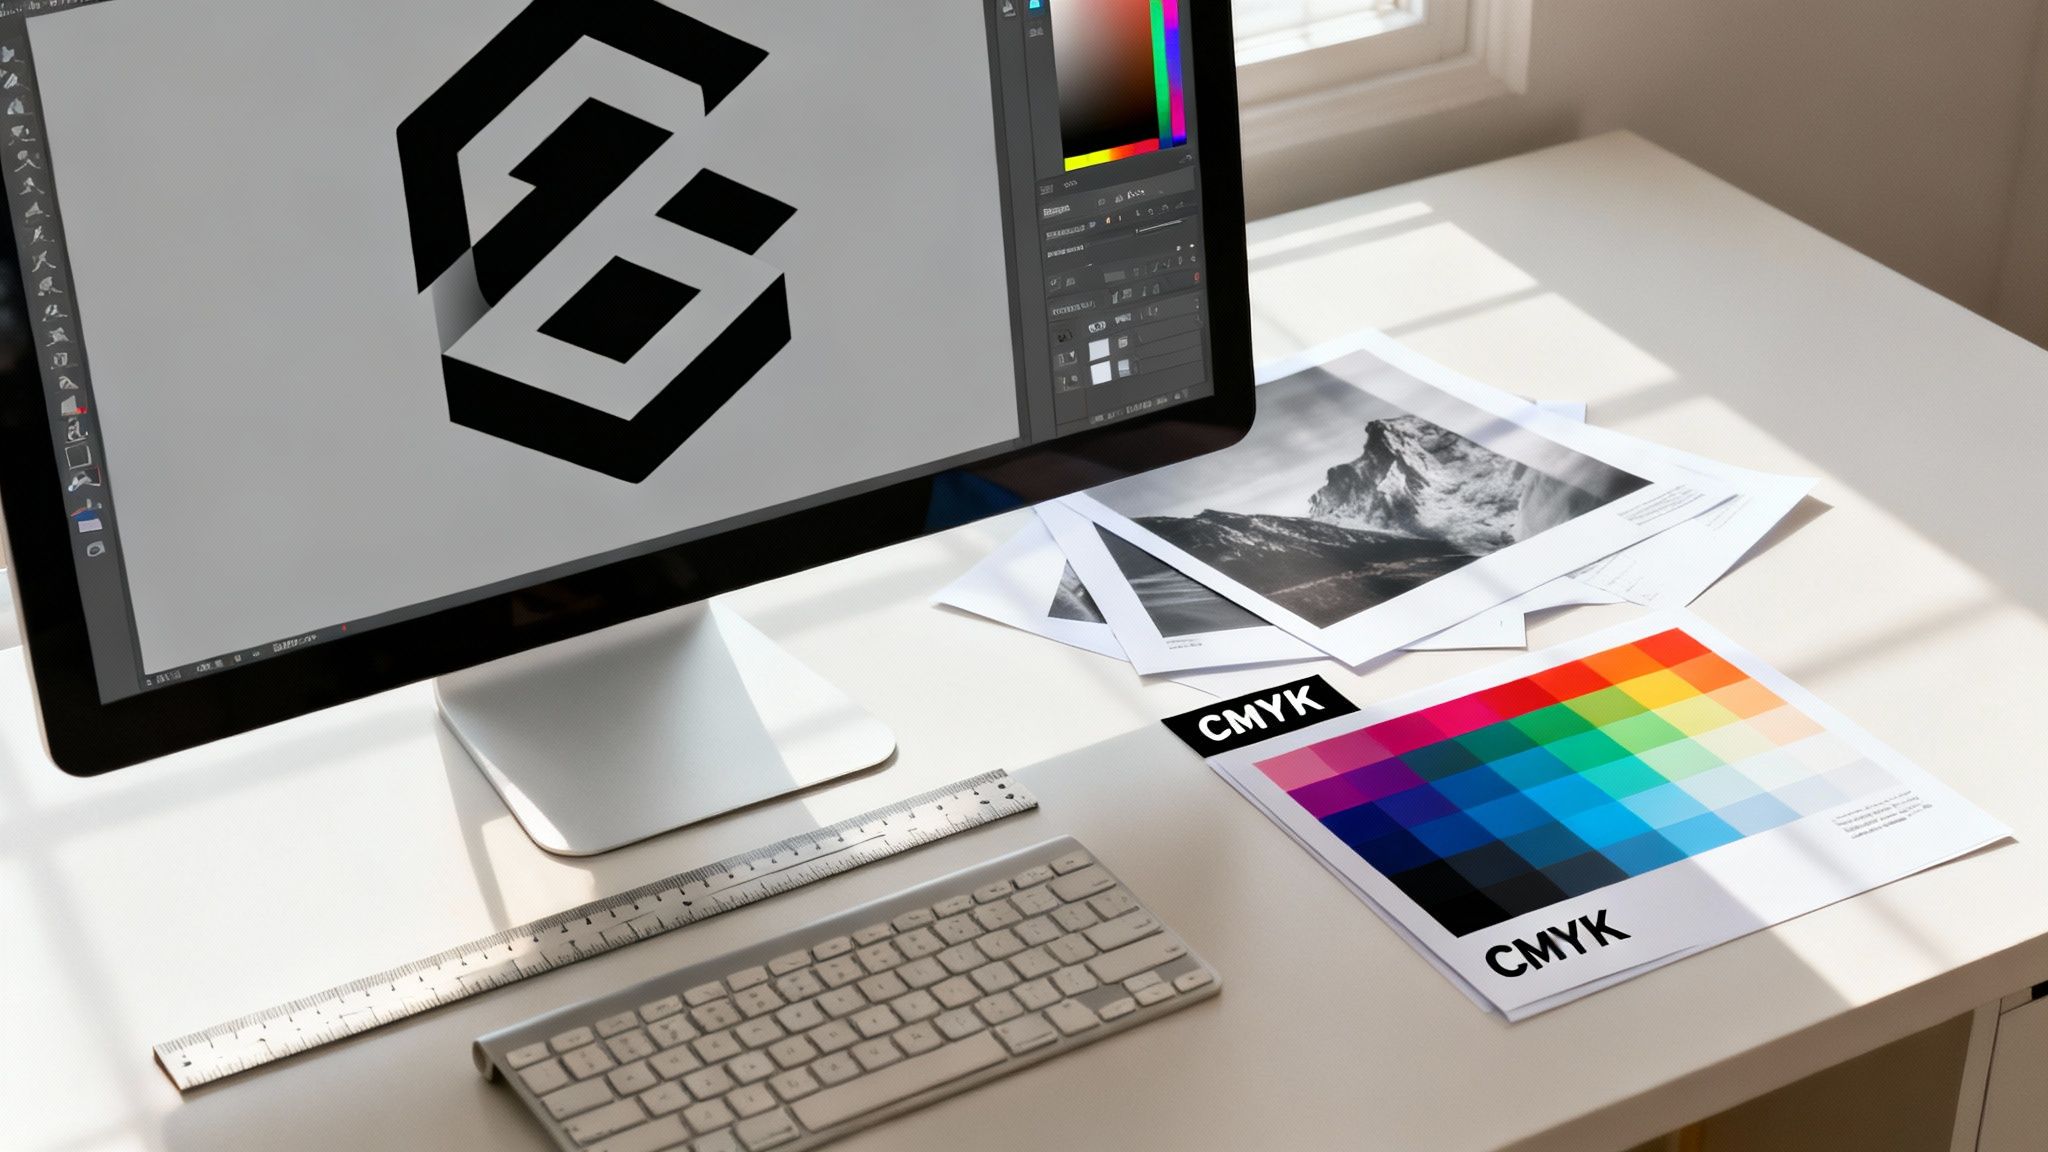
First, let's talk about colour. It's the biggest stumbling block we see. Your computer screen displays colour using light (RGB – Red, Green, Blue), but our printers use ink (CMYK – Cyan, Magenta, Yellow, Black). They're two completely different languages. If you send us an RGB file, that vibrant blue on your screen can easily turn into a dull purple on the final banner.
To get around this, you must set your design software’s colour mode to CMYK before you even start designing. It’s the single most important thing you can do to ensure the colours you see are what you get.
Vector Graphics Are Your Best Friend
When it comes to logos, text, and any kind of line art, vector files are non-negotiable. Seriously.
Unlike a standard image file like a JPEG, which is made of pixels, a vector graphic is built from mathematical equations. This means we can scale it to any size—from a tiny sticker to a massive building wrap—and it will stay perfectly crisp and sharp. No blurriness, no jagged edges.
If you send us a JPEG of your logo, it will almost certainly look pixelated when we enlarge it for printing. Always supply your logos and core brand elements in a proper vector format like AI, EPS, or SVG.
For photos, you'll be working with pixel-based images, and that’s fine. The key here is resolution. For high-quality banner printing in Auckland, your images need to be at least 150 DPI (dots per inch) at their final, full-size dimension. Grabbing a small image from your website just won’t cut it.
Pro Tip: A quick way to check your image quality is to zoom in to 100% on your computer. If it still looks sharp and clear, you're good to go. If it’s fuzzy or blocky, you need to find a higher-resolution version.
Essential File Setup for Printing
Getting the technical specs right from the start saves everyone time and money. Before you export your final design, just run through this quick checklist:
- Bleed: Always add a 10mm bleed around all edges of your artwork. This is a small extra margin of your background that we trim off. It guarantees your design goes right to the very edge of the banner, leaving no accidental white slivers.
- Safety Margin: This is crucial. Keep your text, logo, and any other important info at least 50mm away from all edges. This "safe zone" ensures nothing critical gets cut off or has an eyelet punched through it.
- Outline Fonts: Before you save, convert all your text to outlines (or "curves"). This simple step turns your text into a vector shape. It means we don't need to have your specific font installed on our system to print your file exactly as you designed it.
While our focus here is on banners, these core principles for preparing artwork apply across almost all professional printing. If you're looking to dive deeper into print design, this guide to effective physical ticket printing and design has some fantastic, transferable advice. Nailing these fundamentals is what makes the difference between an amateur-looking sign and a professional one that truly stands out.
Nailing the Banner Size and Finishing Touches
Once your design is sorted, we need to talk about the physical stuff – the nuts and bolts that make a banner actually work in the real world. Getting the size and finishing right is absolutely critical for making an impact and making sure it lasts, especially with Auckland’s four-seasons-in-one-day weather. These details aren't just afterthoughts; they determine how your banner looks, where you can hang it, and how long it will hold up.
Finding the Sweet Spot: Common Banner Sizes
Bigger isn't always better. The right size comes down to a simple question: where is this banner going to live? A banner for a fence outside a building site in Takanini has very different needs than one for a booth at the Auckland Home Show.
Here are a few go-to sizes we print all the time for local businesses:
- Small (approx. 1.2m x 0.6m): These are perfect for market stalls, pointing people in the right direction, or shouting about a special deal in a smaller retail shop. They're easy to transport and won't break the bank.
- Medium (approx. 2.4m x 1.2m): This is the workhorse of banner sizes. It’s ideal for storefronts, event backdrops, or sponsorship signs at the local rugby club. It's big enough to grab attention from a distance but won't overwhelm the space.
- Large (3m x 1.5m and bigger): When you need to make a serious statement, this is your size. Think big building wraps, massive fence banners, or the main stage backdrop at a major event. These are designed to be seen by passing traffic and crowds.
A Quick Local Tip: Planning a big banner for a public spot? It pays to check with the Auckland Council or the venue first. Some places have specific rules about banner sizes and where you can put them. A five-minute phone call can save you a world of trouble.
The Finishing Options That Make Your Banner Last
Finishing is all about strength and easy installation. Think of it as the insurance policy for your banner – these features protect your investment and make sure it hangs properly and looks professional.
Here are the non-negotiables:
- Hemmed Edges: We always recommend hemming. We fold the edges over and weld or stitch them shut. This simple step doubles the thickness and strength around the border, stopping it from tearing or fraying when the wind picks up.
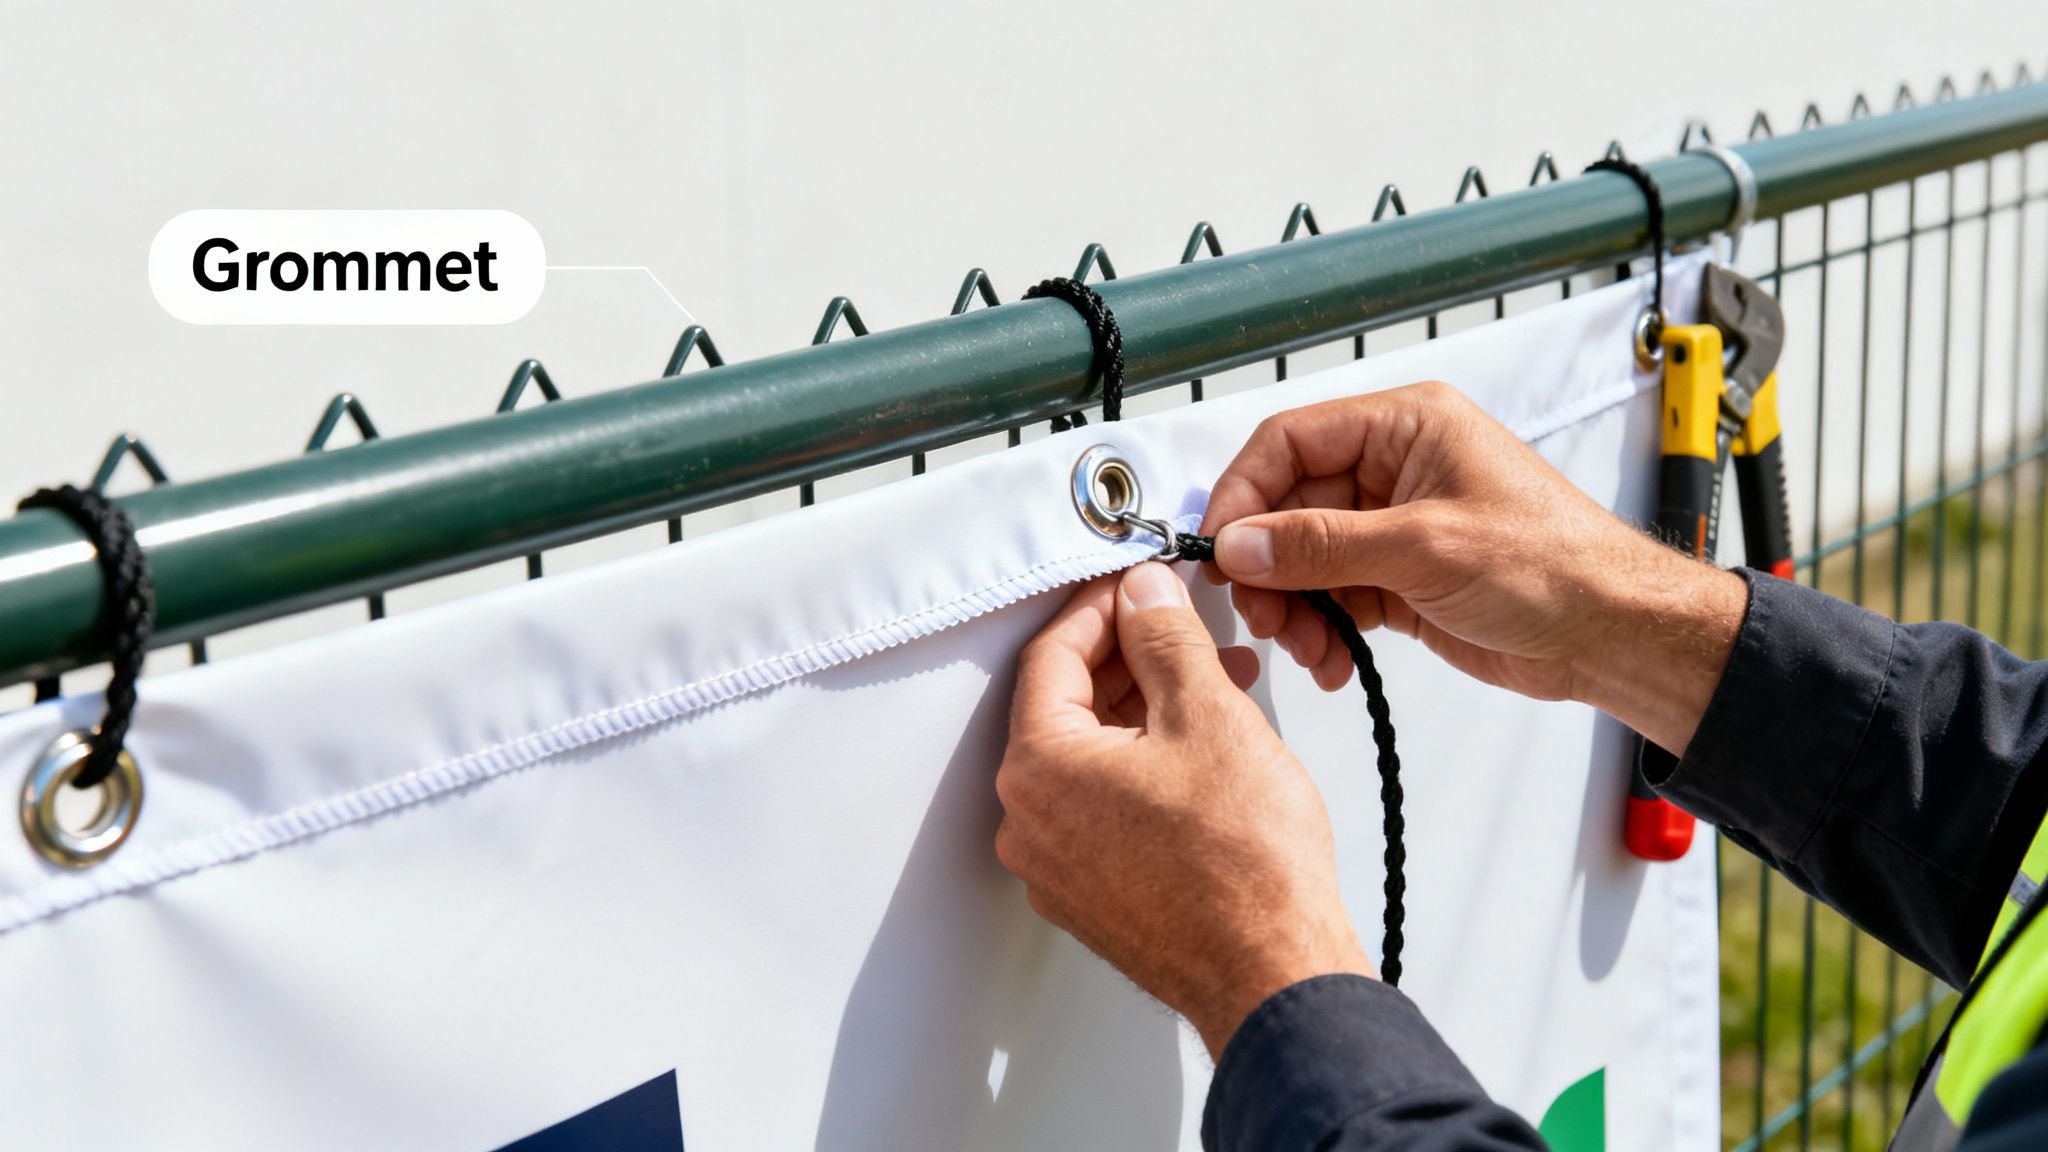
- Eyelets (Grommets): These are the metal rings we punch along the hemmed edges. They give you strong, reinforced points to tie ropes, bungee cords, or zip ties through, making it a breeze to securely mount your banner on a fence, wall, or frame. We usually space them every 500mm to 1000mm.
- Wind Slits: If your banner is going up in a really exposed spot – think along the waterfront or a windy ridgeline – wind slits are a lifesaver. We cut small, half-moon shapes into the banner to let some of the wind pass through. This stops it from acting like a giant sail and ripping itself off the wall.
Choosing the right combination of these finishes means your banner won't just look great when you first put it up; it'll keep looking sharp for a long time to come. Here at Soni Design, we can talk you through the best setup for exactly what you need.
How We Work With You: A Look Inside the Soni Design Process
Ordering a banner shouldn't feel like a transaction; it should feel like a partnership. We’ve designed our process here at Soni Design to be completely transparent and collaborative, so you're in the loop from the initial chat right through to the finished product. Let's walk you through how we get it done.
It all starts with a simple conversation. You bring the idea—what the banner's for, where it's going to live, and the message you want to send. From there, we’ll put together a detailed, easy-to-understand quote. No jargon, no hidden fees, just a clear breakdown of the costs for materials, finishing, and any design help you might need.
The All-Important Proofing Stage
Once you're happy with the quote and give us the go-ahead, we move on to what I think is the most crucial part of the whole process: the proof. This is our chance to get everything perfect before a single drop of ink is used. We’ll send over a digital mock-up of your banner showing the exact layout, colours, and text.
This is your opportunity to put on your detective hat and check for:
- Spelling and Grammar: Are all names, dates, and contact details 100% correct? It's amazing how a small typo can slip through!
- Colour Accuracy: Do the colours on the proof match what you had in mind? Keep in mind that your screen can show colours a little differently, but it should be a very close representation.
- Layout and Spacing: Does the logo have enough breathing room? Is the text easy to read from a distance?
We absolutely will not start printing until you are completely satisfied and have given us your formal sign-off on this proof. Over the years, we've learned this one step is the secret to avoiding costly reprints and making sure the final banner is exactly what you were hoping for.
At Soni Design, we treat the proof as our contract with you. It’s our shared guarantee that what you approve is exactly what we will deliver, ensuring complete peace of mind.
Our Production Timelines in Auckland
After you’ve signed off on the artwork, your banner officially enters our production queue. One of the first questions we always get is about timing for banner printing in Auckland, and it’s a great question. While every project has its own nuances, we can give you a pretty good idea of what to expect.
For a standard PVC vinyl banner with simple hems and eyelets, our typical turnaround is 3-5 working days. This gives us the time we need for printing, allowing the inks to cure properly, and then finishing your banner to the quality we're known for.
Of course, a few things can shift this timeline. A massive order of banners, a custom shape, or a job that requires special fabric might add a day or two. The most important thing is that we'll be upfront with you from the very beginning, giving you a firm completion date when you place your order. That way, you can plan your event or marketing launch with total confidence, never left guessing.
Getting Your Banners Installed and Cared For
Your new banner has arrived from our Auckland print shop, and it looks brilliant. Now for the most important part: getting it up and making sure it stays that way. How you install and look after your banner is what makes all the difference, ensuring it works hard for you for months or even years to come.
The aim is always to get a taut, drum-tight finish. A banner that’s sagging or flapping in the wind doesn't just look unprofessional; it puts a huge amount of strain on the eyelets and the material itself. That’s a fast track to tearing, especially when an Auckland southerly blows through.
Achieving a Professional Installation
The real secret to a tight banner isn't about brute force. It's all about applying even, consistent tension across every single anchor point. Think of it like changing a tyre on your car – you tighten the wheel nuts in a crisscross pattern to spread the pressure evenly.
For a typical installation against a fence or a wall, here's a simple method we've perfected over the years:
- First, secure one of the top corners. Don't yank it completely tight just yet, just get it snug.
- Next, move to the opposite top corner. Pull the banner taut horizontally to get that top edge straight and secure it.
- Now, move down to one of the bottom corners. Pull down firmly to smooth out any vertical wrinkles before fastening it.
- Finally, move to the last corner. As you secure this one, pull both down and outwards to create that final, smooth tension across the whole surface.
- If your banner has middle eyelets (and most larger ones do), secure them last. This stops the banner from bowing in the middle and acting like a sail in the wind.
When it comes to what you use, bungee cords with hooks are fantastic. They provide a bit of give, absorbing shocks from wind gusts. Rigid rope, on the other hand, can transfer all that force directly to the eyelets, which is a common cause of tearing.
A quick pro tip: Always use every single eyelet. We put them there for a reason! Skipping a few to save a couple of minutes creates uneven stress points, which is the number one cause of wind damage we see. Each eyelet helps distribute the load.
Keeping Your Banner Clean and Stored Correctly
Over time, your outdoor banner is bound to get a bit grubby. Cleaning it is easy, but you have to be gentle to protect the ink and the banner material.
Forget about harsh chemicals, abrasive scourers, or blasting it with a pressure washer. All you need is a bucket of mild, soapy water and a soft cloth or sponge. Gently wipe the surface, give it a good rinse with clean water, and make sure it air dries completely before you think about putting it away.
Speaking of storage, how you store your banner is crucial for preventing permanent creases and fading.
- Never fold it. Folding creates sharp creases that can crack the print and permanently weaken the vinyl.
- Always roll it. The best way is to roll the banner with the printed side facing outwards. This protects the ink from getting scuffed or scratched by the rougher backing material.
- Keep it somewhere cool and dry. Store the rolled-up banner away from direct sunlight to stop the colours from fading over time.
Following these simple tips for your banner printing Auckland project means you’re doing more than just hanging a sign. You’re protecting your investment and making sure your brand looks its best, day in and day out.
Your Top Banner Printing Questions Answered
Over the years, we've helped countless Auckland businesses with their banner projects. Naturally, a few questions pop up time and time again. Here are the answers to some of the most common queries we get, based on our hands-on experience.
What's a Realistic Turnaround Time?
This really comes down to what you need. For a straightforward PVC vinyl banner, once you give the final artwork the thumbs up, we can usually have it ready in about 3-5 working days. That gives us enough time for the printing, letting the inks cure properly, and applying the finishing touches.
Of course, if you're after something a bit more specialised—like a custom die-cut shape or a huge run of banners—it might take a little longer. We'll always give you a firm, realistic timeline upfront with your quote, so there are no surprises. If you're in a real pinch for an event, just give us a shout. We'll always see what we can do to help.
I've Got an Idea, But No Design. Can You Help?
Absolutely! This is where our creative team at Soni Design really shines. We work with clients all the time who have a great concept but not the technical skills or software to create a print-ready file.
Whether you just need a few tweaks to an existing layout or a completely new design built from the ground up, we've got you covered. Just bring us your logo, the text you want to include, and any photos you might have. From there, we can work together to craft a banner that not only looks fantastic but also gets your message across loud and clear.
Our Approach: We see design as a partnership. Our job isn't just to hit 'print'. It's to help you create a marketing tool that actually works for your business and gets you results.
How Much Does Banner Printing Cost in Auckland?
This is the big one! The honest answer is: it depends. There’s no single price list because every banner we produce is custom-made.
The final cost really boils down to a few key things:
- The Material: A heavy-duty, long-life outdoor vinyl will naturally cost more than a lightweight fabric for a one-off indoor event.
- The Size: Simple physics—a larger banner requires more material and ink.
- Finishing Options: Adding things like reinforced hems, extra eyelets, or wind slits will influence the final price.
- Design Help: The cost will differ if you supply a perfect print-ready file versus us designing it for you.
A small, simple indoor banner is always going to be more budget-friendly than a massive, all-weather one built to last for years. The best way forward is to ask for a custom quote. We'll break everything down for you so you can see exactly where your money is going, with no hidden costs for your banner printing Auckland project.
Ready to get your message out there with a banner that truly stands out? The team at Soni Design is ready to help you nail every detail. Contact us today for a free, no-obligation quote!
Leave a Comment
Stay home & get your daily
needs from our shop
Start You'r Daily Shopping with Nest Mart