
Your cart is currently empty.
When you first dip your toes into the world of banner and print, the sheer number of options can feel a bit much. But at its heart, it's all about one thing: using a powerful set of tools to grab people's attention and tell your story. The real secret is learning how to match the right material and printing technique to what you're trying to achieve.
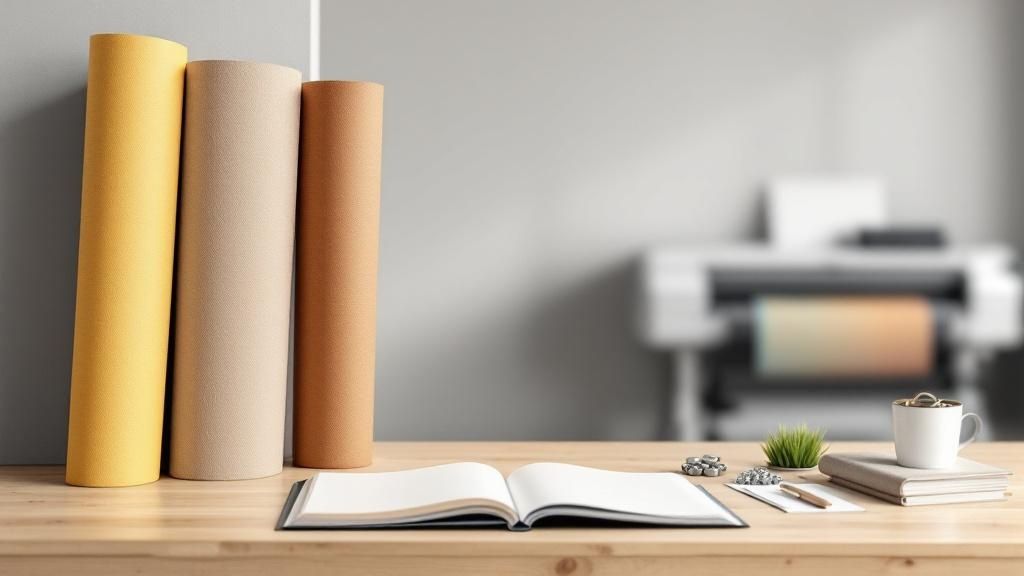
Making Sense of Banner and Print Options
Think of it like a builder's toolkit. You wouldn't use a sledgehammer to hang a picture frame, right? In the same way, every banner and print material is engineered for a specific job. A light, elegant fabric banner is perfect for an indoor trade show, but for an outdoor sign that has to brave the elements, you’ll want a tough, weather-resistant vinyl. This isn't about finding a single 'best' option; it’s about making smart choices for each unique situation.
Thankfully, modern printing has made incredible quality and customisation available to everyone. What used to be a complicated and costly affair is now within reach for businesses of all sizes. This guide is here to be your roadmap, cutting through the jargon and showing you the ropes. We want to take the guesswork out of the process so you can feel confident you're making the right calls to get your message seen and heard.
Core Components of Print Projects
Before we dive deep, let's break down the four key ingredients that go into every single print job. Understanding how they work together is the first step to creating something that looks great, lasts as long as you need it to, and makes a real impact.
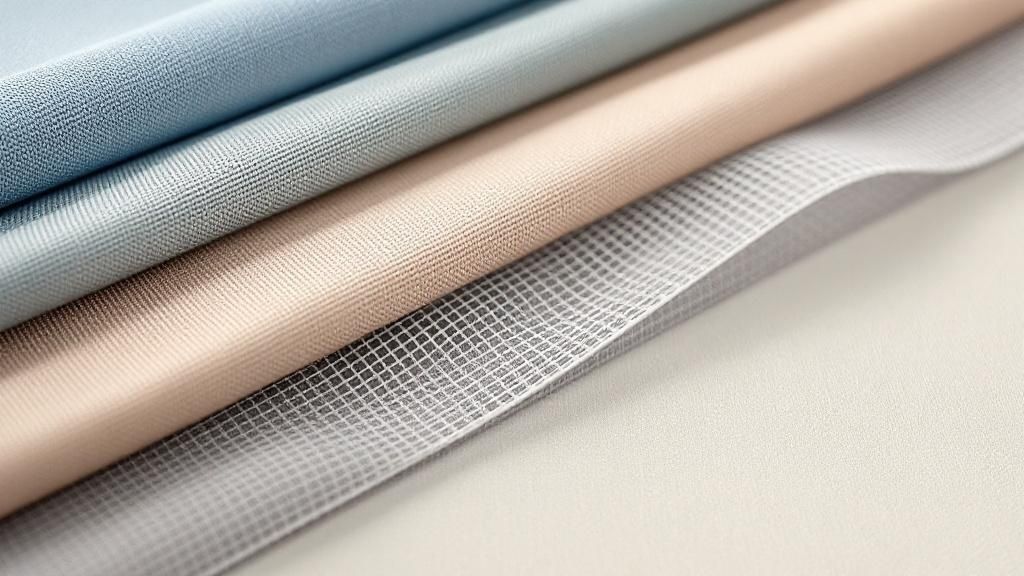
- Material Selection: This is the canvas for your masterpiece. It could be anything from flexible vinyl and breezy mesh to sophisticated fabrics or different types of paper.
- Printing Method: This is the tech that gets your design onto the material. The main players are digital printing for smaller, quicker jobs and offset printing for large-scale runs.
- Design and Artwork: This is the soul of your project—the logos, colours, words, and images that actually communicate your message.
- Finishing Options: These are the final touches that add durability and function, like reinforced hems, metal eyelets (grommets) for hanging, or a protective laminate.
Once you see how these pieces connect, the whole process becomes clearer. You'll understand exactly why one type of vinyl is better for a windy spot, or how a specific paper finish can give your brochure that premium feel. This knowledge turns complicated decisions into a solid marketing strategy, making sure every dollar you spend works as hard as it possibly can.
Choosing the Right Materials for Your Project
The foundation of any great banner and print project isn't just about a brilliant design; it's the material it’s printed on. Think of it as the canvas for your masterpiece. The right choice dictates the final look, feel, and, crucially, how long your investment will hold up where it's meant to be seen.
Picking the perfect material can transform a simple sign into a powerful marketing tool. Your decision really comes down to a few key questions: Where will it be displayed? How long do you need it to last? And what kind of visual impact are you aiming for? Getting this right from the start is a genuine strategic advantage.
Outdoor Banners Built to Last
When your message has to stand up to the elements, durability is everything. Outdoor materials are specifically engineered to resist rain, wind, and harsh UV rays, making sure your design stays vibrant and the banner itself remains intact.
-
PVC Vinyl: This is the undisputed workhorse for outdoor banners. It’s tough, completely waterproof, and fade-resistant, which makes it perfect for long-term storefront signs, event promotions, or construction site hoardings. Its smooth surface also means you get incredibly sharp and colourful print results.
-
Mesh Vinyl: Picture a standard vinyl banner, but with thousands of tiny holes punched through it. That’s mesh vinyl. These small perforations let the wind pass right through, which dramatically reduces the "sail effect" and helps prevent tearing in gusty conditions. It's the go-to choice for large banners on fences, scaffolding, or exposed buildings.
As you can see below, a well-thought-out banner—often printed on the right material for the job—can massively outperform a poorly designed one.
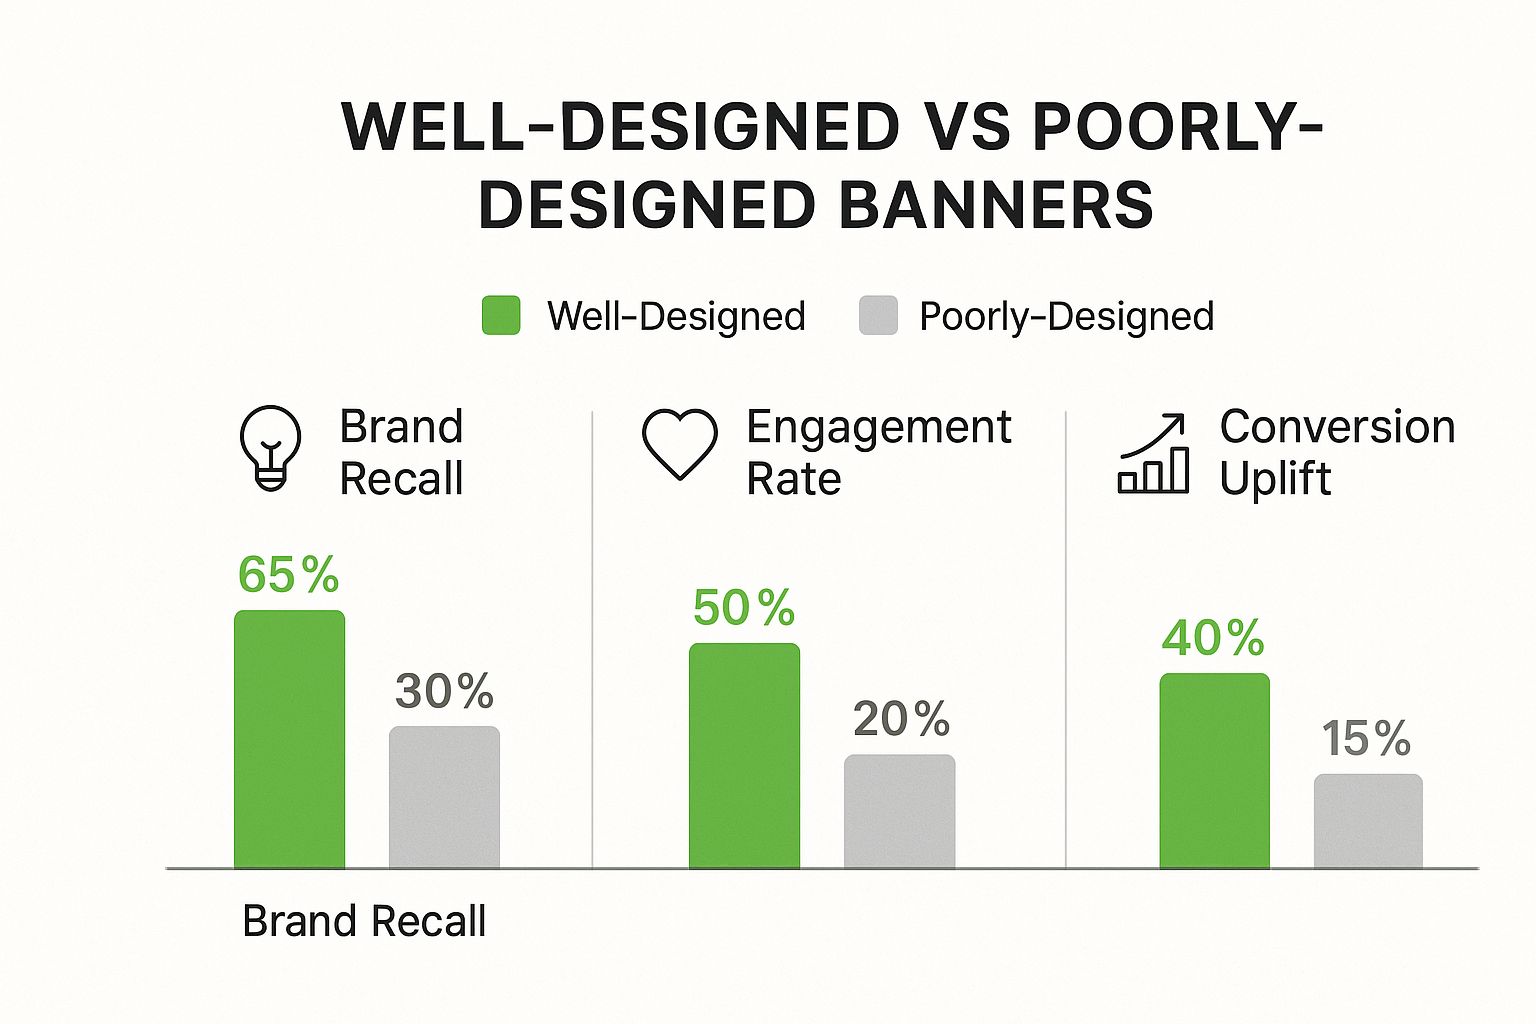
The numbers don't lie. A strategic approach to your banner's creation can more than double brand recall and engagement, which directly impacts your return on investment.
Indoor Materials for Impact and Elegance
Once you move indoors, the focus shifts from hardcore weather resistance to visual appeal and texture. Here, you have the freedom to choose materials that offer a more refined or specialised look to complement your interior space.
Fabric banners, for instance, give you a high-end, glare-free finish that’s perfect for media walls, trade show backdrops, or premium in-store displays. They're lightweight, easy to transport, and bring a sophisticated, elegant feel that vinyl just can’t quite match in an indoor setting.
The golden rule is to match the material's properties to its environment. An indoor fabric banner would be shredded outside in a week, while a heavy-duty outdoor vinyl might look clunky and out of place inside a boutique shop.
To help you decide, here’s a quick guide comparing some of the most common banner materials.
Banner Material Suitability Guide
| Material Type | Best Use Case | Durability | Print Quality |
|---|---|---|---|
| PVC Vinyl | Long-term outdoor signs, storefronts, events | Very High | Excellent, vibrant colours |
| Mesh Vinyl | Windy locations, large building wraps, fences | High (prevents tearing) | Good, slightly less vibrant due to holes |
| Fabric (Polyester) | Indoor displays, trade shows, backdrops, retail | Moderate (indoor use only) | Excellent, glare-free, high-end feel |
| Corflute | Short-term signs, real estate boards, events | Moderate | Good, cost-effective |
| Paper/Card Stock | Posters, flyers, brochures, business cards | Low (indoor/single-use) | Varies from good to premium |
This table should give you a solid starting point for matching the right material to your specific needs, ensuring your project not only looks great but performs as intended.
Rigid Signs and Everyday Print
Beyond the world of flexible banners, many projects call for a rigid or semi-rigid substrate. These materials provide structure and are fantastic for temporary signage, informational displays, and any promotional item that needs to stand on its own.
-
Corflute: Lightweight and incredibly cost-effective, corflute is the go-to for temporary signs. Think real estate "For Sale" boards, directional signs at events, or short-term notices on construction sites. It’s essentially a corrugated plastic sheet that’s both surprisingly durable and easy to handle.
-
Paper and Card Stocks: This is the familiar territory of flyers, brochures, business cards, and posters. The weight of the stock (measured in GSM, or grams per square metre) and its finish—be it gloss, matte, or satin—can dramatically alter the perceived quality of the final product. A thick, matte card stock feels premium and substantial, whereas a lighter gloss paper is great for vibrant, high-volume flyers.
This sheer variety highlights the health of New Zealand's print sector, which is constantly adapting to meet a huge range of business needs. In fact, the printing industry in New Zealand is projected to have a market size of approximately NZ$1.4 billion in 2025, proving its sustained economic importance. This resilience is fuelled by a shift towards value-added services and offering a wide array of material and print solutions. You can find more insights into the NZ printing industry on ibisworld.com.
Ultimately, choosing the right material ensures your banner and print project not only looks professional but also does its job effectively for its entire intended lifespan.
Understanding How Your Banners Get Made
Once you've picked the perfect material, the next step is actually bringing your design to life. The world of banner and print technology can seem a bit technical, but it really comes down to a few key methods, each with its own special talents. Getting a handle on how these processes work will help you make much smarter choices for your project's budget, timeline, and the quality of the finished product.
Think of it like choosing a vehicle. For a quick trip across town, a zippy little car is perfect. But if you’re hauling heavy cargo across the country, you’ll want a freight train. Printing methods work in a similar way, offering different tools for different jobs.
Digital Printing: The Agile Specialist
Digital printing is the modern-day hero of speed and flexibility. It functions a lot like a super-powered office printer, taking your digital file (like a PDF) and printing it directly onto the banner material. There are no traditional printing plates involved, and this direct approach is what makes it so incredibly efficient for certain jobs.
This method is your go-to solution for:
- Small to Medium Quantities: Just need one banner or a few dozen posters? Digital is, by far, the most cost-effective way to get it done.
- Quick Turnarounds: With minimal setup, digital print jobs can often be turned around in just a few business days, making it a lifesaver for tight deadlines.
- Variable Data Printing: Since every single print can be different, digital is perfect for personalising your materials. Think of adding individual names to event passes or unique discount codes to flyers.
For instance, imagine you're running a local fair and want 20 banners to thank each individual sponsor by name. Digital printing makes this easy and affordable, whereas trying to do the same with older methods would be a logistical and financial nightmare.
Offset Printing: The Powerhouse for Volume
Offset printing is the seasoned veteran of the commercial print industry. The process is a bit more old-school: it involves transferring (or "offsetting") ink from custom metal plates onto rubber rollers, which then press the image onto the final material. The setup takes more time and money upfront, but once it's running, the cost per banner plummets as the quantity goes up.
Think of offset printing like baking a massive batch of biscuits with a custom-made cutter. Creating the cutter (the printing plates) is the initial investment, but once it’s ready, you can churn out thousands of identical, perfect biscuits incredibly quickly and cheaply.
This is what makes offset the reigning champ for huge jobs where consistency is absolutely critical.
The main benefits of offset are:
- Amazing Cost-Effectiveness at Scale: If you’re ordering thousands of flyers, brochures, or posters, the cost per item is drastically lower than digital printing.
- Superior Colour Consistency: This method gives you pinpoint control over colours, ensuring every single piece in a massive run looks exactly the same.
- Unmatched Print Quality: For a long time, offset has been considered the gold standard, producing incredibly sharp, high-resolution images and crisp text.
Large-Format Printing: For Maximum Impact
When you need to go big, you need a specialised tool for the job. Large-format printing isn't so much a completely different method as it is a category of digital printing that uses enormous, purpose-built machines. These are the beasts that create everything from towering vinyl banners and trade show backdrops to vehicle wraps and construction site hoardings.
They use the same direct-to-print digital technology but on a massive scale, printing on huge rolls of vinyl, fabric, or mesh. This technology ensures that even when your design is blown up to a huge size, your graphics stay sharp and your colours remain vibrant, grabbing attention from way down the street.
Knowing the difference between these core banner and print methods means you can have a much more productive chat with your print provider. You’ll be able to make sure the final product not only looks great but also perfectly aligns with your vision and budget.
Designing Banners That Actually Get Noticed
You can have the most amazing print job in the world, but it’s all for nothing without a compelling design. If your banner doesn't communicate clearly and quickly, it's just expensive decoration. This is where smart design strategy for banner and print comes in, transforming a piece of vinyl or fabric into a powerful tool that grabs attention and gets results.
The real challenge with banner design is that you’ve only got a few seconds to make an impact. Someone walking or driving past isn't going to stop and read a wall of text. Your message has to land almost instantly, and that requires a very deliberate and focused approach.
Create a Clear Visual Hierarchy
Think of visual hierarchy as being a tour guide for your viewer's eyes. You're telling them exactly where to look first, second, and third. Without it, your banner is just a confusing jumble of information that people will tune out.
You can create a strong hierarchy with a few simple tricks:
- Headline First: This is your big hook. Your main message or offer should be the largest, boldest text on the banner, grabbing their attention from the get-go.
- Supporting Details Second: Any secondary info, like dates, a location, or a website, should be smaller but still perfectly clear and easy to read.
- Logo and Branding Last: Your logo is there to build brand recognition and give context. It needs to be visible, but it shouldn't overpower the main message.
This structure makes sure your most important information gets through, even with just a passing glance.
Readability From a Distance Is Everything
A banner is only as good as its readability. A design might look fantastic up close on your computer screen, but turn into an unreadable blur from 10 metres away. The secret is to keep it simple, bold, and high-contrast.
Always think about the context. Is your banner going to be seen from across the street or up close in a conference hall? Use large, clean fonts. Steer clear of skinny, decorative scripts that are tough to decipher in a hurry. And high contrast between your text and background? That’s non-negotiable. There's a reason classics like black on yellow or white on dark blue work so well—they’re instantly legible.
A great rule of thumb is the "three-second rule." If someone can't grasp the main point of your banner in three seconds or less, the design has failed. Simplicity here isn't just an aesthetic choice; it's a functional necessity.
This focus on clear, immediate communication is why physical media still has a firm place in marketing. While the New Zealand print advertising market is adapting to digital growth, with total ad spend projected to hit around US$84.97 million in 2025, print holds unique power. A strong physical presence can cut through the digital noise, especially in regional markets. You can find more insights on the New Zealand print advertising market on statista.com.
Technical File Setup for Flawless Printing
Getting the technical side of your design right is just as crucial as the creative part. Sending a poorly prepped file to your printer is a recipe for blurry images, wonky colours, and a whole lot of disappointment. Here are the must-knows for any professional banner and print job.
Use High-Resolution Images This is a big one. Always use images that are at least 300 DPI (dots per inch) at their final print size. Anything less will look pixelated and amateurish when it's blown up on a massive banner. It’s one of the most common mistakes, and thankfully, one of the easiest to avoid.
Design in CMYK Colour Mode Your computer screen displays colour using RGB (Red, Green, Blue) light. Printers, on the other hand, create colour with CMYK (Cyan, Magenta, Yellow, Black) ink. If you design in RGB and convert at the last minute, you can get some nasty surprises with colour shifts. To avoid this, start your design in CMYK from the very beginning. That way, what you see on screen is a much truer representation of the final printed piece.
Include Bleed in Your Artwork If any part of your design—a background colour or an image—goes right to the edge, you need to add a bleed. This is a small extra margin (usually 3-5mm) that extends beyond the final cut line. It acts as a safety net, ensuring that when the banner is trimmed to its final size, you don't end up with any ugly, accidental white slivers along the edges. It’s what gives your banner that clean, professional finish.
Adding Professional Finishing Touches
A great design and a crisp print job get you most of the way there, but the final details are what really make a banner or print project shine. These professional finishing touches aren't just for looks; they’re critical for durability, function, and achieving that polished quality that says a lot about your brand.
It's a bit like framing a beautiful painting. The artwork is the main attraction, of course, but the right frame protects it, makes the colours pop, and gets it ready to hang. Finishing options for your banner and print projects do exactly the same thing.
Essential Finishes for Banner Durability and Function
When it comes to banners, especially those going up outdoors, finishing isn't optional—it's essential. These final steps reinforce the material, making sure it can handle wind, tension, and general wear and tear without giving up. This is how you get the most out of your investment.
The two most common and crucial finishes you'll come across are hemming and grommets.
- Reinforced Hemming: This is where we fold over the edges of the banner and either heat-weld or sew them down. It’s a simple move, but it massively strengthens the banner's perimeter, stopping the edges from fraying or tearing, especially when the wind picks up.
- Metal Grommets (Eyelets): These are the metal rings punched into the reinforced hem. They create strong, reliable anchor points so you can hang your banner with rope or cable ties without any risk of ripping the material. We typically place them in each corner and then every 60-90cm along the sides.
Honestly, without these basics, an outdoor banner just wouldn't last. They make sure your message stays put and looks sharp from day one.
Protective and Presentational Finishes for Print
Now, let's shift from big banners to smaller printed items like brochures, posters, or business cards. Here, the finishing options are less about structural strength and more about protection and presentation. These touches can completely change the look and feel of your materials.
Finishing isn't an afterthought; it's a strategic choice that dictates how your audience interacts with your printed material and how well that material holds up over time. A laminated menu, for example, communicates durability and quality before the customer even reads a single menu item.
Some popular choices include:
- Lamination: Applying a thin plastic film over your print is the best way to guard against spills, fingerprints, and daily scuffs. You can go for a gloss finish to make your colours really vibrant, or a matte finish for a more subtle, sophisticated look that cuts down on glare.
- Folding: For things like brochures and pamphlets, the fold is an integral part of the design itself. A classic tri-fold guides your reader through the information in a logical sequence, while more imaginative folds can create a really unique, memorable experience.
- Mounting: If you need a poster or sign to be rigid, mounting it onto a solid backing like foam board or corflute gives it the structure it needs. This keeps it perfectly flat and presentable, whether it's sitting on an easel or fixed to a wall.
Choosing the right finishing touches for your banner and print project is the final, vital step. It ensures your project not only looks fantastic but also performs perfectly in its environment. It's what separates a product that just gets the job done from one that truly makes an impact.
Connecting Your Print Marketing to Digital
Your banners and print materials are fantastic on their own, but they really start to punch above their weight when they act as a bridge to your online world. The best marketing strategies don't see print and digital as two separate things; they weave them together into one seamless customer experience. This approach makes your print materials work so much harder, turning someone who just glances at your banner into an active, engaged follower online.
Think of it this way: your physical banner starts the conversation, and your website or social media is where that conversation continues. By making it dead simple for people to move from one to the other, you get more bang for your marketing buck and build a much stronger brand that people recognise everywhere.
Creating a Seamless Customer Journey
The trick is to make the jump from the physical world to the digital one feel completely natural—and even a little bit rewarding for the customer. A classic example is popping a simple QR code on a poster that takes people to a special online-only discount. It gives them a real, immediate reason to pull out their phone and connect with you.
Suddenly, a static print ad becomes an interactive experience. Here are a few practical ways to do this:
- Exclusive QR Code Offers: Link a QR code on your flyers or banners to a special landing page. This could be for a unique coupon, a free e-book, or early access to a new product.
- Social Media Hashtags: Got an event? Print a catchy, unique hashtag on all your signage. Encourage people to use it when they post photos, which gets the online conversation started and gives you a heap of user-generated content.
- Consistent Visual Branding: Make sure the design, colours, and fonts on your physical banners are a perfect match for your social media ads and website. This kind of consistency is how you build a powerful, instantly recognisable brand identity.
By treating your banner and print materials as gateways, you can guide potential customers straight into your digital sales funnel. It's about making sure your offline efforts don't just end with a glance—they inspire the next click.
This integrated approach is more important than ever. The digital ad space is booming, and linking it to your physical marketing gives you a real edge. In New Zealand, digital banner advertising is on a serious growth spurt, with ad spending projected to hit US$357.93 million in 2025. This is all thanks to Kiwis spending more and more time online. You can read more about the growth of digital banner advertising.
Integrating Print with Your Online Strategy
To truly nail this, you need a solid grasp of effective digital marketing for local businesses. This ensures your physical banners and print materials lead customers to your digital world without a hitch. It really just means planning your print campaigns with your online goals in mind from day one.
For example, a real estate agent could put a QR code on a corflute "For Sale" sign that links directly to a video walkthrough of the house. Or a café could put table talkers on every table with a QR code inviting customers to follow them on Instagram for a chance to win a free coffee.
Each of these examples uses a physical prompt to drive a specific, measurable digital action. This strategy doesn't just make your marketing more effective; it makes it trackable and, ultimately, much more successful.
Common Questions About Banner and Print Services
Working through the final steps of a banner and print order often brings up a few last-minute questions. Nailing these details is the secret to a stress-free process and a finished product that looks just as good in your hands as it did on your screen. We’ve answered some of the most common queries we get to give you a bit of clarity and confidence.
Think of this as your quick-reference checklist before you hit ‘send’. A little bit of prep here goes a long way to making sure there are no nasty surprises down the line.
What File Format Is Best for My Print Design?
Nine times out of ten, a high-resolution PDF is your best bet. It’s the universal standard for a reason—it packages up all your design elements and locks them in place, so nothing moves or gets substituted when your printer opens the file. When you export your design, just make sure you’ve ticked the right boxes for professional printing.
Here’s what you need to look out for:
- Colour Mode: The file must be in CMYK, not RGB. This is non-negotiable for print.
- Fonts: It's best practice to convert all your text to outlines (or curves). This prevents any issues if the printer doesn’t have the exact same font you used.
- Bleed and Crop Marks: If any part of your design touches the edge of the page, you absolutely need to include these.
While a high-quality JPEG (at least 300 DPI) can sometimes do the trick for simpler jobs, a vector-based PDF will always give you the sharpest, most dependable result for professional banner and print work.
Your goal is to hand over a file that's a perfect, self-contained blueprint of your design. A properly prepped PDF does just that, taking all the guesswork out of the equation for the print team.
How Can I Ensure My Brand Colours Print Accurately?
Getting your colours spot-on is everything when it comes to brand consistency. The most reliable way to guarantee accuracy is to use Pantone (PMS) colour codes. The Pantone Matching System is essentially a universal colour dictionary that designers and printers use to make sure a specific shade of blue looks exactly the same, no matter who prints it or where.
If you don't have PMS codes, the next best thing is to make sure your design file is set up in the CMYK colour profile right from the start. Working in CMYK gives you a much more realistic preview of how colours will look on paper, helping you avoid those disappointing moments when your vibrant on-screen colours look muted in the final product.
What Is a Realistic Turnaround Time for a Banner Order?
Turnaround times really depend on the size of the job, the material, and the printing method. For a standard, digitally printed vinyl banner, you’re usually looking at a turnaround of 2-5 business days from the moment you sign off on the final proof.
Of course, more complex jobs will take a bit longer. If you’re placing a large order that requires offset printing or involves extra finishing like custom lamination or sewing, you might be looking at 5-10 business days. It's always a good idea to chat with your print provider about timelines upfront, especially if you have a hard deadline for an event.
At SONI DESIGN, we are passionate about bringing your vision to life with vibrant, high-quality banner and print solutions. Let's create something extraordinary together. https://www.sonidesign.co.nz
Leave a Comment
Stay home & get your daily
needs from our shop
Start You'r Daily Shopping with Nest Mart